
How to Use a Virtual Drive to Mount ISO File
A virtual drive, also called virtual disc or disk emulator, is a non-existing drive that does not physically exist in the computer. But the disk emulator is necessary tool for many people. You get a disc image of a popular video game, for example. it allows you to play the game without burning the image to a disc. Plus, many movie enthusiasts back up their DVD movies as ISO image, which is not a playable format. It also enables you watch the movies without discs. Many people prefer to use disk emulator more than physical disk, because disc image and virtual disk have better performance. They run faster than optical drives and are able to bypass the spinning up process, which is necessary for the optical drive. Moreover, it could protect DVDs and other discs. With a virtual drive, you can use the disc image as a real disc without damaging the original one. And you can set up dozens of separate them from one image file. Considering it is so important, we will talk about how to use it to mount disc images in this post.
Part 1. Create disc image for Virtual Drive
Today, people almost could download anything from internet. If you need a video game or an operating system, you can download their disc images online easily. But if you already have a physical disc, you can create a disc image by your own. We recommend you using Tipard DVD Cloner, because it is one of the most stable ISO creators on market.
How to create disc image with Tipard DVD Cloner
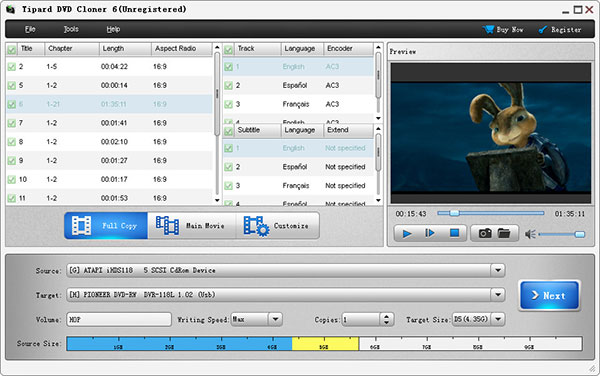
Download the correct version of DVD Cloner from its official website and follow the on-screen instruction to install it on your PC. Insert the disc you want to back up into computer's optical drive and run DVD Cloner.
Go to File menu and choose Load DVD option to load the entire DVD. After DVD loaded, you can preview the files and videos first. Then locate to bottom area of the interface and press the Full Copy button.
Choose your DVD drive from the Source drop-down list and ISO image from the Target drop-down list. Click on the Next button to continue.
Here you can pick a location to save the disc image by clicking on the button with three-point icon in After Burning section.
Finally, click on the Start button to start creating disc image for virtual drive.
After a few minutes, you can get the ISO image file saved in the location you set in step 4.
Part 2. How to mount disc image in Windows 7
Windows 7 and early versions do not have built-in virtual drive capacity, so you have to use a third party tool to mount disc images, such as DVDFab Virtual Drive.
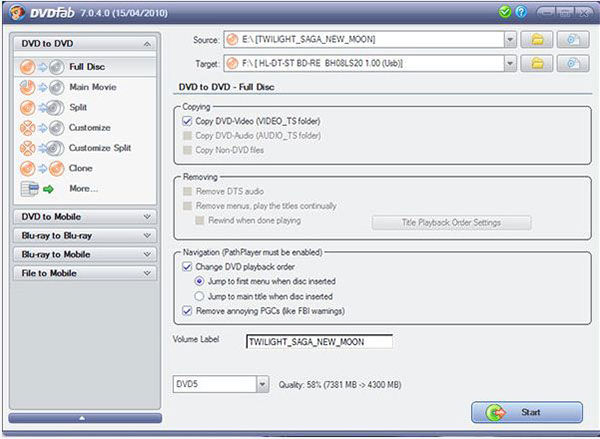
Right-click on the disc image file and choose Mount option.
If you already install the software in your Windows 7, it will appear on the available virtual drive list. Press DVDFab Virtual Drive to mount the disc image.
Then you can use the disc image as a physical disc, although there is no physical disc in optical drive.
Part 3. How to use virtual drive in Windows 8/ Window 10
Windows 8 and later versions support ISO mounting natively, so you do not need to download and install any software on your computer.
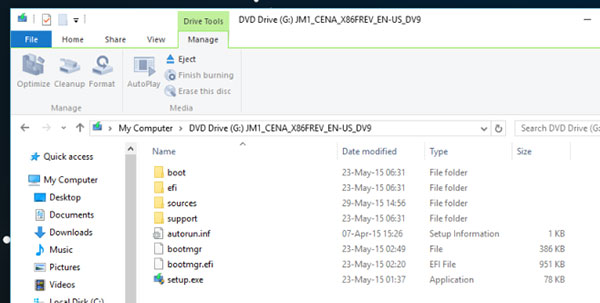
Right-click on the ISO image file and choose Windows Explorer from the Open with list.
Then the disc image will show as a disc in a virtual disk. If it is a DVD movie image, you can play it in any media player supports DVD.
When you want to unmount the disc image, right-click on the virtual drive that the disc image is mounted in and choose Eject to unmount the disc image.
Part 4. How to mount ISO on a virtual drive on Mac
Apple has integrated virtual drive Mac in the operation system, so you can create a virtual drive through ISO image directly.
Locate to the folder contains the ISO image file and mount ISO file by double-clicking. If it is mounted successfully, you can find the disc image on your desktop like an inserted DVD.
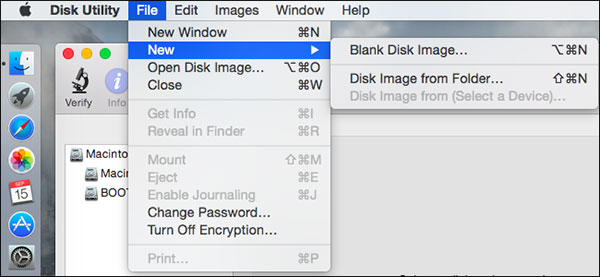
If double-clicking is not successful, you can go to Disk Utility. Choose Open Disk Image under the File menu and select the ISO file you want to mount. Then it will be mounted on your desktop. Disk Utility works for most disc image formats, including ISO, DMG and IMG.
Part 5. How to make a virtual drive under Linux
Linux is a special operating system; but as Mac OS X, Linux is able to turn ISO image to a virtual drive natively.

- 1. Switch to root user with following command, if not login as a root user: $ su -
- 2. Type in the command line below to create a directory to mount the ISO: # mkdir –p /mnt/disk.
You can replace disk in the command line with any folder name as you wish. - 3. Mount the image file with the command line: # mount –o loop [sample].iso /mnt/disk/
Replace [sample] with the image filename and disk with the folder name you customized in step 2. - 4. Then the image file has been mounted and you can access it as a physical disk.
Conclusion
Virtual drive has many benefits, so game players, movie enthusiasts and other people prefer the drive to optical drive and physical disc. In this article, we shared the basic methods to mount ISO images on virtual disc on different platforms. Windows 7 and earlier versions do not have the features, but there are many third party tools available. Windows 8/8.1, 10, and Mac OS X, Linux have embedded the virtual driver natively, so you can mount an ISO file by the built-in one directly. If you want to mount an ISO file on a virtual drive, you have to create an ISO file first. We recommend you using Tipard DVD Cloner to extract image from a disc, because this application has the capacity to create high quality ISO files.

 Best 1Click DVD Copy to Clone DVD Disc/Movie
When you need to copy DVD disc, 1Click DVD Copy can produce a quite excellent-quality copy. Learn more details about the program and alternatives.
 How to Create ISO from DVD with Top 4 Methods
Losing DVD disc is really awful, but creating ISO image file from DVD with some software can easily avoid losing files when your DVD disc lost.
 6 Great DVD Writer Software to Burn Your Videos
Want to record some wonderful videos you treasure most? The following article introduces 6 top DVD Writers to help you better preserve your memory.
 Any DVD Converter and 5 Best Alternatives
Popular alternatives to Any DVD Converter for Windows, Mac, Linux. You can learn more applications similar to Any DVD Converter in this article.