
MKV files often contain multiple audio tracks, which can be unnecessary when you only need a specific one or want a silent video. Extra audio tracks can increase file size, create playback confusion, or cause issues during editing. Learning how to remove an audio track from MKV makes it easier to manage your videos and keep only what you need. In this guide, you will discover three simple ways to remove an audio track from MKV files quickly.

Method 1. Best Way to Remove Audio Track from MKV
MKV files are flexible because they can store multiple audio tracks, subtitles, and high-quality video in one file. However, extra audio tracks can be confusing during playback and unnecessary for your project. Removing the unwanted audio track helps keep the file clean and easier to use. The method below works on both Mac and Windows, keeps the video quality intact, and is simple enough for beginners.
Tipard Video Converter Ultimate is one of the easiest tools for removing audio tracks from MKV files. With just a few clicks, even beginners can quickly remove unwanted audio without any hassle. All you need to do is upload your video, and the tool takes care of the rest. It also offers great flexibility, supporting the conversion of over 500 video and audio formats. On top of that, you can access a variety of tools for both audio and video editing, making it an all-in-one solution.
Here's how to use Tipard Video Converter Ultimate:
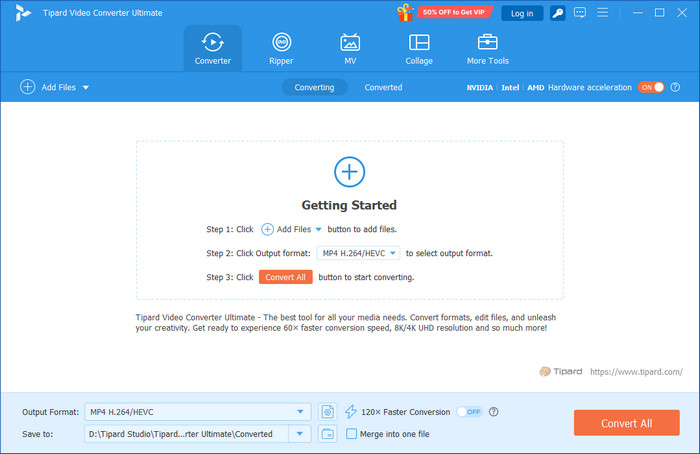
Step 1 To get the tool, simply click the Free Download button below. Install it by clicking the downloaded file twice. Then, run the program.
Step 2 On the main interface, click the Add button or simply drag and drop your MKV file onto the program.
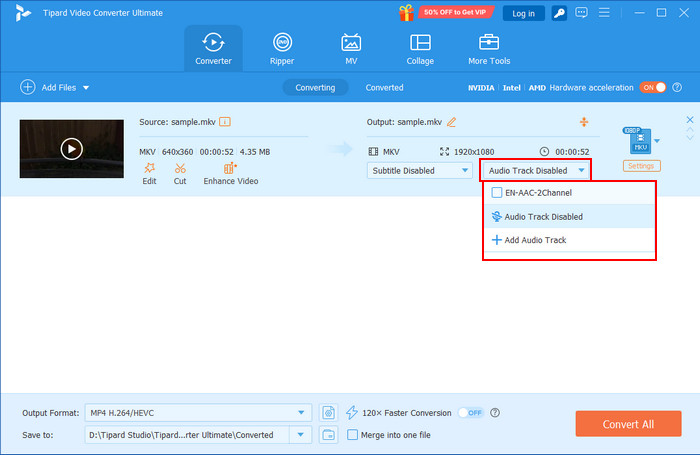
Step 3 On the right side under the output section, select Audio Track Disabled to remove the audio track from your MKV file. Then click Convert All to start the process. You also have the option to add a new audio track or manually adjust it to the correct timing if needed.
This tool provides one of the easiest ways to remove audio tracks from MKV files, and you can even add new ones if needed. It also supports batch editing, so you can work on multiple files at the same time without having to repeat the process for each video. For faster processing, you can activate hardware acceleration, which makes handling large files much quicker and smoother.
Method 2. Remove Audio Track from MKV in VLC Media Player
VLC Media Player is one of the most popular free media players out there, and it also allows you to remove an audio track from MKV files. While it is a bit more technical than Tipard Video Converter Ultimate, VLC is great for users who are already familiar with it and don't want to download additional software.
Here's how to use VLC:
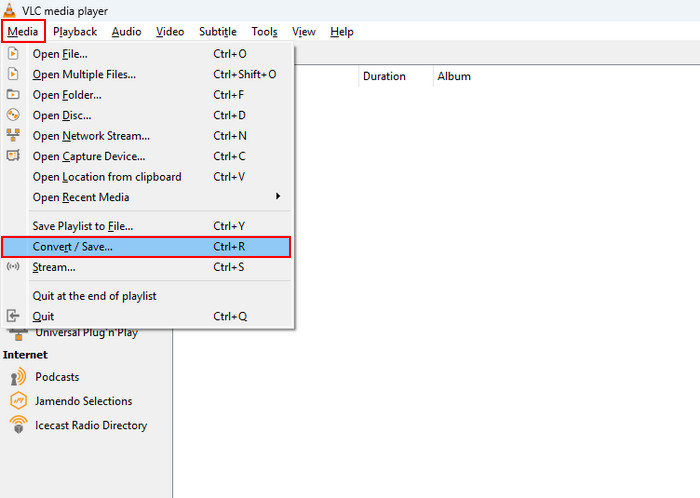
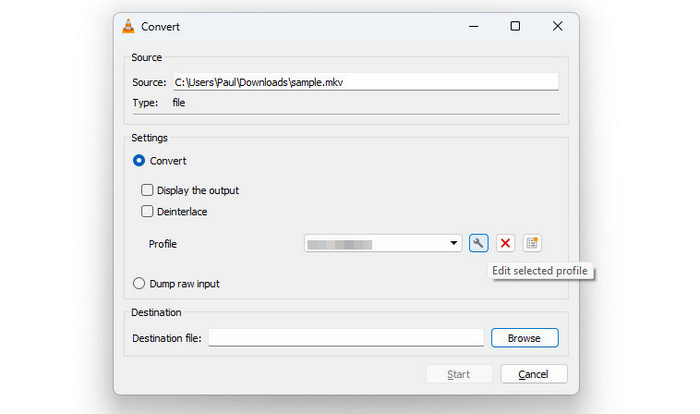
Step 1 pen the VLC player and go to the Media menu, then click Convert/Save.
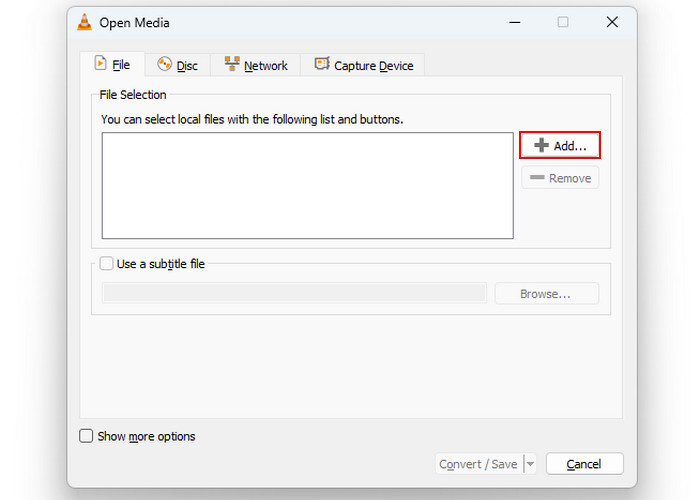
Step 2 In the File tab, click Add and select the MKV file you want to remove the audio from.
Step 3 In the Profile section, click the Settings button to access the MKV metadata.
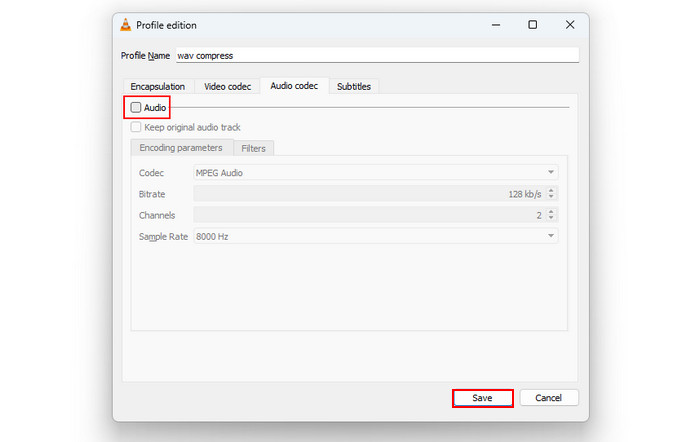
Step 4 Go to the Audio Codec tab and uncheck Audio. Click Save to return to the Convert panel, choose your output destination, and then click Start to begin the process.
This tool works by keeping the video in the same format while removing the audio track from it. It can handle MKV files as well as other popular video formats like MP4, making it easy to remove audio from MP4 and similar videos. However, the process can involve several steps, which might be confusing for users who are not familiar with the tool.
Method 3. Remove Audio Track from MKV with MKVToolNix
MKVToolNix is a free and open-source tool specifically designed for working with MKV files. It's one of the best options for removing audio tracks if you need more control over your MKV files. However, it may require a bit more patience compared to other methods, as it's not as beginner-friendly.
Here's how to use MKVToolNix:
Step 1 Drag and drop the MKV file you want to remove the audio from into the Source Files section of the program.
Step 2 In the Tracks window, uncheck the audio track (AAC) you want to remove, or change the Copy this item option to No in the Properties box on the right.

Step 3 Set the file name and choose the save location in the Destination File section. Then click Start Multiplexing to remove the audio track from your MKV video.
MKVToolNix gives you a lot of control over your MKV files, but it can feel a bit complicated if all you want is to quickly remove an audio track. It's great for users who like to tweak every detail. You can even use it to remove background noise from video, which comes in handy if your original audio isn't perfectly clear. This way, you get a cleaner video without losing any of the parts you actually want.
Recommended Tools for Removing MKV Audio Tracks
Here are three tools that are commonly used for removing audio tracks from MKV files in 2026. Each one works well, but it really depends on what you need right now. The table below summarizes their main differences.
| Tool | Main Features | Best use for |
|---|---|---|
| Tipard Video Converter Ultimate | Easy controls, removes audio, batch support | Quick audio removal with minimal steps |
| VLC Media Player | Free, adjustable export settings remove audio tracks | Free option if you already use VLC |
| MKVToolNix | Open-source, track selection, remuxing | Removing specific tracks with full control |
Choosing the best tool depends on what you need right now. If you want the quickest and easiest option, Tipard Video Converter Ultimate is the best since it removes audio in just a few clicks and works with many formats. If you want a free tool you already use, VLC is a good choice as long as you’re okay with the Convert/Save steps. If you need more control over specific MKV tracks and you’re comfortable with more technical tools, MKVToolNix is the better pick.
Conclusion
There are several ways to remove audio tracks from MKV files. Tipard Video Converter Ultimate is the best option for those who want a straightforward, no-fuss experience with no quality loss. If you prefer working with free software, VLC and MKVToolNix are both good alternatives, but they require more steps and technical know-how. Ultimately, the method you choose depends on how much time and effort you're willing to invest, as well as the level of control you need over your video files.
More Reading


About the Author
