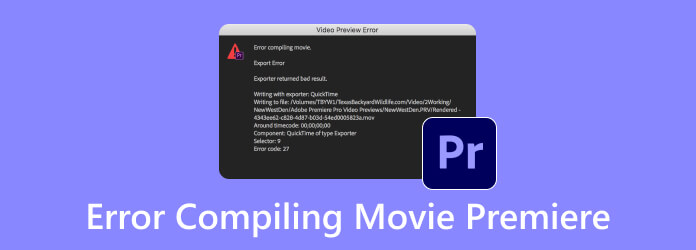
Seeing the error compiling Movie Premiere can be really frustrating. This error stops your project from rendering and can delay finishing your video.
Many people search for answers, but there is no need to look elsewhere. The solutions are right here. Understanding why this error happens is key, and with the right steps, you can get your project exported smoothly without extra stress.
Part 1. Top Reasons for Error Compiling Movie in Premiere
Exporting a video in Premiere Pro can sometimes fail with the "Error Compiling Movie" message. It can be frustrating because the error may give hints, like "Accelerated renderer error" or "Unable to produce frames." Other times, it just says "Unknown error." But there are several common reasons why this happens, and below are the top five reasons.
1. Lack of System Resources
If your computer does not have enough RAM or your hard drive is too slow, Premiere cannot finish rendering. It can cause a compile error.
2. Corrupt Project Files
Broken or missing media, assets, or preview files can stop the export. Damaged project files can also lead to errors.
3. Effects or Titles Are Missing
If a video effect or title is offline or deleted, Premiere cannot compile those frames.
4. Sequence or Export Settings
Using the wrong settings can create errors. Mixed frame rates or video resolutions that do not match the export settings can stop the process.
5. Drive Errors
Problems with your scratch disk or export drive can cause failure. It includes full storage, disconnected drives, or bad sectors.
Part 2. Quick Fixes to Error Compiling Movie in Premiere Pro
Exporting video in Premiere Pro can sometimes fail. The good thing is, there are still several easy fixes you can try.
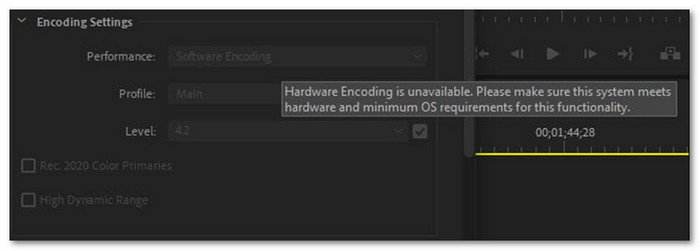
1. Use Software Encoding
GPU acceleration helps speed up rendering. But it can sometimes cause Adobe Premiere error compiling movie GPU render error on older computers or unstable drivers.
- Save your project.
- Go to File > Export > Media.
- In Encoding Settings, set Performance to Software Encoding.
- Export your video.
Test with Render In and Out first. If it works, export the whole video.
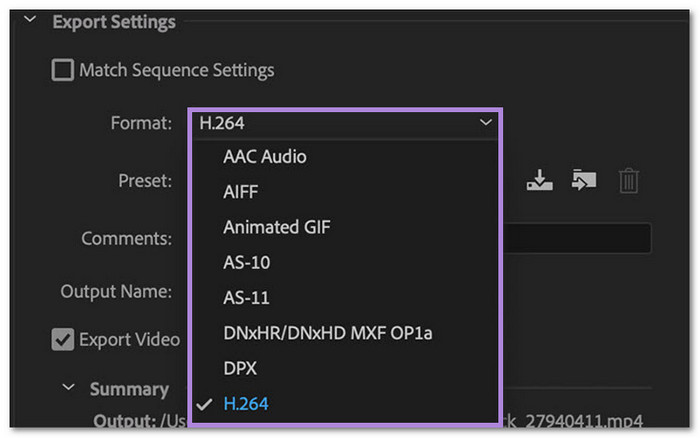
2. Export in a Different Format
Sometimes, your default format causes errors. Switching formats can solve the issue.
- Open File > Export > Media.
- Choose a different format (MOV, AVI, MTS, WMV).
- Adjust codec settings if needed.
- Click Export.
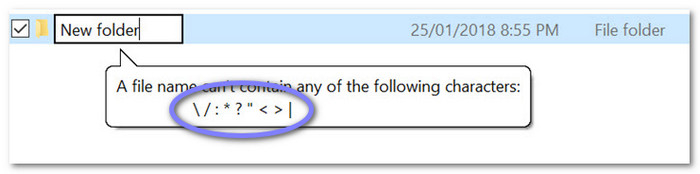
3. Remove Special Characters in File Names
Premiere dislikes special characters in file names. They can stop your video from compiling.
- Save your project.
- Check all files in the media bin for characters like # / [ ] " * and remove them.
- Re-import the files and export again.
4. Try a Different Output Path
If Premiere cannot write to the selected folder, export errors happen. It is a common cause of the Adobe Premiere CC error compiling message.
- Go to File > Export > Media.
- Click the file name and select a different folder or drive.
- Save and export.

5. Remove Some Special Effects
Too many effects can overload Adobe Premiere Pro. Some clips may also use unsupported formats or codecs, which can lead to the Adobe Premiere error compiling movie import error during export.
- Remove unnecessary effects or turn off features like smart rendering.
- Export the video again.
- Optionally, enable Smart Encoding in the export panel if you do not want to remove effects.
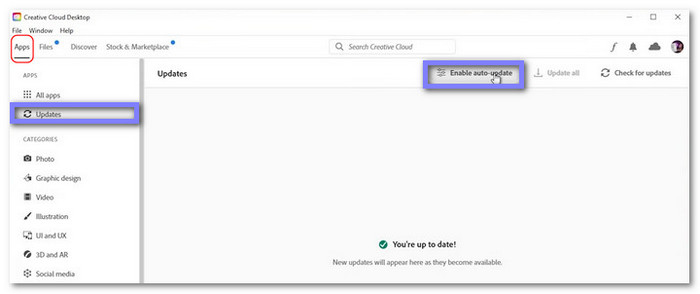
6. Update Premiere Pro
Errors can be fixed in updates. Updating can resolve unknown errors.
- Save your project.
- Go to Help > Updates.
- Download and install the latest version.
- Open your project and export again.
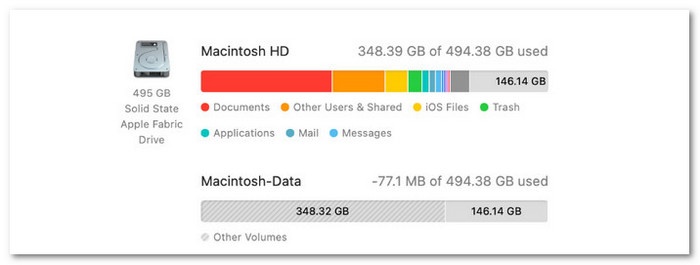
7. Ensure Enough Disk Space
Low storage can trigger errors like Adobe Premiere error compiling movie disk full or an I/O Error during export.
- Clear space on your computer.
- Delete unnecessary files or clear caches.
- Export again.
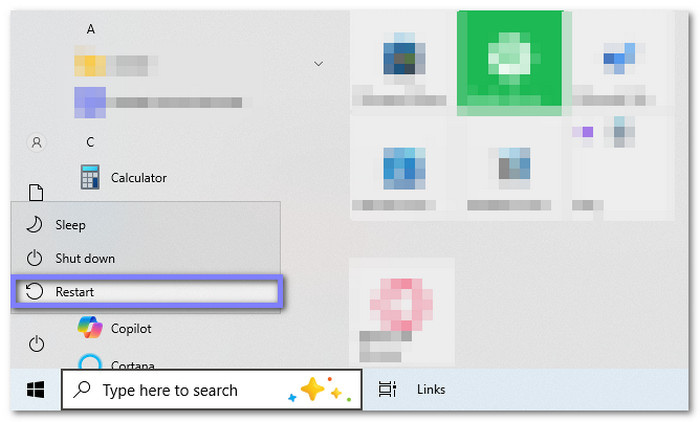
8. Retry and Reboot
Restarting can clear temporary issues.
- Save your project.
- Exit Premiere Pro and restart your computer.
- Open the project and export again.
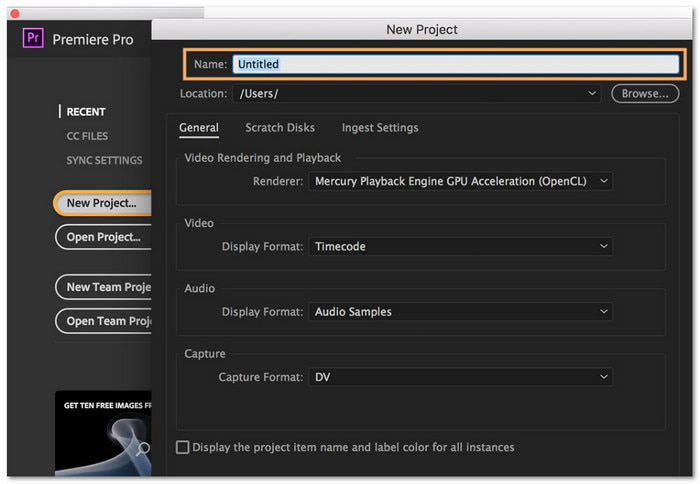
9. Create a New Project
Sometimes the project itself is corrupted. Copying it to a new project can help.
- Save and close the current project.
- Run Premiere Pro and start a new project.
- Import the old project (Import Entire Project).
- Render and export the new project.
Part 3. Convert Your Source File to Fix the Error Compiling the Movie in Premiere
Some source files can cause errors compiling the movie in Premiere. It is because of unsupported codecs, unstable formats, or mismatched settings. A quick fix is to convert the file first, and Tipard Video Converter Ultimate makes that easy. It supports many video formats and codecs. With that, your file becomes easier for Premiere to read and export.
Do you need faster processing? It supports level-3 hardware acceleration, which speeds up decoding, editing, and re-encoding. It also offers simple editing tools and AI features. These include upscaling, noise removal, and brightness improvement. And of course, it stays lightweight and works fast on most computers.

- Up to 120× faster video conversion speed.
- Handles batch conversion for many files at once.
- Built-in video editor for trimming, merging, adding filters, and more.
- Supports 500+ video and audio formats, like MP4, MOV, and MP3.
- Ready-made output presets for phones, tablets, game consoles, etc.

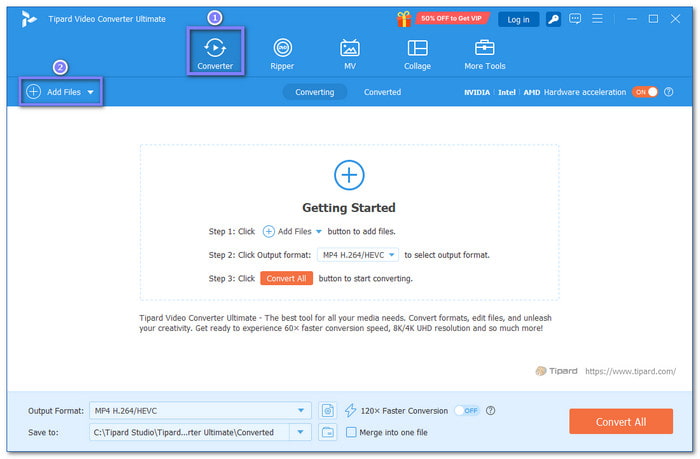
Step 1 Install and open Tipard Video Converter Ultimate by referring to the Download buttons. Then, press the Add Files button and choose the video that gives you trouble in Premiere.
Step 2 Move to the right side of the file and open the Format drop-down menu. Under the Video section, choose MP4 or MOV. These two formats work well with Adobe Premiere Pro. Plus, they are often used for editing because they are stable and easy to process.
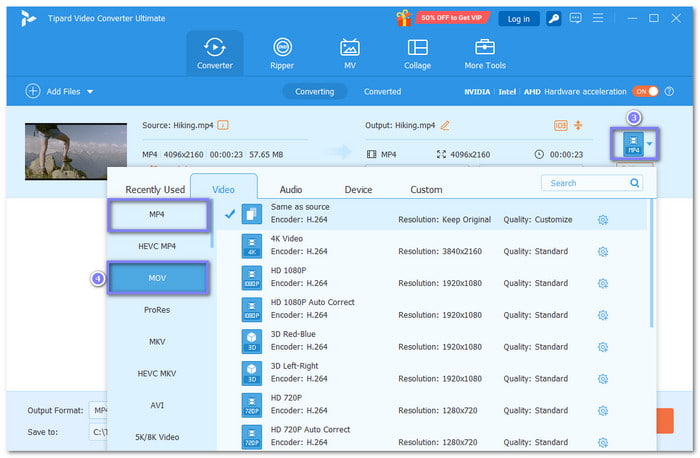
Step 3 After that, open the Custom Profile button. Here, you can configure the output settings. Set the Encoder to H.264 or MPEG-4. It is because both give better compatibility during editing and export. Match the frame rate and resolution with your Premiere sequence settings. It helps avoid timeline and export issues. After that, click Create New to save the changes.

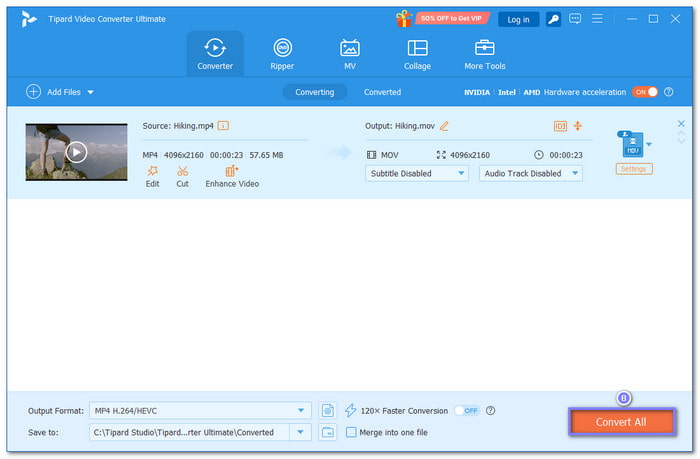
Step 4 Begin the conversion by hitting the Convert All button in the lower right corner. Once it finishes, import the new file back into Adobe Premiere Pro and try exporting again.
As mentioned, Tipard Video Converter Ultimate offers easy-to-use editing tools and AI features. You can take advantage of those. You can rotate or crop your video, add filters or watermarks, and even improve video quality.
Conclusion
There are many reasons why the error compiling the movie Premiere Pro happens. These include low disk space, corrupt files, missing effects, or wrong export settings.
The good thing is, there are quick fixes. These include removing special characters, changing the export format, or freeing up storage.
You can also use Tipard Video Converter Ultimate to convert your source file to fix the error. With that, your video becomes easier to edit and export smoothly. That saves you time and frustration.
More Reading


About the Author