
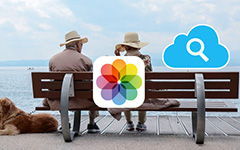
How to Use iCloud Photo Sharing With Ease
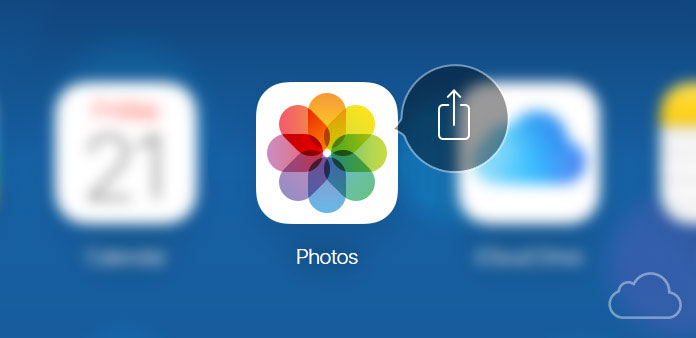
Apple always offers humanized design that attractive customer all over the world. iCloud photo sharing is one of the outstanding service that well embodies in iDevice. It is a service through iPhone, iPad, Mac in Photos apps to help you share photos more privatively and smartly. It lets you to create a shared photo album within iCloud and only the selected people can see your photos. Moreover, they can also announce their comments on you and send you their affection. Different from the other social platforms, iCloud photo sharing is more like a small Instagram. And you can share your life more private and intimate. Read on to find how to create a Shared Photo Stream on iPhone.
1. How to set up iCloud Photo Sharing
First of all, if you have never used iCloud Photo sharing before, you need to know how to enable it. Just check out the detail process as below.
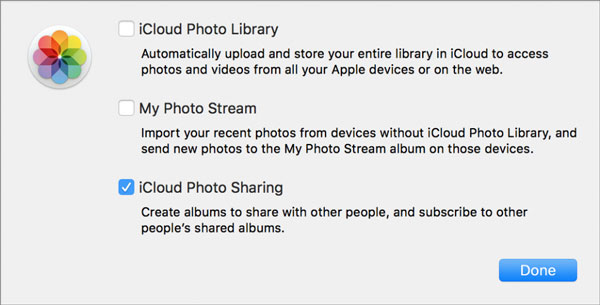
Step 1: Click on "iCloud" icon in Settings app. Launch Settings on your home screen. And then find iCloud icon and click on it.
Step 2: Switch iCloud Photo Sharing to "ON". In the iCloud page, enable the Photos option. Then in the next page, you need to switch iCloud Photo Sharing to "ON". Now, you have already enabled the feature.
2. How to create a shared Photo Album on iPhone
After setting up iCloud photo sharing, the next step is to create a shared photo album. And here is the introduction on how to do it.
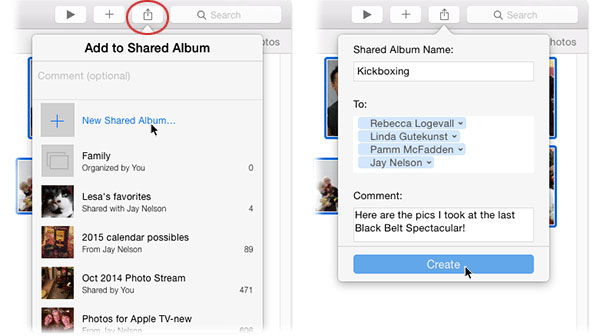
Step 1: Tap "Shared" icon at the bottom of the screen
First of all, open "Photos" app on your iPhone. Then you can find Shared icon at the bottom of the screen and tap on it.
Step 2: Tap "Add" button in the upper left corner
Then you will see a frame to ask you to name your album. After that, tap "Next" to continue.
Step 3: Invite iCloud contracts you want to share photos
Enter the contracts of your friends and family. Add the people you want. Then tap "Create" button.
Step 4: Add photos to the shared photo album
Tap on the newly created Shared Photo Album, and then click on "Add" icon in the album tray. You are able to select photos you want to add to your shared photo album. After that, you can tap "Done" button in the upper right corner.
Step 5: Post your shared photo album
You can add a comment, if you like. Then tap "Post". And then you can use iCloud Photo Sharing to create a shared photo album on iPhone.
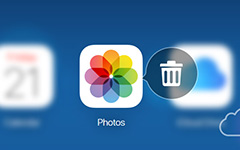
3. How to delete photos from a Shared Photo album
When using iCloud photo sharing, sometimes you don't want to share some photos with people or you want to delete them from your shared photo album, what should you do? And this part will give you a guide to know the steps on how to delete photos from a shared photo album.
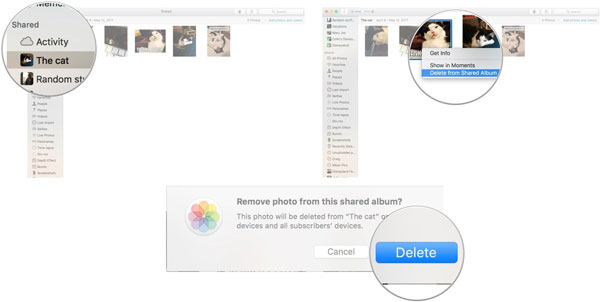
Step 1: Choose "Shared Photo Stream" which you want to delete photos.
Firstly, launch "Photos" app on your iPhone. Then tap on "Shared" button at the bottom of the screen. After that, tap the "Shared Photo Stream" that you want to delete photos.
Step 2: Select photos you want to delete
Tap "Select" button in the upper right corner to choose photos you want to delete by tapping on the photos.
Step 3: Delete photos
After finishing selection, tap "Trash" icon in the bottom right corner. Then tap "Delete" Photos to confirm your action.
4. How to "like" and comment on shared photos
Can I make comments or like someone's album when I use iCloud photo sharing? Of course you can. And please read on to find how to like and comment on shared photos.

Step 1: Open Photos on your iPhone
After that, find "Shared" icon at the bottom of the screen and click on it. And after turning to another page, go for the "Sharing" button on the top left.
Step 2: Choose a photo you want to make a comment
Tap on the "Name of Stream" which you can comment or like the photos. And now, you are allowed to add a smiley face or send your messages to your loved one.
5. How to save photos from a shared album
When you see a nice photo by your friends, you want to save it to your iPhone. How can you do it? Read on to find how to save photos from a shared album.

Step 1: Find the photo you want to save. Go to "Photos" on your iPhone. Then find a photo you want to save and tap it.
Step 2: Tap on "Share" button and then choose "Save Image" option. After that you can save photos onto album. Here is the way to save photos from a shared album when using iCloud photo sharing.
Conclusion
After learning from this article, you can learn more detail about the tutorial about how to use iCloud photo sharing. You can set up the account, create some share albums, delete the unwanted file and make some comments for the shared album. If you want to know more about the features of iCloud photo sharing, just inform more detail in the comments.

 How to View iCloud Photos Online
View iCloud Photo online from iCloud official website, and manage and preview iCloud photo stream on Mac or PC.
 How to Retrieve Deleted Photos from iCloud
How can you restore iPhone from iCloud? The article explains an easy way to retrieve deletedphotos from iCloud.
 Easiest Ways to Delete Photos from iCloud
Here is the guide with top 4 methods on how to delete photos from My Photo Stream, iCloud Photo Library and more.
 How to Restore iPhone Data from iCloud Backup
You can recover iPhone data from iCloud backup when setting up new iPhone. Just find the best way to restore from iCloud backup.