
How to Delete Emails and Voice Mails on iPhone with Simple Steps
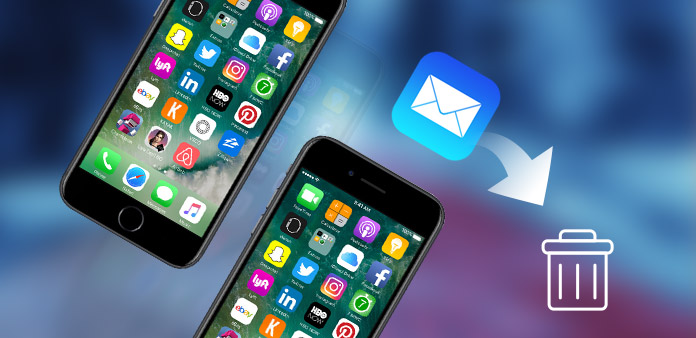
In the past, people checked and sent emails mostly on their computers. With the Smartphone becoming common in people's lives, nowadays, people try to do anything on their iPhone and Android phones, including checking and sending emails. People who use iPhone must find that iOS system supports Gmail, Yahoo mail and POP mail system, which must take up a lot of space. When you want to get rid of some useless emails, how to delete emails on iPhone in different ways? Or if you need to delete all data in your email account, what you are supposed to do? Read this passage, you will find the best solution to delete emails on iPhone in simple steps.
Method 1: How to delete an individual email message
The first method recommended is to delete a certain email message on your iPhone. Sometimes you will find you have received a spam email that tries to cheat you. It' s time for you to delete the spam email with the following process.
Open the Mail App on iPhone
Power on your iPhone and go to the Mail app, which is a blue app with a sealed, white envelope. And then you can access to all the emails on iPhone.
Choose the email message
Find the email message you want to delete. If you want to delete an email on iPhone that is in another folder or mailbox, click the Back button in the right top of the screen.
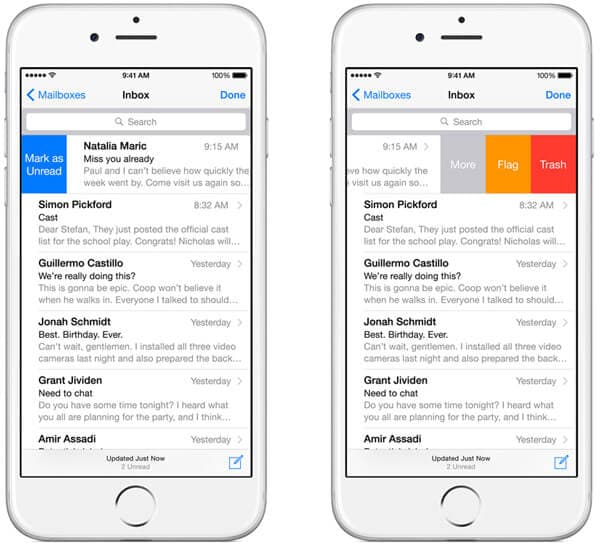
Swipe the email from right to left
Once you have chosen the email message, just swipe it from right to left. And you can see three buttons appear in front of your eyes, including "More", "Flag" and "Delete".
Delete an email on iPhone
Tap the red "Delete" button on the right side of the screen and your email message has been deleted from this mailbox you are in.
Method 2: How to delete emails on iPhone in bulk
You must have experienced a time when your iPhone storage was running out. After removing and deleting photos, chat histories, videos and so on, you will finally open your mailbox to select and delete multiple unwanted emails on iPhone. It seems to be impractical and time wasting to delete a single email at one time. What measure should you take to delete emails on iPhone in bulk in all your email accounts or a certain account in a simple way? Just follow the steps below:
Open the Mail application on iPhone
Power on your iPhone and open the Mail, which is a blue app with a sealed, white envelope. On the Mailboxes window, tap "All inboxes" button, and you will find emails of all your email accounts. If you want to delete multiple emails on iPhone in a certain email box, just tap the name of the email service provider.
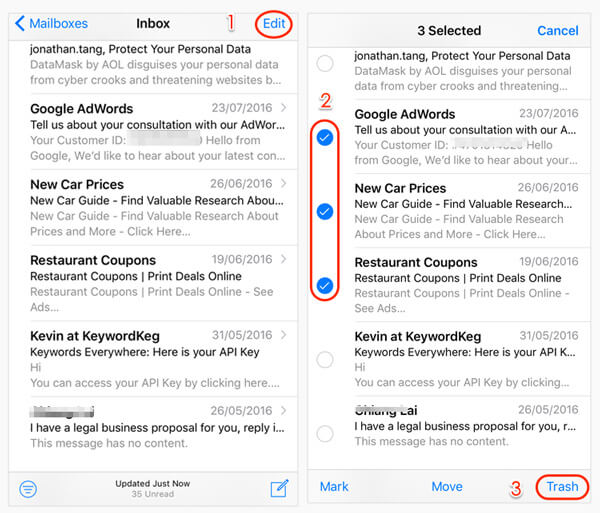
Choose the desired emails
Tap the "Edit" button on the top right of the screen, select all the useless and unwanted email messages you are going to remove. Have another check to make sure the messages are not wanted.
Delete selected email on iPhone
Find the "Trash" or "Delete" button at the right bottom of the screen, and tap it. These emails will be removed in seconds. And then you can also confirm the action before moving all the emails to trash on iPhone.
Method 3: How to delete Voicemails on iPhone
Like text messages, voicemail message can also cause the revelation of your personal information. So, learn to delete some useless and sensitive voicemail messages is important too, which will stuff your iPhone at the same time. You can read following steps and try to operate.
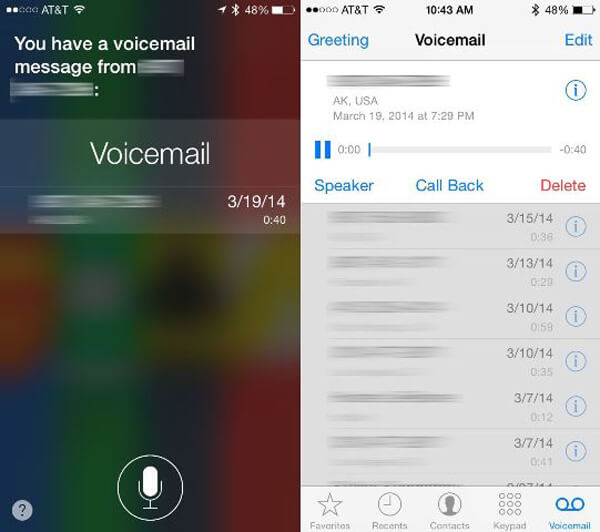
Step 1: Turn on your iPhone. Switch into the Home screen of your iPhone and tap "Phone" icon. Tap the "Voicemail" button at the right bottom of the interface.
Step 2: Swipe the useless and sensitive voicemail messages you want to delete. Tap the "Delete" button to delete voicemails on iPhone.
Step 3: In order to delete voicemails in bulk, you can click "Edit" and select all the voicemails you want to delete, which will mark with a blue checkmark. And then tap the "Delete" option in the bottom right corner.
Method 4: How to delete a mailbox from iPhone
If you do not want all mails on iPhone within one mailbox, you can also remove the mailbox on iPhone in few easy clicks. Just learn more details about how to delete emails on iPhone as well as the mailbox.
Open the Mail application on iPhone
Open the Mail application on iPhone
Choose the desired mailbox
At the "Accounts" section, choose the mail service provider with your email account, in which you are going to select the mailbox you want to delete. A new window will appear and tap "Edit" on the right top corner. Choose the selected mailbox.
Delete the mailbox on iPhone
Tap "Delete mailbox" button and confirm your action. At the same time, all the emails of the mailbox on iPhone will also be deleted.
Tipard iPhone Eraser
If you want to erase emails, music, photos, messages, and other files on your iPhone, the best choice is using iPhone Eraser. What is more important, when you need to delete email on iPhone permanently or unrecoverable, Tipard iPhone Eraser should be the choice. The program supportsiPhone 17/16/15, iPad Air/Air2, iPad mini 4/3/2/1, iPad Pro, iPod touch and so on. In order to meet different requirements, the iPhone Eraser provides 3 levels of modes to help you clear all junk files, history, cookies and useless data.

Main features:
- 1. Erase everything from your iPhone permanently.
- 2. Promise to protect your personal information from being recovered and stolen.
- 3. Support all iOS devices Compatible with the latest iOS 18 and Window 11.
Conclusion:
To master the correct ways to delete email messages on iPhone is not only to protect your personal information, but also a way to clear storage of your iPhone and make room for other data. Whether you are going to delete an individual email, multiple emails, voicemails or even the mailbox, you can find the best and simplest way in the passage above.

 Top 4 Methods to Delete Photos from iPhone
Learn 4 best methods to delete photos from iPhone, including duplicate images, all iPhone photos, and more.
 Top 3 Methods to Delete Songs from iCloud
If you have some unwanted music files from iCloud, the article shows top 3 different methods on how to delete songs from iCloud.
 Delete Messages on iPhone in Different Methods
Some private messages are very important that cannot leak out. You should know to delete messages on iPhone from the article.
 How to Delete Cookies on iPhone
In order to protect the private information, you should know the solutions to delete cookies on iPhone from the article.