
Sometimes, a simple image or video is not enough to capture a moment or express an idea. That is why GIFs are so popular. They let you show emotions, highlight fun moments, or create eye-catching content in a quick, looping animation. Whether for memes, tutorials, or social media posts, making a GIF is a great way to share something in a fun and creative way.
In this post, we will talk about how to make a GIF. We will guide you through five different methods that let you turn videos or multiple photos into high-quality GIFs. With the right tools and a little creativity, you can create GIFs in just a few clicks. Excited to know how? Keep reading and find the best way to make GIFs today!

Part 1. Make a GIF on Windows/Mac in One Click
A perfect GIF should be quick and easy to make. No complicated steps, no editing skills needed, and no waiting forever. If you want a fast and straightforward way to make a GIF, there is a tool made just for you. Tipard Video Converter Ultimate lets you create GIFs in one click with no experience required.
There is no watermark, and you can preview your GIF before saving. Moreover, it allows you to adjust the size, resolution, frame rate, and loop animation to get the best results. Whether you are on Windows or Mac, this tool makes GIF creation smooth and effortless.
- Make GIFs from videos or photos instantly.
- Works with MP4, MOV, AVI, PNG, JPG, and more.
- Set your GIF to loop endlessly
- Keeps your GIFs high-quality and clean.
- Cut, crop, rotate, add effects, adjust speed, and apply filters.

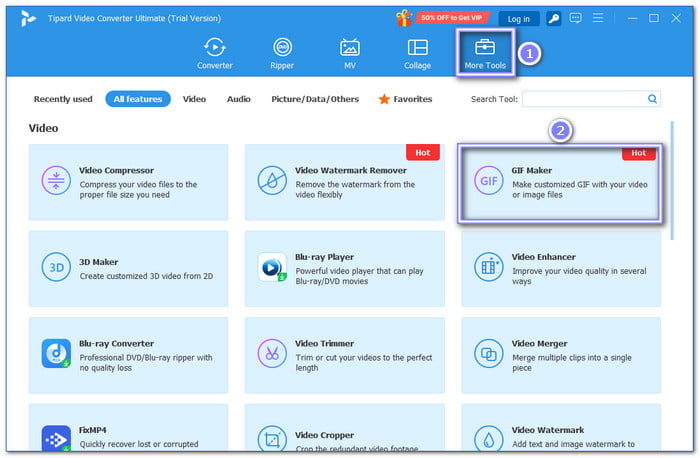
Step 1The first thing you need to do is open the Tipard Video Converter Ultimate on your computer once it is installed. This program works on both Windows (Windows 11, 10, 8, 7) and Mac.
Once it opens, navigate to the More Tools section. You will find many valuable tools; look for GIF Maker and click on it to start creating your project.
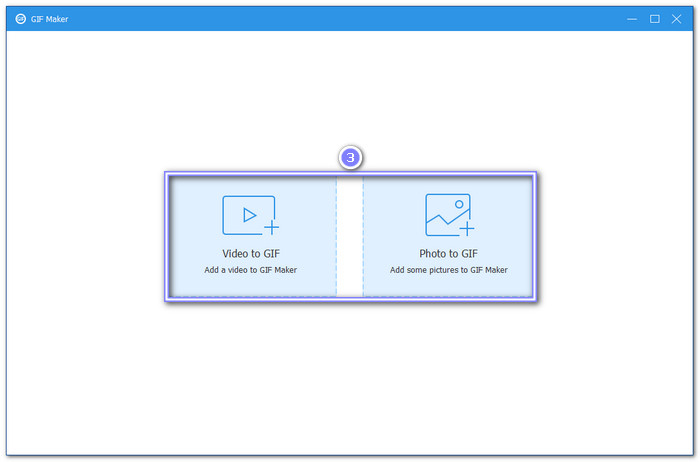
Step 2Tipard Video Converter Ultimate gives you two ways to create GIFs: Video to GIF and Photo to GIF. If you have a video clip, choose Video to GIF and import the file. If you want to use multiple images, select Photo to GIF and add pictures. You can upload one or more files at once.
The supported popular formats are MP4, AVI, MOV, JPG, PNG, and BMP, making it easy to work with different types of media.
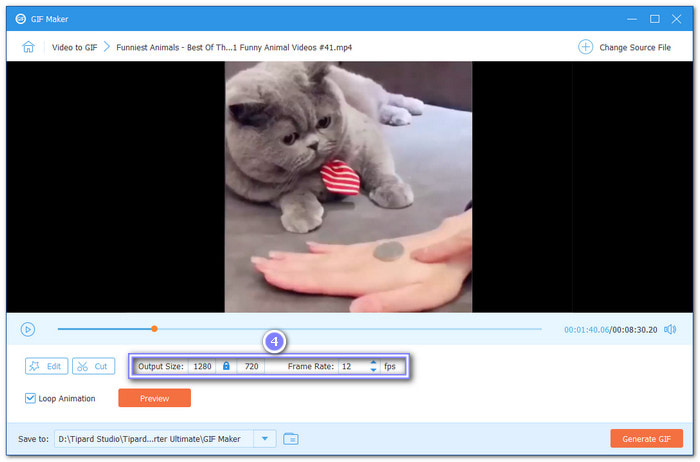
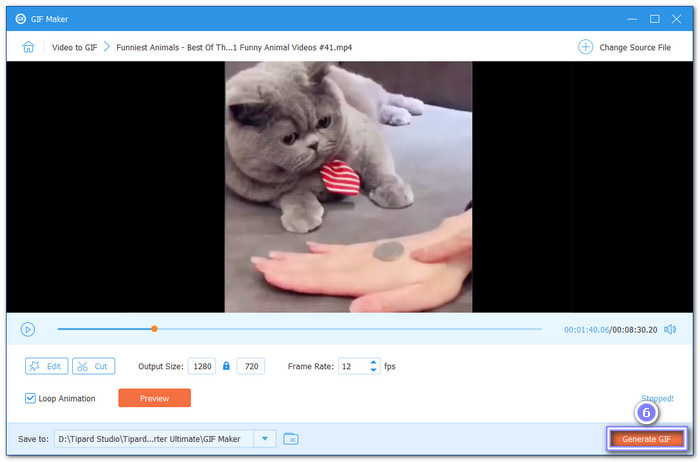
Step 3If you choose to turn your videos into GIFs, you have extra settings to fine-tune the GIF. You can change the Output Size to make it smaller or larger. You can also adjust the Frame Rate to control how smooth the animation looks. If you want the GIF to loop endlessly, just click the box under the settings.
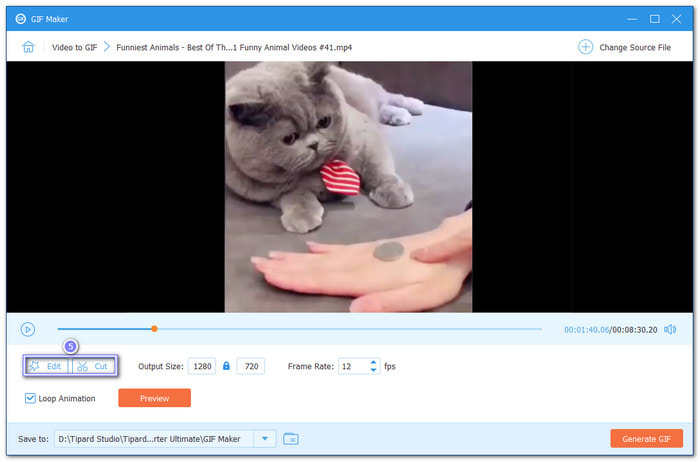
Step 4Before finalizing the GIF, you can edit the video using built-in tools. You can rotate the clip to fix orientation, crop the frame to remove unwanted parts, cut the length to keep only the best moments and apply effects or filters to enhance the look. You can also add text to include captions.
Step 5Once you have made the adjustments, click Generate GIF to process it. Tipard Video Converter Ultimate will process your file and generate the GIF.
When it is done, a message will pop up saying The GIF making process is completed. You can either save the GIF to your computer or click Make GIF Again if you want to try a different version.
Benefits and drawbacks: This tool is easy to use, making it great for beginners. With one click, you can turn videos or photos into GIFs without extra effort. Since it has no watermark, your GIFs look clean and professional. However, the free version only allows you to generate GIFs five times, so you will need to upgrade for unlimited use.
Part 2. How to Make a GIF on iPhone
GIFs are a fun way to share moving images, and the iPhone makes it easy. With Live Photos, you do not need extra applications. Just capture a moment, tweak it, and share it instantly. The built-in Photos app lets you turn Live Photos into GIFs with simple effects like Loop and Bounce. It is a quick way to bring pictures to life without hassle. If you have ever wanted to make a GIF without using a third-party application, this method is for you.
Here is how to make a GIF on iPhone using the Photos app:
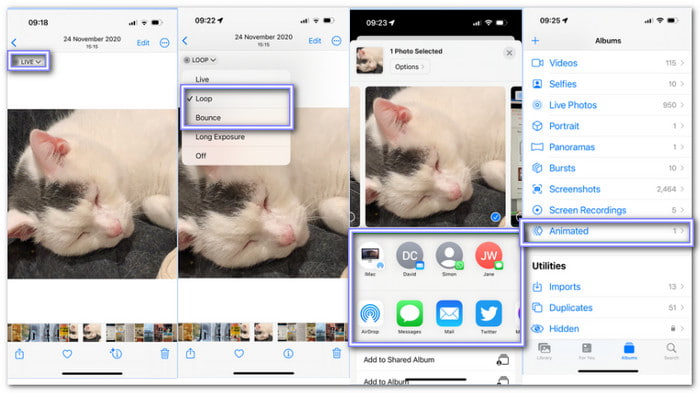
Step 1First, launch the Photos app on your iPhone. Tap on Albums and scroll down to Media Types. Find and select Live Photos.
Step 2Browse through your Live Photos and pick one. Tap the Live button at the top left corner of the screen to access editing options.
Step 3You have two choices: Loop makes your Live Photo replay continuously, while Bounce makes it play forward and then in reverse. Choose the one that fits your style.
Step 4There is no need to save it manually; your iPhone saves the effect automatically. Tap the Share button to send it through messages, social media, or email.
Step 5To see your GIFs later, go to Albums, scroll down, and tap Animated. All the GIFs you have made will be there.
Benefits and drawbacks: Making GIFs this way is effortless, but it has limits. You cannot edit much beyond Loop or Bounce, and file sizes can get big. However, the ease of use and quick sharing options make up for it. If you need more control over your GIFs, you might want an advanced tool.
Part 3. How to Make a GIF in Photoshop
For those who want precision and creativity, Photoshop is a powerful tool. It lets you make GIFs from multiple images or video frames. You can control each frame, adjust the timing, and even add text or effects. If you want professional-looking results, Photoshop gives you the freedom to craft high-quality animations with full customization. To learn how to make a GIF in Photoshop, check the guide below:
Step 1Open Photoshop, go to File, Scripts, and then Load Files into Stack. Click Browse and select the images you want to turn into a GIF.
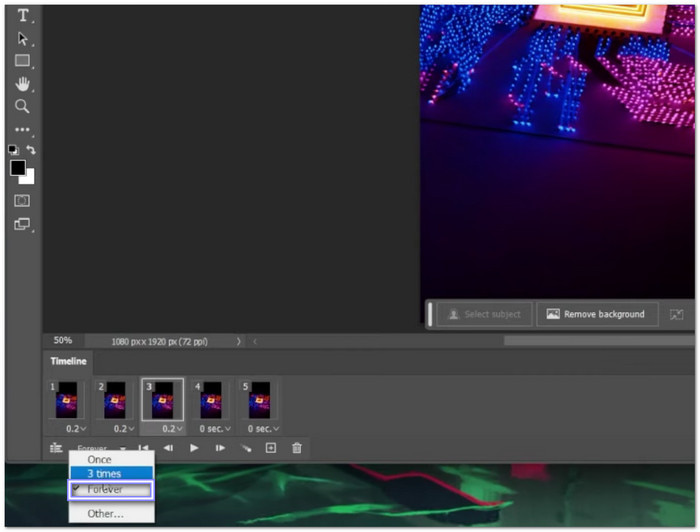
Step 2Click Window and then Timeline to bring up the animation tool. After that, select Create Frame Animation.
Step 3Click the three lines in the timeline panel. Select Create New Layer for Each New Frame and then Make Frames from Layers.
Step 4Adjust the frame delay to control the speed. Set it to Forever if you want the GIF to loop.
Step 5Click File, Export, and then Save for Web (Legacy). Choose GIF format and save the file to your computer.
Benefits and drawbacks: Using Photoshop means you can fine-tune every detail, but it is not the easiest method. The learning curve is steep, and the software is not free. Exporting the final GIF can take time, and the file size might be large. However, the flexibility and editing options make it a top choice for serious creators.
Part 4. How to Make a GIF with GIPHY
GIPHY is one of the fastest ways to make a GIFs from video. You upload your file, trim it, and add effects like text, stickers, or filters. This method is excellent for social media because it lets you make eye-catching GIFs without needing design skills. Plus, you can share directly to platforms like Twitter or Instagram.
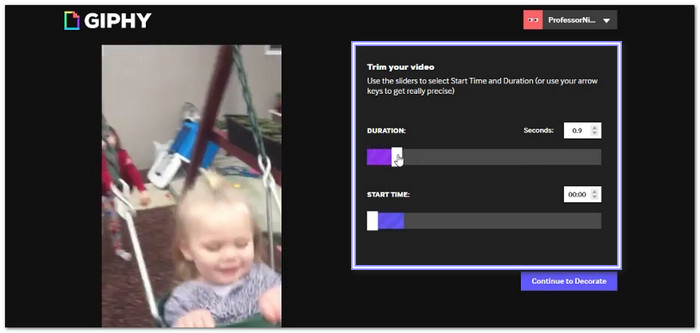
Step 1Go to GIPHY and upload a video or paste a link to an online clip. The video must be under 100 megabytes and 15 seconds or less.
Step 2Adjust the start and end points to highlight the best part of your video.
Step 3Customize your GIF with captions, stickers, or visual effects.
Step 4Add tags so people can find your GIF easily. Choose whether to make it public or private.
Step 5Click Create GIF, save it, and share it on social media or download it for personal use.
Benefits and drawbacks: GIPHY is user-friendly, but it has limitations. You need an internet connection, and the customization options are not as advanced as Photoshop. Also, uploaded files can lose some quality. Still, for quick and fun GIFs, it is one of the best tools available.
Part 5. How to Make a GIF with Adobe Premiere
Adobe Premiere is not just for video editing; it is also an excellent tool for creating GIFs. You can select any part of a video, trim or cut GIF, and export it as a GIF. This method works well if you want high-quality GIFs with more control over resolution and frame rate. It is perfect for turning movie clips or personal videos into smooth, looping animations. So, how do you make a GIF with it? Check the tutorial below!
Step 1Open your project in Premiere. Find the section of the video you want to turn into a GIF. Use the I key to mark the start and O to mark the end.
Step 2Zoom in on the timeline and adjust the clip to avoid black frames.
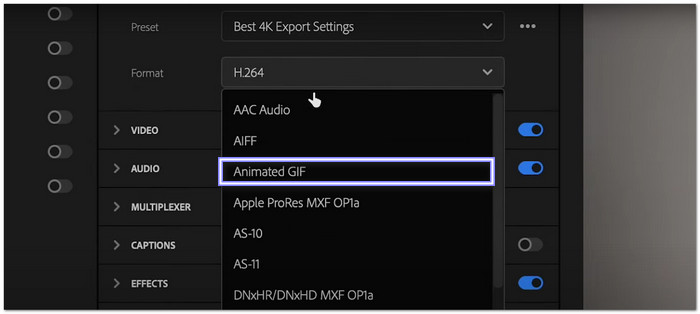
Step 3Click File and then Export and change the format to Animated GIF.
Step 4Under video settings, uncheck default settings and set a custom size (256x144 works well for small GIFs).
Step 5Click Export. Your GIF is now ready to be shared or uploaded online.
Benefits and drawbacks: While Premiere gives you excellent control, it is not ideal for beginners. The software is complex, and exporting a GIF requires several steps. Also, Premiere is expensive. But if you already use it for video editing, it is a great way to make high-quality GIFs without needing extra software.
Conclusion
How can I make a GIF? That question you had is now answered with the help of our guide using the tools we provided. As you notice, creating GIFs is fast and simple. You do not need special skills; all you need to have is a tool to help you get the job done.
Among the options, Tipard Video Converter Ultimate is the best choice. It lets you create GIFs from videos or multiple photos with one click. There is no watermark, and you can preview before saving, edit, trim, and enable loop animation to make your GIF perfect.
Now that you know how to make GIFs, you can bring any moment to life and share your creativity effortlessly. Have fun making GIFs!
More Reading

About the Author
