
The Most Worthwhile Software to Convert JVC MOD Video

Many people love traveling and prefer recording videos. They keep the precious moment forever as long as they put the video on computer. However, the format (Mod/Tod) of video recorded by camcorder is not common format, so it is difficult to play the video with some players. This problem can be easily solved with Tipard Video Converter Ultimate.
Mod and Tod extensions are the video formats generated by most popular digital camcorders such as Panasonic SV AV100, Canon MOD Camcorders, JVC (MOD and TOD) and Panasonic (MOD only).
Let's come to this guide now – convert JVC Mod files.
Step 1: Download and install Tipard Mod Converter.
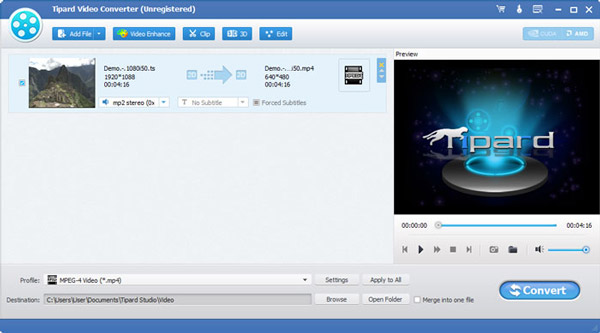
Step 2: Add file to Tipard Mod Converter interface. There are three ways to put your files on it.
Method One: Click "Add File", it would pop up one window, and select you want to convert file on this window.
Method Two: At the top of the drop menu, click "File", then select "Add File" to import your .mod files.
Method Three: Drag the file to Tipard Mod Converter interface directly.
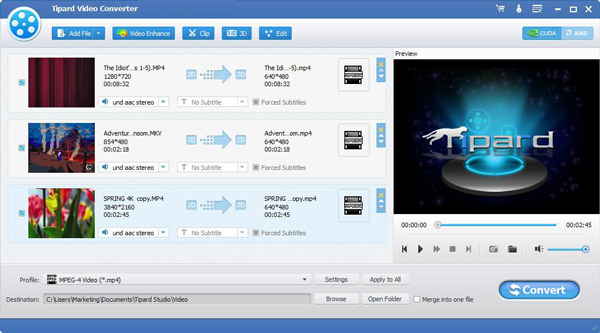
Step 3: Choose profile
Tipard Mod Converter is the professional mod converter to convert Mod files to the popular video formats: MP4, MPG, MOV, VOB, AVI, 3GP, FLV, HD H.264, HD WMV, HD AVI, etc. It can also extract audio from Mod and Tod video and convert Mod/Tod to AAC, AC3, AIFF, AMR, AU, MP3, M4A, MP2, OGG, WMA, WAV etc. After you select the profile, continue to select the format on the right drop menu.

Note:
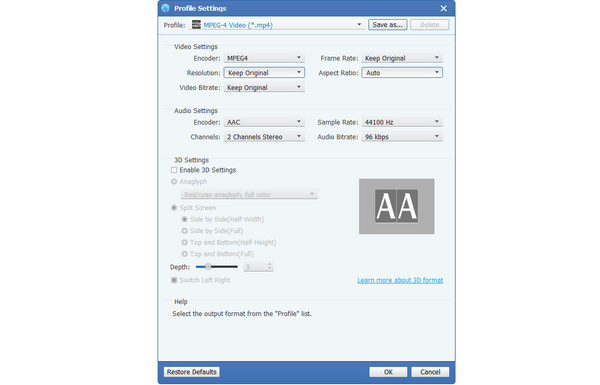
Before you start the conversion, you can define the video and audio settings.
Click the "Settings" button to open the Settings window.
In the Video Settings, you can select Encoder, Frame Rate, Resolution and Video Bitrate to convert your movie. Moreover, you can also directly input your own resolution as the form of "XXX*XXX";
In the Audio Settings, you can select Encoder, Channels, Bitrate and Sample Rate to convert your movie.
You also can save all the output settings as your preference, which is saved in the user-defined column automatically.
Tips:
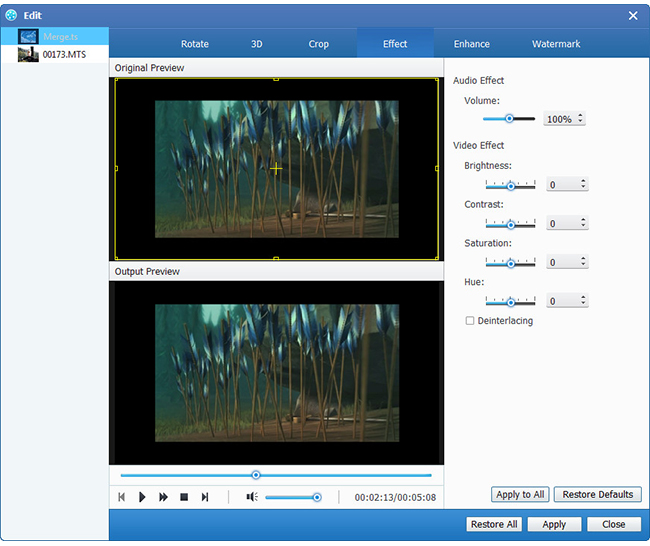
Tip 1: Edit video effect
Click "Effect" button on the top of the interface to pop up the video edit effect window.
Brightness: Drag and click the Brightness adjustment bar to set the brightness of the video.
Contrast: Drag and click the Contrast adjustment bar to set the contrast of the video.
Saturation: Drag and click the Saturation adjustment bar to set the saturation of the video.
Deinterlacing: when you convert the interlaced video formats such as 720i,1080i, for you to obtain better output videos, you can set the Deinterlacing function to avoid the mosaic.
Tip 2: Trim video
Click "Trim" button on the top of the interface to pop up the video edit trim window.
Tipard QuickTime Video Converter provides you three methods to trim your video length.
Method 1: Enter the start time in the Start Time box and click OK, then enter the end time in the Set End Time box and click OK.
Method 2: Drag the scissors bars under the preview window when you want to trim, then the time will be shown in the Start Time box and End Time box for your reference.
Method 3: Click "Trim From" button when you want to begin your trimming. Click "Trim To" button where you want to stop your trimming.
After you set trim time, the length of the captured clip will be shown in the Select Length box for your reference.
Tip 3: Crop video
Click "Crop" button on the top of the interface to pop up the video edit crop window.
Tipard QuickTime Video Converter allows you to remove the black edges around your movie video and customize the size of video play region.
There are three methods available to crop your video:
Method 1: Crop by selecting a crop mode
Method 2: Crop by adjusting the crop frame
Method 3: Crop by setting the crop values
There are four crop values on the lower right part of the crop window: Top, Bottom, Left and Right. You can set each value to crop your movie video, and the crop frame will move accordingly.
You can also set the output aspect ratio from the Zoom Mode according to your need. There are four choices available: Keep Original, Full Screen, 16:9 and 4:3.
Tip 4: Snapshot:
Click "Snapshot" button on the right bottom of the preview video window and the current picture in the Preview window will be captured and saved.
Click "Folder" button to open the folder where the captured images are saved. As default the captured image will be saved at users' My Documents\Tipard Studio\Snapshot.
Click "Preference" menu, you can reset the snapshot folder and the type of your captured image: JPEG, GIF or BMP formats.
Tip 5: Preferences
Click "Preferences" menu to adjust the settings related to conversion
It includes the output folder, snapshot folder, image type, conversion done, CPU usage.
Step 4: Convert
After all the steps above are done, click the right button on the interface to start to convert .mod files to popular format.

 3 Easiest Ways to Remove Watermark/Logo from Video
This is the detailed tutorial for beginners to remove watermark from video. You can remove watermark or logo from a video within several steps quickly.
 Top 10 Best MP4 to AVI Converter Software
If you are looking for the methods to convert MP4 to AVI, you can learn from the detail about the 10 best MP4 to AVI Converters.
 Top 20 MP4 to MP3 Converter Software
Want to have easy access to convert MP4 to MP3 easily? The following article suggests 20 Converters.
 Top 10 MP4 to MOV Converter Software for You
This post tells you top 10 MP4 to MOV converters. With them you can convert MP4 to MOV on your computer or online without installing any software.