Quickest Way to Burn Images to DVD with a Tutorial on the Best Options
In this guide, we'll explore the straightforward process of transforming digital images into DVDs, ensuring your memories are stored and celebrated. Stick around for a handy tip on effortlessly mastering this art at home, blending convenience with a personal touch. Let's dive into the simplicity and sentimentality of breathing life into your images through the classic medium of DVDs.

Part 1. How to Burn Image to DVD Using Software & Built-in Tools in Windows & Mac
1st Method. Using ImgBurn
Burning photos to a DVD can be done using various software tools. One popular and user-friendly software for this purpose is ImgBurn. Here's a step-by-step tutorial on how to use ImgBurn to burn an image to a DVD:
Step 1Visit the official page of ImgBurn and download the latest version of the software. Install ImgBurn on your computer by following the on-screen instructions.
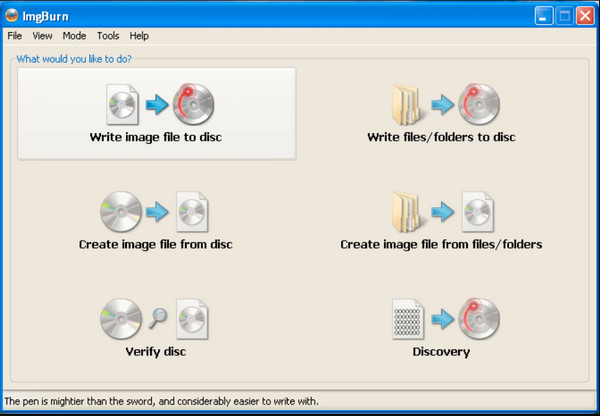
Step 2Open ImgBurn after installation and select Write image file to disc in the main menu.
Step 3Click on the folder button next to the Source field and browse to the location where your image file is stored. Pick the image file you want to burn to the DVD.
Step 4Insert a blank DVD into the drive and select your burner drive. Click on the large Write button to start the burning process. ImgBurn will display the progress and notify you when the process is complete.
2nd Method. Using Windows Disc Image Burner
Windows Disc Image Burner is a built-in tool in the Windows OS that allows users to burn ISO images to DVDs. It provides a straightforward interface for selecting the image file, choosing the destination DVD burner drive, and initiating the burning process. This tool is convenient for users who want to perform basic burning images on DVD Windows 10.
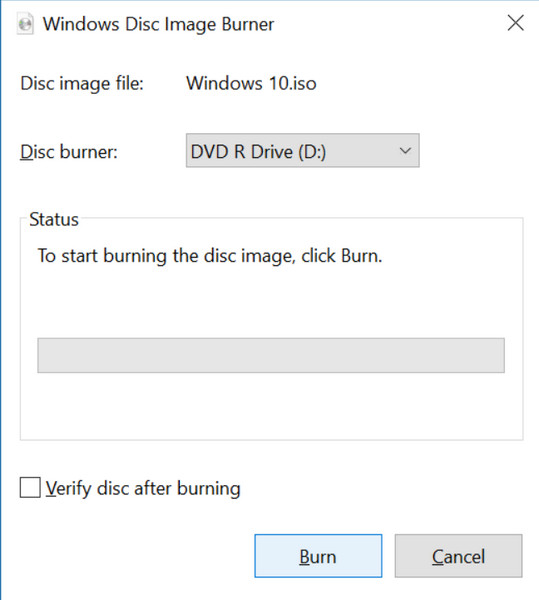
Step 1Position a blank DVD into your DVD burner drive. Ensure it has enough storage for the image you want to burn. Right-click on the image file you wish to burn. From the context menu, choose Burn disc image.
Step 2The Windows Disc Image Burner tool will open, prompting you to choose the DVD burner drive. Confirm the correct drive is selected.
Step 3Click the Burn button to initiate the burning process. Windows will display the progress, and a notification will appear upon completion.
3rd Method. Using Mac Disk Utility
Disk Utility is a built-in app dedicated to Mac that provides various disk management and troubleshooting functions. Among its features, Disk Utility can be used to burn disc images to DVDs. It offers a user-friendly interface for selecting the image file, configuring burn settings, and initiating the burning image file to DVD.
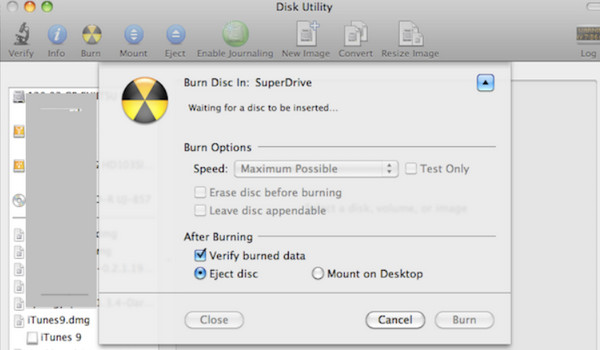
Step 1Insert a blank DVD into your Mac's DVD drive, ensuring it has sufficient capacity for the image. Navigate to Disk Utility in the Applications and Utilities folder. Open it either through Spotlight or by manual navigation.
Step 2Click on File in the menu and pick Open Disk Image. Select the image file you intend to burn.
Step 3Once the image file is loaded, click the Burn button in the toolbar. Configure burn settings if needed, and click Burn to start the process.
Part 2. Tip: Quickly Burn Contents to DVD at Home with Ease & for Free
For those aiming for a seamless and user-friendly solution to create DVDs at home, Tipard DVD Creator stands out as a reliable choice. This software caters to novice and advanced users, offering an intuitive interface that simplifies the DVD-burning process. With support for a diverse range of input formats such as MP4, AVI, and MKV, Tipard enables effortless conversion of videos into DVD-compatible formats. It goes beyond basic functionalities, providing customization options such as adding background music, subtitles, and personalized DVD menus. Tipard is committed to high-quality output, ensuring that the burned DVDs maintain exceptional audio and video quality. The software's efficient burning engine allows for a fast and streamlined DVD creation experience, delivering prompt results without compromising quality.
Step 1Begin by downloading and installing Tipard DVD Creator on your computer. Use the designated download button below based on your operating system.
Step 2After successfully installing the software, launch Tipard DVD Creator. On the initial window, click on the DVD Disc option. Then, click the Add Media Files button at the center of the main interface. This allows you to load all the videos or movies you wish to burn, including those in MP4 and various other formats. Once all files are added, click the Next button.

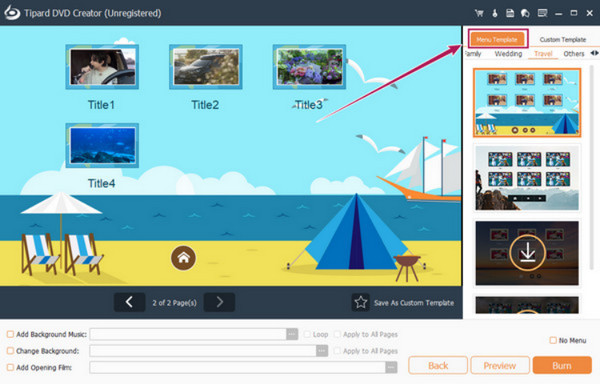
Step 3Customize the menu template for your DVD. Tipard DVD Creator offers multiple templates under the Menu Template section. Choose the one that suits your preference.
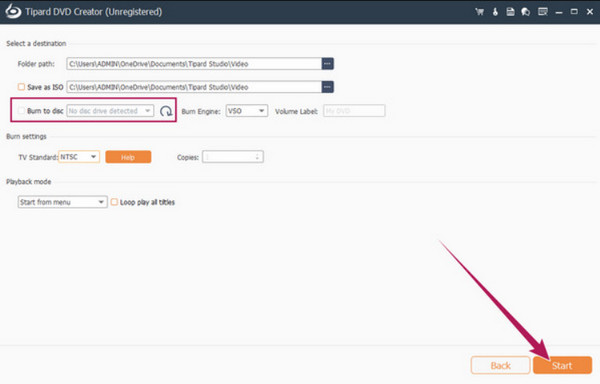
Step 4Click the Burn button in the last window to move to the next step. Ensure your DVD is inserted into the disc drive. On the subsequent window, toggle the Burn to Disc option. Adjust other presets according to your preferences. Finally, click the Start button to initiate the DVD-burning process.
Part 3. FAQs on How to Burn Images to DVD
Does DVD support all image formats?
DVDs typically support specific image formats, with JPEG and PNG being most widely compatible. It's advisable to check your DVD player's manual or specifications to ensure compatibility. If needed, consider converting images to supported formats using appropriate software.
How long does it take to burn pictures to DVD?
The burning time depends on various factors, such as the size of the image files, the speed of your DVD burner, and the capabilities of your computer. Burning pictures to a DVD can take a few minutes to an hour. Higher quality settings and larger file sizes may result in longer burn times.
What can you do with a slideshow DVD?
A slideshow DVD is a multifaceted platform for commemorating memories and delivering engaging presentations. It enables users to curate a visual archive, encapsulating cherished moments from family events, vacations, and special occasions. Beyond personal use, the versatility of a slideshow DVD extends to crafting personalized gifts for friends and family, where shared memories come to life in a dynamic and thoughtful format.
Can I add music to my image slideshow on a DVD?
Many DVD burning and authoring tools allow you to add background music to your video or image slideshow. When creating your slideshow, look for options related to audio or background music and follow the steps provided by the chosen software.
How much space is available on a standard DVD for images?
The storage capacity of a standard single-layer DVD is approximately 4.7 GB. The image space depends on the DVD type, file sizes, and the number of images. It's recommended to check the total size of your image files before burning them to ensure they fit within the available storage.
Conclusion
Turning your digital pictures into DVDs isn't just a space-saving endeavor; it's a journey of preserving precious moments in a timeless and high-quality format. This comprehensive guide has illuminated various methods, from using software on Windows and Mac to the convenient home DVD-burning experience with Tipard DVD Creator. Besides, you can learn how to convert 8mm to DVD if needed.