
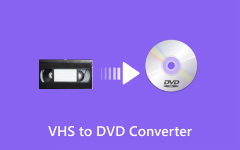
Old VHS tapes can hold special family memories, home movies, or recordings you do not want to lose. The problem is that VHS players are hard to find today, and tapes can wear out over time. That is why many people turn to a VHS to DVD converter. With the right tool, you can move your video to a digital format that is easier to watch and store. The process is simple once you know what you need. In this guide, we will explain why to convert, what you need, and how to do it step by step.

Part 1. Why You Need to Convert VHS Tapes to DVD
VHS tapes were once the best way to record family events and movies. The issue is that they do not last. Tapes wear out, lose picture quality, and can even break. Finding a VHS player today is also tough. This makes it hard to enjoy the videos you still have.
When you convert VHS to DVD, you protect those memories from damage. DVDs last longer and are more reliable. They give you clearer playback and work on most modern devices. You can also share them with ease. By moving your tapes to DVD, you save your recordings in a safe format for the future.
Part 2. Requirements of VHS to DVD Conversion
Before you begin the process, it is important to prepare well. Start by checking all the tapes you own. Make a simple list so you know how many recordings you want to transfer. This step helps you set a plan, estimate the time needed, and avoid missing any tape. Once you are ready, gather the equipment that will allow you to convert VHS videos to DVD in a smooth way.
Here is the list of tools you should have:
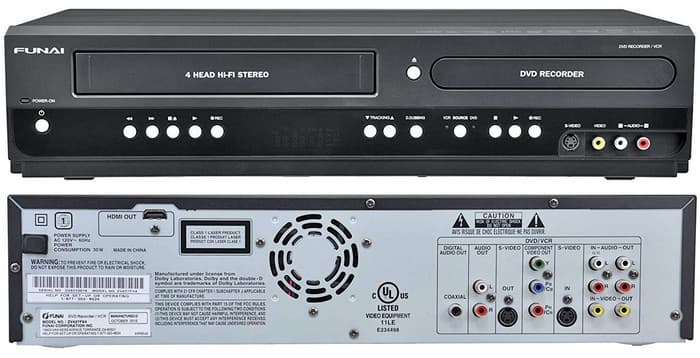
- A VHS player, either a stand-alone unit or a combo deck that also records DVDs.
A DVD recorder or a computer, if you use a computer, make sure it has a working DVD drive. - Cables or adaptors connect the VHS player output to the input on the recorder or computer.
- Blank DVDs are needed to store the final copies of your recordings.
Having these items ready makes the job easier and faster. With the right setup in place, you can change VHS to DVD without stress and keep your memories safe in a lasting format. Thus, if you want to digitize your VHS, then converting VHS to MP4 would be your go-to with the same preparation.
Part 3. Step-by-Step Guide to Convert VHS to DVD
There are different ways to save your old recordings. Below is a simple guide that shows you three clear methods.
1.Use a DVD Recorder
Start by connecting your VCR to a DVD recorder with composite cables. The yellow cable carries video, while the red and white cables handle audio. Plug them into the input ports on the recorder. Then set the recorder to the correct input channel. Place your VHS tape into the VCR and a blank DVD into the recorder.
To begin, press record on the DVD recorder, then press play on the VCR. This order ensures you capture the full video. Many people prefer this method when they want to transfer VHS to DVD with basic equipment.
2.Use a VHS/DVD Combo Unit
Suppose you own a combo deck, the process to convert VHS to digital easily. Insert your tape and a blank DVD into the unit. Many machines have a dubbing button that lets you copy directly. Choose the VHS to DVD option and press record. If your machine does not include the dubbing feature, press play on the VHS side and record on the DVD side. This setup reduces the need for extra cables and makes it simple to transfer VHS to DVD with less hassle.
3.Use a Computer with a Capture Device
A computer offers another practical way to save your recordings. Attach your VCR to a video capture device, then link the device to your PC through USB. Install the tool that comes with the capture card to record the video to your hard drive.
Part 4. The Best Way to Convert VHS Videos to DVD on Desktop
A smart choice is Tipard DVD Creator in case you are seeking a simple tool. When you have recorded your VHS tapes to your computer using a capture device, this program allows you to convert them into DVDs in a matter of steps. It accommodates DVD-friendly and makes the process user-friendly for beginners. This is one of the simplest answers if you have been asking how to convert VHS to DVD at home.
Plus, it also gives you room to be creative. It has ready-made DVD menu templates that you can edit to fit your style. You can add menus, titles, and chapters to make your disc more personal. The program keeps the original video quality and can even improve it. This means your old VHS tapes will look clearer once they are saved on DVD.
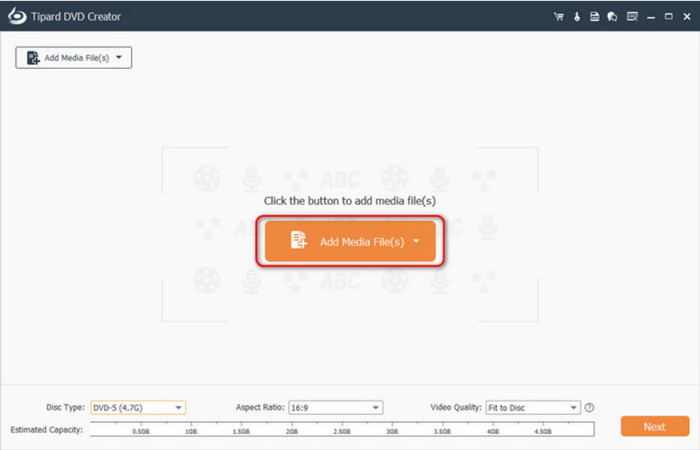
Step 1 Download and install Tipard DVD Creator on your computer. Launch the program, then insert a blank DVD into your computer’s disc drive.
Step 2 After that, click the Add Media File button to import the digitized VHS videos you want to transfer.
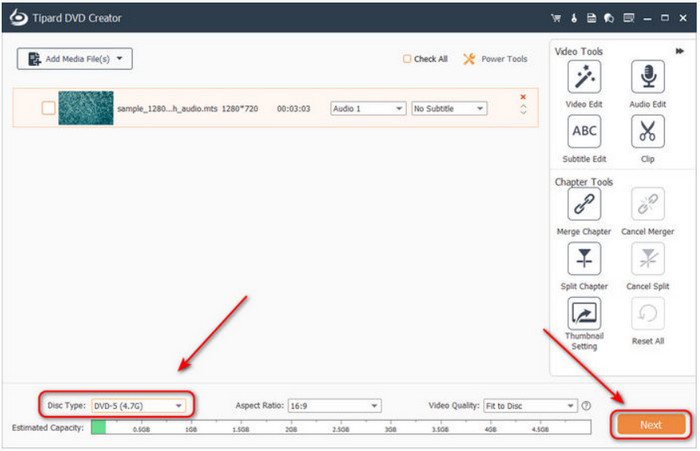
Step 3 Before converting VHS to DVD, you can edit the video inside Tipard. Use the built-in tools to trim, merge chapters, or adjust audio. Then, choose your preferred disc type, DVD-5 or DVD-9, and click Next to continue.
Step 4 Now, select a DVD menu template for your task. You can edit titles, buttons, and background settings to personalize your DVD before burning.
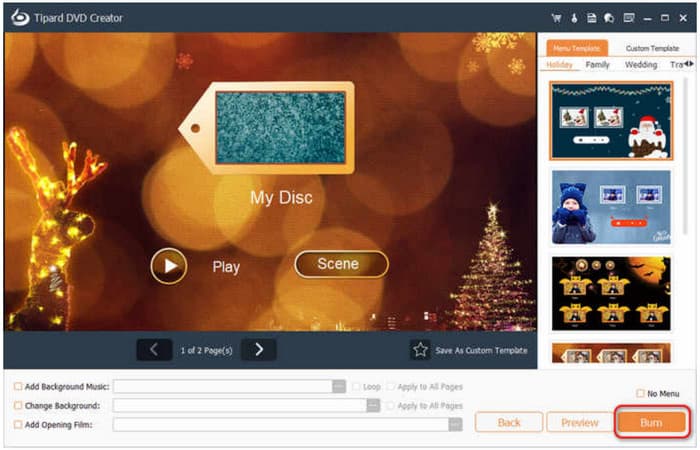
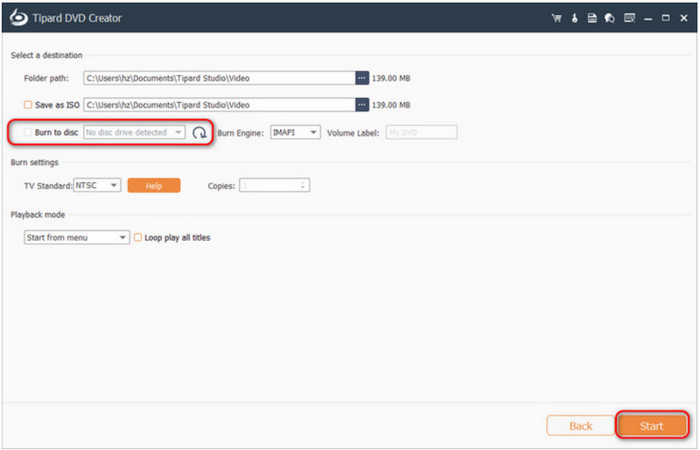
Step 5 Finally, choose Burn to disc as the output option, pick your DVD drive, and hit the Start button. Tipard will handle the rest and complete the process of converting VHS to DVD while keeping the video quality intact.
Conclusion
Converting old tapes is now easier than ever with the right tools. Using Tipard DVD Creator, you can quickly turn your digitized VHS recordings into playable discs without losing quality. If you want to keep your memories safe and watch them on any DVD player, choosing a reliable VHS to DVD solution like Tipard is the best way to go.
More Reading


About the Author
