
Have you ever shot a video only to discover that it plays upside down? It occurs more frequently. Regardless of whether you were making a video using a phone, webcam, or a camera, videos may be turned upside-down because of settings or the orientation of holding the device. The positive aspect is that this issue can be easily resolved; there is no need to redo everything and discard the recordings. In this guide, we will show you how to fix upside-down video across different platforms, from Windows and Mac to iPhone, Android, and even online tools. We will make your video upright.

Part 1. The Best Way to Fix Upside Down Video on Windows and Mac
Have you ever tried opening a video on your computer only to discover that it is being shown upside down? It may have been perfect when recording, but after it was saved, the angle is not right. Rather than glancing at the screen with a twisted head or quitting on the clip, it would be a better option to repair the upside-down video using a quick and efficient application. Whether you are using a camera or need to fix upside-down video, users often deal with this, and this guide will walk you through the best way to correct it on both Windows and Mac.
One of the most well-known tools capable of performing such a task is Tipard Video Converter Ultimate. It can handle practically every video format, and compatibility is not a concern. You can simply flip your video vertically or horizontally with a single click without rotating it. This makes it ideal if you are learning how to fix a video that is upside down without messing up the frame. Another highlight is its export quality, which does not compromise the sharpness of either the video or the audio.
Step 1 Download the Tipard Video Converter Ultimate for free on your Windows or Mac operating system, then install it promptly to use it and correct the video orientation.
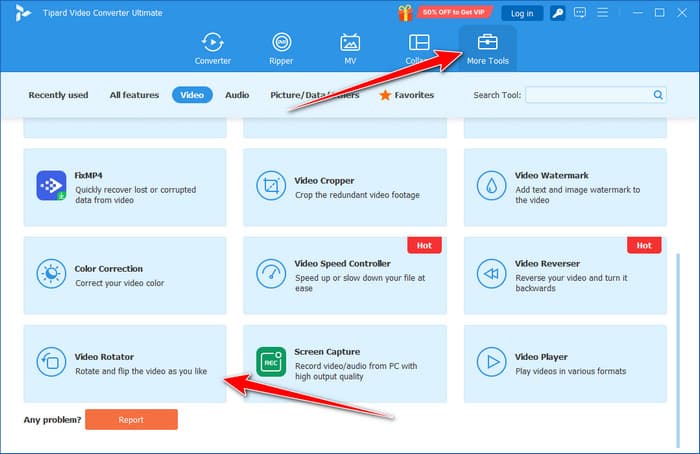
Step 2 Proceed by clicking the More Tools, and search for the Video Rotator. Then, a new window will occur on your screen. This time, click the + button to import the video you want to fix the orientation of here.
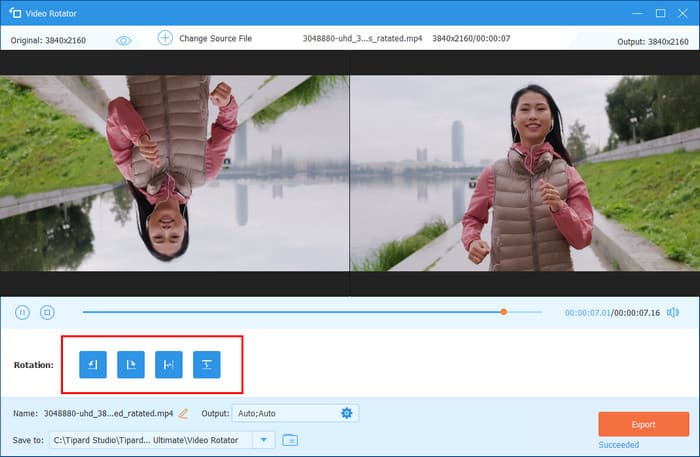
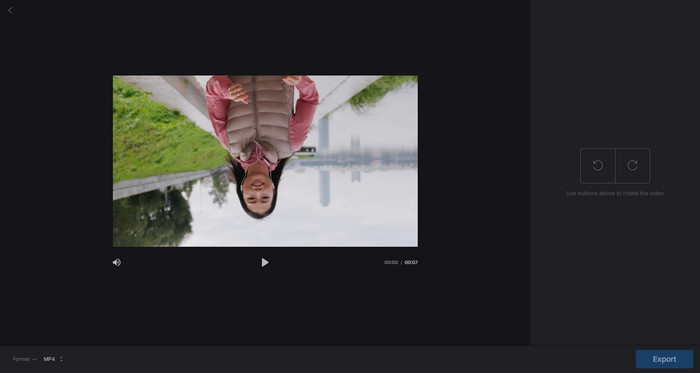
Step 3 Next, you can see on the preview on the left that the video is in the upside-down orientation. Here, you can use these buttons to flip or rotate the video to the desired orientation. Take a quick preview of the video to see what the outcome would look like.
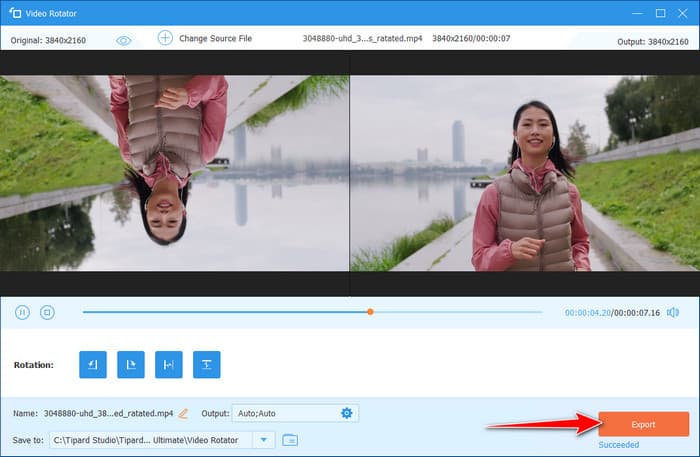
Step 4 Finally, once you are satisfied with the result, click the Export button to download the fixed video. As you can see, flipping video with the help of the best editor here can make the job easy.
Part 2. How to Fix Upside-Down Video on iPhone
If you recorded a video only to find it plays upside down, do not worry. iPhones come with a built-in editing tool that lets you turn videos in just a few taps, eliminating the need for extra apps. This method is perfect if you want to quickly fix an upside-down video that iPhone users often encounter after recording. Just follow these simple steps:
Step 1 Open the Photos app on your iPhone. Find and tap the video you want to fix, then tap Edit in the top-right corner.
Step 2 At the bottom of the screen, tap the Crop button or the square with arrows. Then, hit the Rotate button in the top-left corner of the screen.
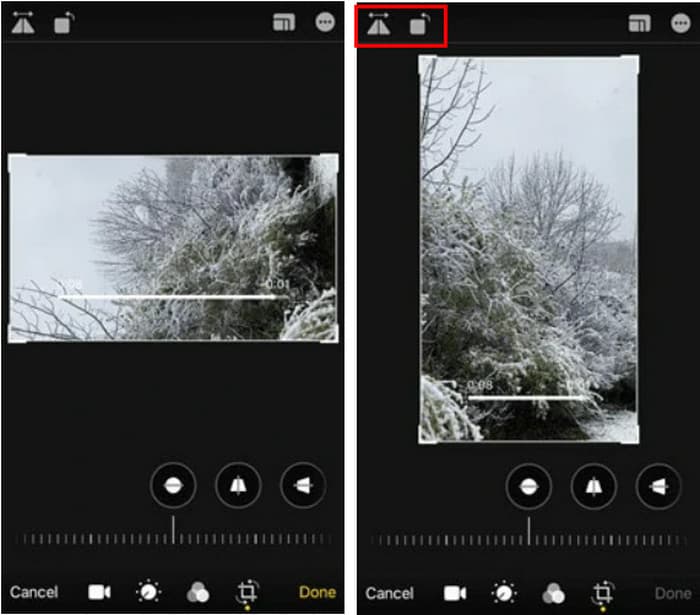
Step 3 Keep tapping the rotate button until your video is upright and properly aligned. Tap Done to save your changes. The rotated video will be saved automatically in your gallery. As easy as that, you can maximize the potential of the iPhone built-in editor to change the angle of the video.
Part 3. How to Fix Upside-Down Video on Android
Captured a great moment, only to find the video is playing upside down? No problem, Android phones make it easy to fix this with the built-in Google Photos app, whether the video was flipped during recording or saved at the wrong angle. Here is how to fix upside-down video on Android, allowing users to resolve this issue with just a few taps.
Step 1 Open the Google Photos app on your Android device. Use the search bar or scroll to find the video you want to rotate.
Step 2 Tap on the video to open it. Then, tap the Edit button or the slider bar at the bottom of the screen.
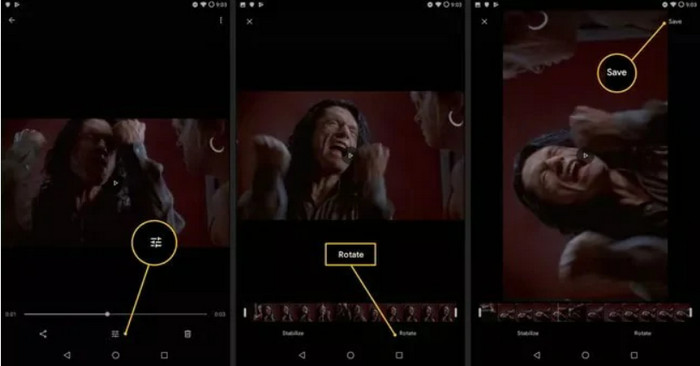
Step 3 Tap the Rotate button until the video appears in the correct orientation. Once it looks right, tap Save to apply and store the changes. No app is needed to download, as it is already available on your Android device.
Part 4. How to Fix Upside-Down Video Online
In case you require a fast solution that does not require software download, an online tool can assist you in rotating your video within a few minutes. This is especially useful when trying to figure out how to fix a Zoom video that is upside-down, such as from recorded calls or online meetings. Only the browser and a couple of clicks are required to adjust the angle correctly and download the final copy. For this, we recommend using Clideo, a free and beginner-friendly online video editor.
Step 1 Open your browser and go to Clideo's Rotate Video Tool.
Step 2 Click Choose file to upload your upside-down video from your computer, Google Drive, or Dropbox.
Step 3 Use the Rotate button to turn your video until it is upright and properly aligned. Click Export, then download the fixed video once it finishes processing.
If you are using a Mac device, there is no need to use this online rotator, as you can easily flip videos in iMovie. A native video editor ready to help you on any macOS for free.
Conclusion
With this article, you already know how to fix upside-down video in Windows 10 with the help of the best video rotator, and you can also use the app even if you are using a Mac system. With the help of a computer, iPhone, Android device, or an online converting tool like Clideo, rotating your video to the required angle can be done much easier than ever.
You now know how to correct a video that has gone upside down: how to correct a Zoom video that is upside down, and blank clips that are stuck sideways. Farewell to those dreaded replays and flipping memories, and get every issue fixed in a flash with fixes crossing all your devices.
More Reading

About the Author
