
How to Transfer Data Files from iPad 2 Podcasts to Your PC

As a professional iPad 2 file transfer, Tipard iPad 2 Transfer Pro consists of iPad 2 to PC Transfer and PC to iPad 2 Transfer. Once owning it, you not only can transfer iPad 2 movies, songs and photos to PC for backup and safety, but also can add video, audio and image files from your computer to iPad 2 to enjoy. Plus, you are allowed to transfer video, audio, image and ringtone files between iPhone, iPhone 4 and PC.
Step 1: Install and register Tipard iPad 2 Transfer Pro
Download Tipard iPad 2 Transfer Pro installation file; then follow the instructions to finish the installation. After that, please launch iPad 2 Transfer Pro, and correct User Name and registration key should be entered in the pop-up window, in the end, just click "Register" button to finish registration.
Step 2: Connect your iPad 2
After registration, you will see the the following screenshot.
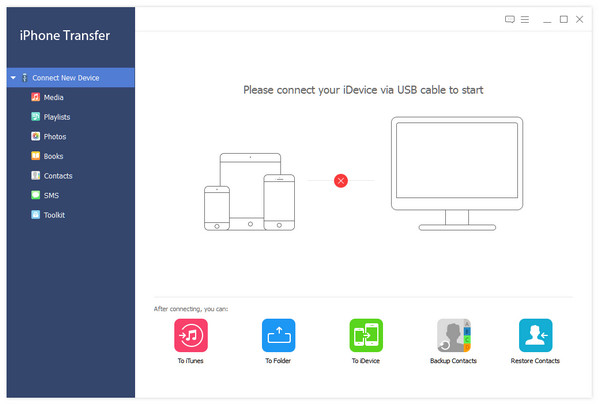
Connect your iPad 2 to PC via Apple dedicated data line, then you will see the following image.
Once connecting, your iPad 2 will be recognized instantly, and the detailed information about your iPad 2 will be displayed, including type, capacity, version and serial number. Plus, it will show the specific capacity values of different iPad 2 files which have taken, and the available space.

Step 3: Transfer various iPad 2 files to PC
On the left side of the main interface, you will see the display list, which will show your various iPad 2 files in different types. You can freely choose any kind of file type(Music, Video, Photo) to transfer to your PC for backup and safety.
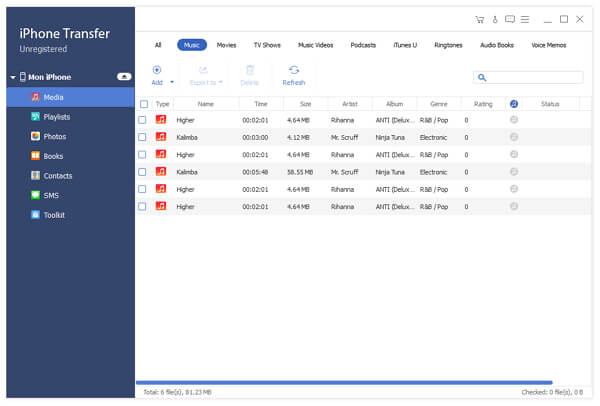
A: Transfer iPad 2 songs
Click "Music" on the display list, then the right side of the interface will display all your music files in details as the following screenshot shows.
In front of each listed music file, there is a check box, you can check all to choose all music files or just one to choose, then click "iPad 2 to PC" image button on the bottom of the interface to start transferring music files from iPad 2 to PC.
B: Transfer iPad 2 video files
Click "Video" on the display list, then the right side of the interface will display all your video files in details as the following screenshot shows.
In front of each listed video file, there is a check box, you can check all to choose all movie files or just one to choose, then click "iPad 2 to PC" image button on the bottom of the interface to start transferring video files from iPad 2 to PC.
C: Transfer iPad 2 image files
Click "Photo" on the display list, then the right side of the interface will display all your image files in details as the following screenshot shows.
In front of each listed picture file, there is a check box, you can check all to choose all photo files or just one to choose, then click "iPad 2 to PC" image button on the bottom of the interface to start transferring photo files from iPad 2 to PC.
Step 4: Transfer various files from PC to iPad 2
Click any one of three file types shown on the display list, then add video/audio/image files from PC to iPad 2.

D: Add video/DVD files from PC to iPad
Click "Video" on the display list, then click "PC to iPad 2" image button on the bottom of the interface. After that, a new window will pop up as the following screenshot shows.
D-1: Add video files from PC to iPad 2
For adding video files, you can click "Add File" image button and choose the target video file on your PC, then the chosen video will be listed on the display list. Then just click the activated "Import" button to transfer the target video file to your iPad 2.
D-2: Add DVD movie from PC to iPad 2
For Loading DVD, you can click "Load DVD" image button and choose the target DVD default folder, then all chapter files of the chosen DVD file will be listed on the display list. You can choose any one chapter file or the whole DVD folder, then just click the activated "Import" button to convert the target DVD file to iPad 2 compatible video formats, and then transfer them to your iPad 2.
E: Transfer Music files to iPad 2
Click "Music" on the display list, then click "PC to iPad 2" image button on the bottom of the interface. After that, a new window will pop up as the following screenshot shows.
You can click "Add File" image button and choose the target music file on your PC, then the chosen audio file will be listed on the display list. Then just click the activated "Import" button to transfer the target songs to your iPad 2.
F: Transfer image files to iPad 2
Click "Photo" on the display list, then click "PC to iPad 2" image button on the bottom of the interface. After that, a new window will pop up to allow you to choose the target photo files from your PC to transfer them to iPad 2.

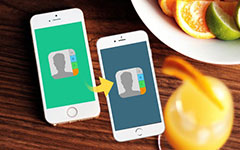 How to Transfer Contacts to New Phone from Broken One
If you are eager to know the methods to transfer contacts to your new phone from broken iPhone with damaged screen, you can get the different methods from the article. It also explains the best method to move contacts to new phone with iPhone Transfer Ultimate.
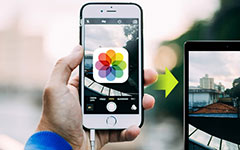 How to Transfer Photos from iPhone to iPad
How to transfer photos from iPhone to iPad/iPhone in a easy way? This article will guide you to transfer iPhone data like photos from iPhone to new iPad/iPhone.
 How to Transfer Music from iPad to iPod
Because of the DRM copy-right protection of Apple, you cannot transfer downloaded music from iPad to iPod with iTunes. The article explains the best method to put music onto iPod from iPad.
 How to Transfer Pictures from Phone to Computer
HWhen you need to transfer pictures from phone to computer, you might be confused with these different methods. Learn the best method from the article.