
Top 3 Solutions to Repair iPhone Screen
iPhone screen is very easy to be shattered, cracked and broken. For example, dropping your iPhone from a high place in-deliberately, scratching your screen with something hard, etc. What should you do for the cracked iPhone screen or how to repair iPhone screen? If you need to know the best and most economic solutions, the article introduces you top 3 solutions to repair your iPhone screen.
Part 1: Repair iPhone screen by Apple
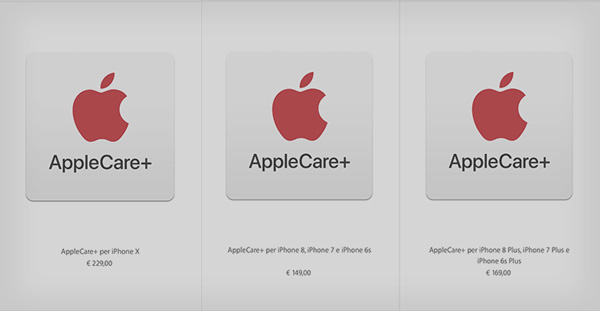
If you are looking for a new iPhone, you can check therepairing iPhone screen price with AppleCare+ and without AppleCare+. AppleCare+ price for iPhone 8/7/6S is $129.00, iPhone X $199.00.
| iPhone Model | With AppleCare+ | Out-of-warranty |
|---|---|---|
| iPhone6, iPhone SE | $29 | $129 |
| iPhone 8, iPhone 7, iPhone 6S, iPhone 6 Plus | $29 | $149 |
| iPhone8 Plus, iPhone 7 Plus, iPhone 6S Plus | $29 | $169 |
| iPhone X | $29 | $279 |
Repairing iPhone screen by Apple is absolutely a very professional and well-guaranteed way. If you have already subscribe the AppleCare+ service, it should be a nice solution. So, this solution is recommended if your screen is cracked due to a manufacturing defect or you have AppleCare+ and your situation is under its warranty.
There are two ways to get your iPhone screen repaired. One is to send your iPhone to Apple Repair Center, another is to bring it yourself to Apple Store at your convenience. If you have Apple Care+, then you can use Express Replacement Service.
Part 2: Repair iPhone Screen By 3rd Party
If you do not have AppleCare+ service, repair iPhone screen with 3rd party should be a nice and economic solution. Some platforms may not be able to fix newest iPhone. So, you should consult with them before you sent your iPhone to them.
You can take your iPhone to your local screen repair shop. There also are many online services to help you repair iPhone screen. The price is not as expensive as Apple store. Here are some online services you can take into consideration.
iToyz and Androidz
iToyz and Androidz is a repair shop which is located at 6200 Stanford Ranch Rd. They have Apple Product Repair specialists, which is able to repair iPhone screen professionally. And they have 30-day warranty. If you have any problem under its warranty, you can contact them anytime you want.
RapidRepair
RapidRepair is an online service for repairing iPhone screen. It helps people repair all iPod, iPhone, iPad, Zune, and other small electronic devices. It has a friendly personal service. What's more, you can send your device to RapidRepair, which diagnose the problem of iPhone for free.
Part 3: Repair iPhone Screen DIY
What should be the most economic solution to repair iPhone screen? Of course, you can do it yourself. As for the case, you only have to purchase the iPhone screen and the basic tools. If you are good at hand making, it should be a good choice for you. A DIY way of repairing your iPhone screen seems to be a suitable way for many people. But DIY way of repairing iPhone screen is more complicated than you think. It needs patience and your skills of hand making. Here the article will introduce a DIY way in detail that helps you repair iPhone screen efficiently.
Preparation: Shop for necessary tools and components on Amazon and eBay and cost from $20 to $50. There are specific kits for repairing iPhone screen. It includes the tools and instructions you need. It is recommended to purchase some guaranteed service, which might be more expensive than others. But it has the entire screen assembly and provides a warranty. You can watch some videos about how to repair iPhone screen on YouTube before repairing.
Step 1: Power off your iPhone
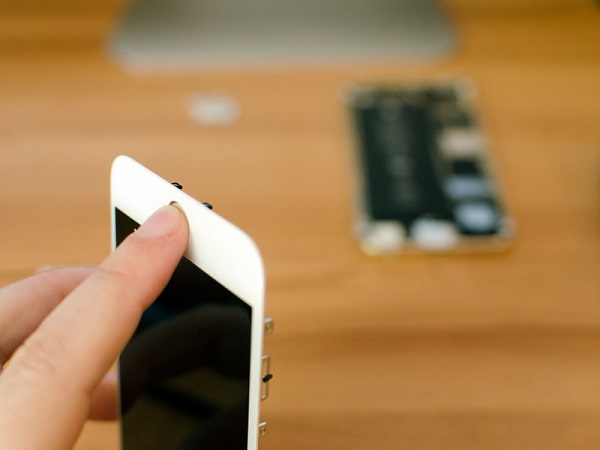
Power off you iPhone is the first step of repairing broken iPhone screen. Press and hold your home button until you see the slide to Power Off indicator.
Step 2: Remove the broken screen
In order to make you clear about this big step, here are more details.
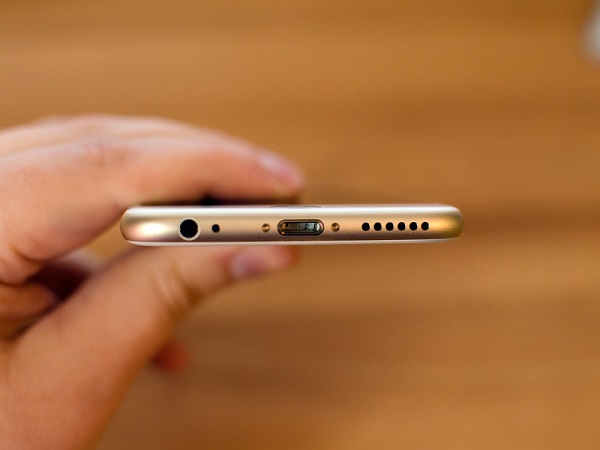
Remove the dock screws. Use screwdriver to remove the two screws that sit on either side of the Lightning Dock. Set these screws aside.
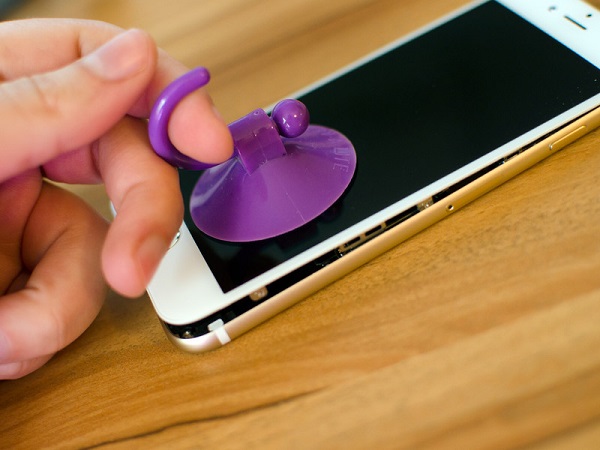
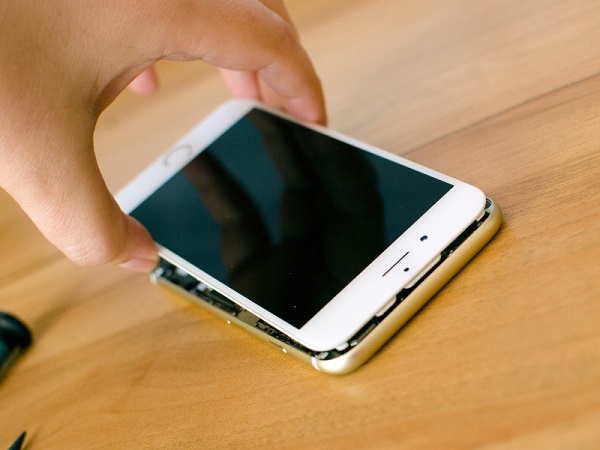
Use your suction cup to carefully pry up the bottom of the display. Please notice the picture to assure the right position and take care not to pull up too hard. Or else you may be failed in repairing your iPhone screen. And then swing up the display enough to reveal the top right of the inside of the iPhone.
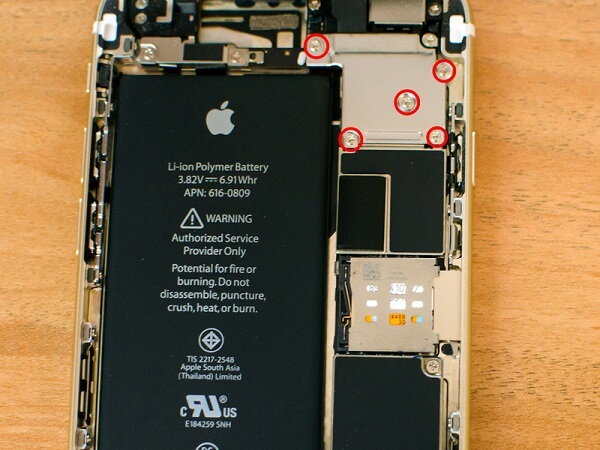
Remove the 5 screws. Just look at the picture. There are 5 screws. Remove them with screwdriver. You should not mix them up because they are different.
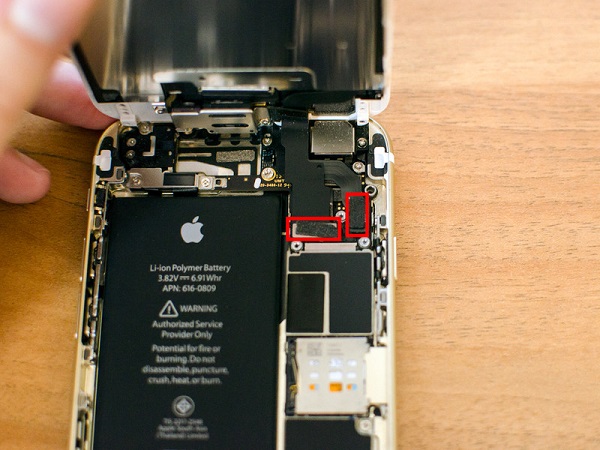
Remove the display shield. There are 4 cables holding the display to the logic board. Remove the display shield with your fingers. Take care not to snag the cables.
Remove the cables. Remove the two cables shown in the picture below. Be careful not to pry at the board.
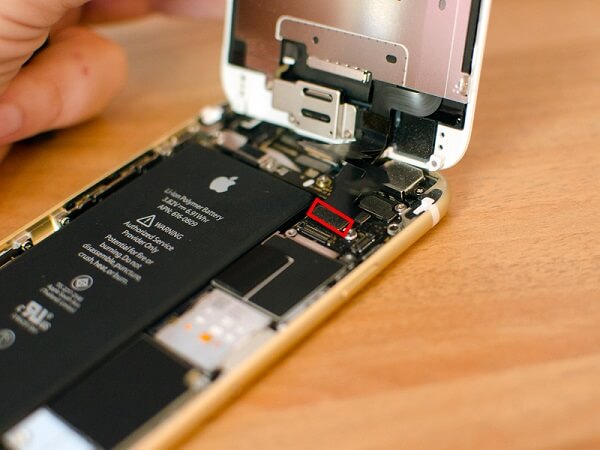
Remove a third cable shown in the picture, just as you did with the previous two.
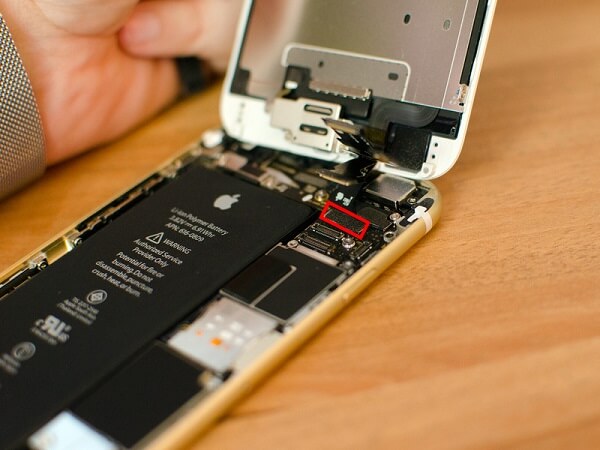
Remove the remaining cable underneath the third one.
Step 3: Transfer Touch ID
After that you can enter the passcode and confirm with "Erase iPhone" option. It needs to take a period of time to restore iPhone from factory settings.
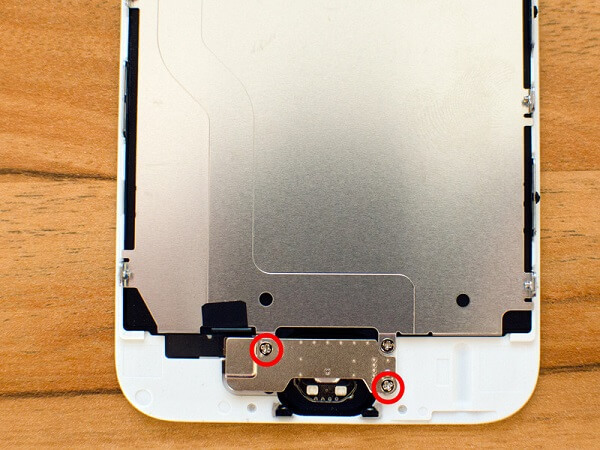
Be patient, repairing iPhone screen by yourself is not easy. You should put all your focus on it. Remove the two screws on the Touch ID shield, which are on the back of your broken display.
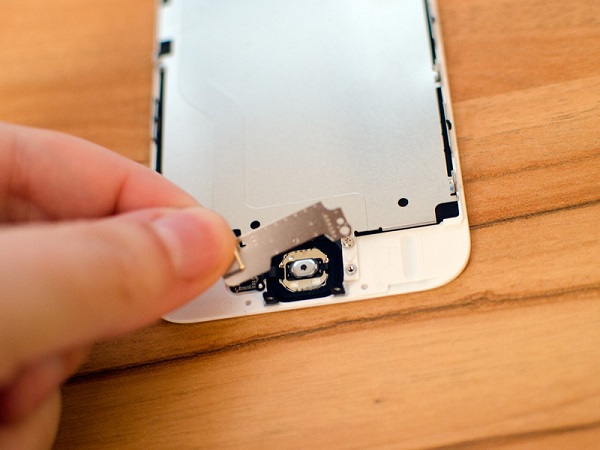
Remove the silver shield holding Touch ID.
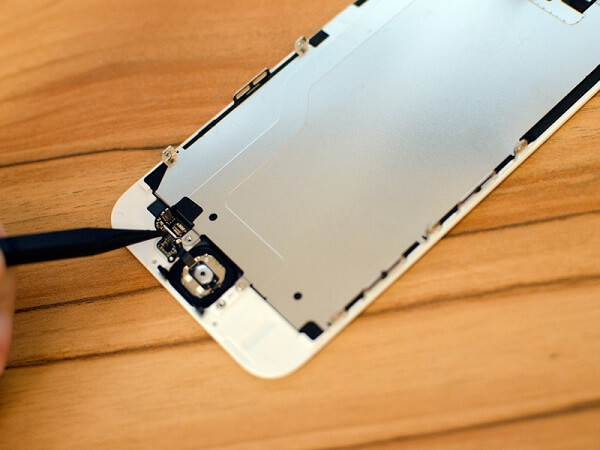
Remove the single cable connecting the Touch ID and Home button assembly.
Push the Home button from the front of the display.
Place the entire Touch ID and Home button assembly in the replacement display.
Make sure that the single cable holding Touch ID to the front assembly.
Replace the silver shield and make sure those two screws holding it in place.
Step 4: Install new display
It's almost done. Install new display is the key to repair your broken iPhone screen. Follow the details we list.
Make sure that the four cables on the new display assembly to the logic board of your iPhone.
Replace the display shield and the five screws that hold it in place.
Line up the top of the display.
Carefully push the display down, starting at the top.
Step 5: Replace the dock screws
Replace the two screws on either side of the Lightning Dock.
Conclusion
There are many solutions of repairing your iPhone screen. If you do have the AppleCare+ service, you can always send to Apple with US$29.00, or else you should contact the 3rd party to repair the cracked iPhone screen for you. If you are good at repairing, you can just follow the method to get the iPhone screen repaired. We hope this article will help you a lot. Thanks for reading.

 Top 3 Methods on How to Reset A Locked iPhone
You might lock your iPhone if you forget the passcode. How to reset a locked iPhone? Check out top 3 methods to achieve the goal.
 How Do I Reset My Apple ID on iPhone
What should you do if you forget your rescue email or security question? Here are some tricks to reset Apple ID on iPhone.
 Export Contacts from iPhone to iPhone/PC/Gmail
This article will guide you how to export contacts from iPhone to iPhone/PC/Gmail, and you will find the one you are used to.
 20 Best iPhone Themes You Can Choose
Here are 20 best iPhone themes that will change iPhone screen and bring a new experience. Make a personalized iPhone screen.