How to Add Video to iMovie: Preparation, Importation & Troubleshooting
iMovie is the pre-installed program/app you get on iPhone/iPad/Mac.. This built-in app enables you to create projects of photos, video clips, or trailers that you can upload to your social media accounts. To make video creation and editing work faster and more conveniently, iMovie is now available on iPad, iPhone, and iTouch aside from Mac. Thus, the question is, how to add videos to iMovie applicable for all platforms? This is what you will learn when you read the entire article below.

Part 1. How to Import Videos to iMovie
This part will teach you how to add your clips to iMovie from the preparation to importation.
The Preparation
You would want to make sure that the video files are prepared and organized properly. They must be in the right format and quality. Here's your step-by-step guide to follow.
1. Collect the Video Clips
The first thing to do is to collect or gather all the video files you want to upload to iMovie for your project. Ensure they are saved in an accessible folder on your computer.
2. Format and Compatibility
If you want the iMovie to work best, then you must prepare video files with common formats like MP4, M4V, MOV, and AVI. This means you must ensure your videos are in these formats. Otherwise, you will fail to upload them and need to convert them first using an extra converting tool.
3. Resolution and Quality
We recommend you use high-quality videos to get the best results in your iMovie project. But if you have nothing but low-resolution videos, consider checking them to see if they will look acceptable, for they will be stretched for your project's resolution.
4. Trim and Edit
As part of your preparation, before importing your .mp4 or .mkv into iMovie, consider editing and trimming them if needed. Use reliable video editing software like Tipard Video Converter Ultimate to make some basic but professional edits.
5. Organize Your Clips
Make descriptive names for your files to identify them easily when working with iMovie. This preparation will make your importation and editing process smoother.
The Importation
After preparing the video files, you may proceed to the importation process, shown below.
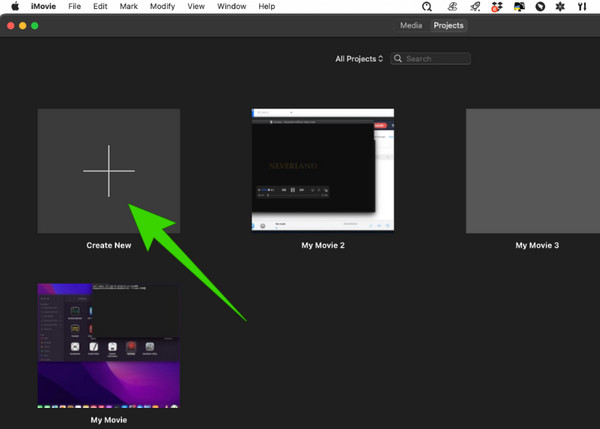
Step 1On your Finder app, find and launch the iMovie app. Once opened, click the Plus button to create a new project.
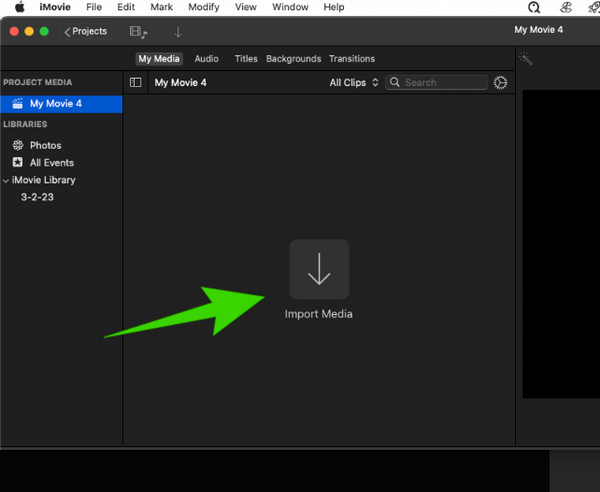
Step 2Then, you can begin importing some videos for your project by clicking the Import Media button you see at the left center of the workspace. This is how to add clips to the iMovie.
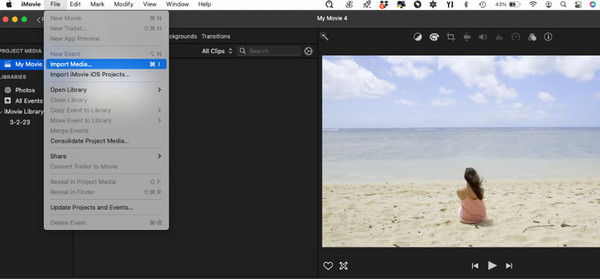
Step 3If, after importing the videos, you want to add more, just click the File tab menu and choose the Import Media option.
Note: We hope you saw the importance of the preparation after trying the importation. You see, it will make your work a lot easier when your video files are already organized, unlike when you need to search one by one during the importation.
Apart from the video importation in iMovie, here are several tricks you might find helpful when exporting videos in iMovie.
Further Reading:
Top 3 Methods to Burn iMovie to DVD With Ease
Top 4 Ways to Save iMovie Projects as MP4 Files on Mac and Windows
Part 2. Troubleshooting Video Upload Issues
iMovie is also one of those programs that have issues with uploads. Several reasons may cause this particular issue. Thus, here are some troubleshooting solutions that you can use.
Restart the iMovie
Sometimes, a quick program restart may help solve the temporary issues and glitches. Thus, if you experience the issue, this must be your initial troubleshooting solution.
Check for Updates
Check if you use the latest software version because an outdated system can cause the issue.
Check the Properties of the Video
Check if the video you are uploading matches the supported formats of iMovie. As mentioned above, iMovie only supports a few media formats: the MOV, MP4, M4V, and AVI. Thus, you will need to convert the video to other formats not mentioned first.
Check the Storage Available
Verify if your device has sufficient space because run-out storage hinders media importation. Scan for the unused apps and files on your device and see if you can already delete them to give way to the new project files.
Look for iMovie Alternative
For the best solution, look for an iMovie alternative to use on Mac and ready for Windows as well. We highly recommend this Tipard Mac Video Converter Ultimate. It is an all-in-one video editing solution that offers a movie maker, video enhancer, editor, and a converter that works 60 times faster. It is infused with powerful technologies like hardware acceleration, ultrafast conversion, and Artificial Intelligence technology for its incredible process. Unlike iMovie, this Tipard Mac Video Converter Ultimate supports more than 500 different media formats, giving you the assurance to work on whatever format you desire for both input and output.
You will also be amazed by its Toolbox because it provides nearly all the editing utilities you need, like a compressor, video enhancer, trimmer, merger, cropper, cropper, color corrector, rotator, volume booster, and many more. Meanwhile, here is a bonus part to learn how to add clips to iMovie’s best alternative.
Bonus: Quick Steps to Upload Videos to iMovie’s Alternative
Step 1Install the program on your Mac by simply clicking the Download button below. Launch the program and go to the function you want to use with it.
Step 2Suppose you chose its MV function to create a movie. In that case, you just need to click the Plus button to upload the videos you will work with.
Step 3Afterward, you can go to the Edit section or the Settings menu to modify your project.
Step 4Then, you can go straight forward to the Export menu to save the project in your desired output and hit the Start Export button.
Part 3. FAQs About Videos and iMovie
Can I add a YouTube video to iMovie?
iMovie doesn’t have a direct function to upload YouTube videos. Hence, you can only upload a saved or downloaded video to it.
Why won't my iPhone videos import to iMovie?
This issue might be due to several reasons. Such reasons as the app’s permission, video setting, outdated app, corrupted file, and others.
How do I import videos from my camera to iMovie?
Your camera must be connected to your Mac via a USB connector to access the videos from it, or you can use a memory card reader. Launch the iMovie, then when you click the add media button, access the file location of your camera.
Conclusion
Making your own movie project is an exciting task. However, as a beginner, you must also know how to add videos to iMovie. But to begin with, some of the preparations for this task must be followed. Fortunately, you can find it all in this post. Thus, you can share this with your friends who are also looking for the same answers. Meanwhile, if iMovie gives you a headache, you can use this Tipard Mac Video Converter Ultimate.