How to Burn iMovie to DVD With or Without iDVD
iMovie is the free video editor for Mac, which you can find for all versions of OSX. After creating or editing videos with iMovie, you may want to export the video to TV or DVD Player. What is more important, burning iMovie to DVD is a good way to backup some important videos. So how to burn iMovie to DVD? Just learn more detail about 3 solutions to create DVD files from the article now. And then choose the best solution according to your requirement accordingly.
Method 1: Use DVD Creator to burn iMovie to DVD
Actually there are other solutions to burn an iMovie project to DVD on Sierra. Tipard DVD Creator for Mac should be the most professional solution to make DVD with any video or audio file on Mac. It enables you to customize DVD menu as well as the video files.
Export iMovie projects to file
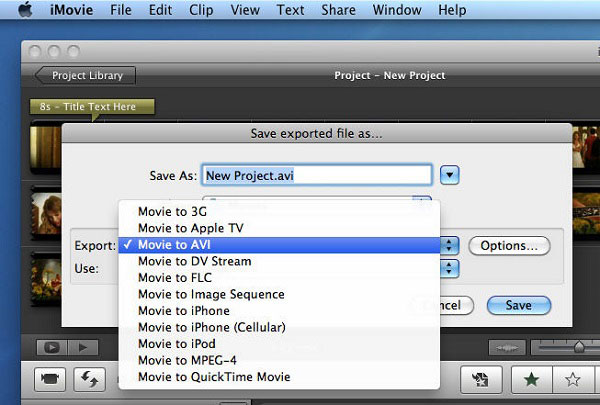
To burn iMovie to DVD, you have to export iMovie projects to video file firstly when the movie making is done. Check the iMovie project you want, click "Share" button and choose "File" to export iMovie to video file for DVD burning. For iMovie '11 or earlier, click "Share" on menu bar and choose "Export File".
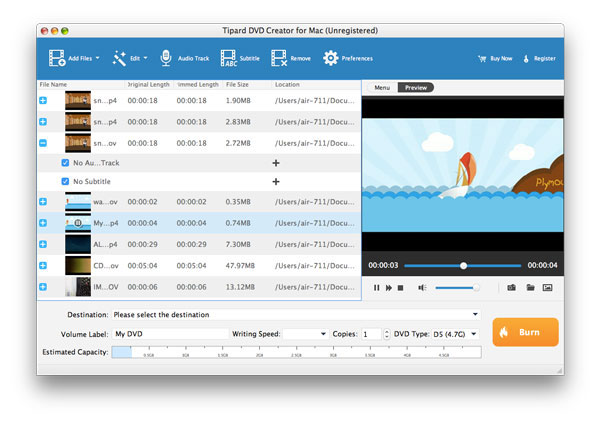
Add iMovie video to DVD Burner
Launch the Mac DVD burner, simply drag the iMovie videos into the program or click "Add Files" button to load the videos exported from iMovie to burn to DVD without iDVD.
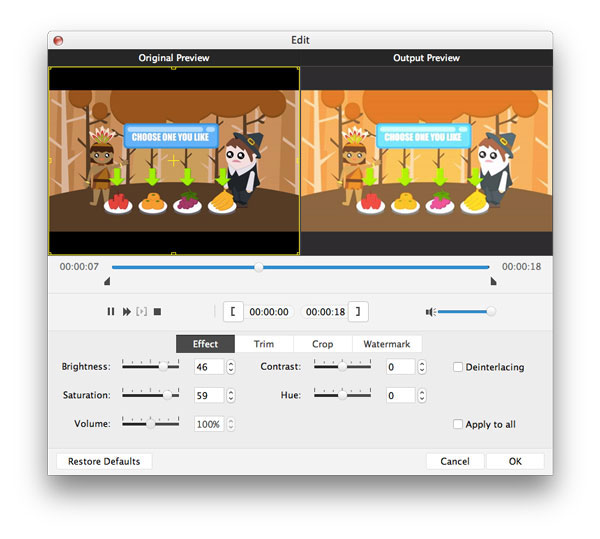
Add DVD menu, customize DVD video (optional)
This DVD burning software allows you to create DVD menu in order to navigate through your DVD movie easily. Click "Menu" tab on top of the preview window, then choose "Edit menu". In the pop-up DVD menu editing window, select your preferred DVD menu for your iMovie video. You can freely define the menu buttons, frames and titles, background music, picture and opening film. By the way, you can adjust video effects, trim video length, crop video and add watermark before burning iMovie to DVD.
Start burning iMovie to DVD
Insert a blank writable DVD disc into your DVD drive; then choose the DVD drive in which you put the empty disc from "Destination" dropdown box. After the destination is set, name your DVD movie in "Volume Label" box. If you just want to save iMovie to DVD folder or ISO file, you have to define the output path from "Destination".
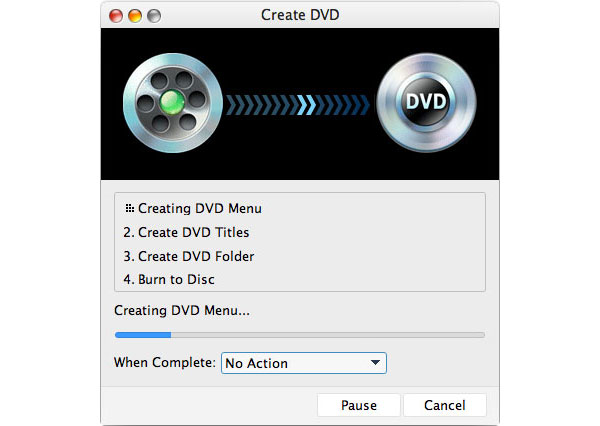
After all parameters are set, click the big "Burn" button at the bottom of iMovie to DVD converter. A window with DVD creating process will pop up. The Mac DVD Burner will start converting the video files and creating DVD from iMovie. The iMovie to DVD burning will complete in a short time.
Method 2: How to burn iMovie to DVD by iDVD
The first solution we recommend is to burn iMovie to DVD via iDVD, because iDVD is a default DVD Creator for Mac users. And it is the perfect component that you will need to burn your project to a disc easily in limited time.
Share iMovie to QuickTime
Open a project in iMovie and click the "Share" menu. Choose "iDVD" and click "Share" to begin the exporting process. This process will last for several minutes depending on the size of your project.
Choose theme and frame
iDVD will automatically open after the file has been exported, then choose a theme you like. By selecting different frames of the video and inserting them onto different pages of the theme, you can customize your project.
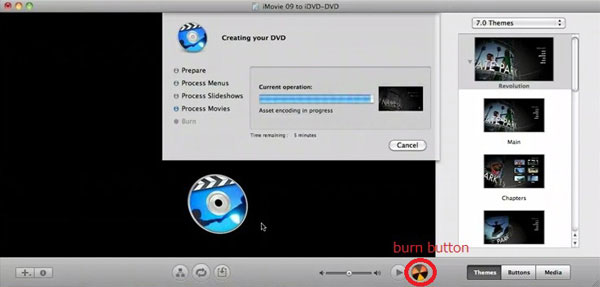
Burn iMovie to DVD on Mac
After the last step, you can click "Preview" to see your project before you burn it to DVD. Also, you can make sure that you go through the burning preference through the "Project Menu" > "Project Info" tabs. Change the quality of the video and the format here.
Watch iMovie video on DVD
Click "Burn" button from the "Project Info" window or click "File" > "Burn DVD" to burn iMovie to DVD. If the iDVD notify you that there are errors in your project, you can ignore them. Once complete, you can watch it in DVD player that is compatible to the file type.
Method 3: Burn iMovie to DVD with Wondershare DVD Burner
With iMovie 11 earlier versions, you can burn iMovie to DVD with iDVD. But since 2011, Apple discontinued the maintenance of iDVD and newer OS X after Lion no longer supports the DVD burning software for Mac. So following is the solution on how to burn iMovie to DVD without iDVD.
Choose the iMovie project you want and click the "Share" menu, then choose "File" to export iMovie to video file for DVD burning.
Launch Wondershare Video Converter Ultimate, click the Burn tab at the top of the window.
Drag the iMovie file you exported earlier inside the window. Give the DVD a name and select the output format you want.
Hit the "Burn" button at the bottom of the window to start burning the DVD.
Conclusion
Making your own videos is a good way to record your important memory. Especially when you capture the videos with iPhone or iPad. And then you can further edit the videos or simply transfer the video to iMovie. In order to create DVD or backup iMovie files, you should know how to burn iMovie to DVD. The article explains the 3 frequently used to create DVD from iMovie videos, you can learn more detail about the process to get the DVD disc. If you have any other solutions to burn iMoive to DVD, you can inform more detail in the comment. Before you create a DVD, you should acquire the differences between DVD R discs here.