How to Add Music and Other Media To Premiere Pro [Instructions]
This article is a tutorial on adding music and how to import MKV and MP4 into Premiere Pro. You shouldn’t miss this method since it is the first step to effective media editing using the said video editing program. As a beginner, this Premiere Pro may be a little bit daunting since there are lots to unload and many new things to hold on with. But don’t be bothered. Rather, keep reading, for this post was made to help you with your new series that focused all on the Premiere Pro. As the saying goes, failing to prepare is preparing to fail, so let’s work on this preparation for you to succeed in your media editing task.

Part 1. What to Do Before Importing Files on Premiere Pro
Before you learn how to import media into Premiere Pro, it is still best to know the best practices before you import the files as they are written below.
1. Use the Correct Format
The first thing to check is the proper formatting of the data before you upload it. Make sure that it is compatible with the software you are about to use. For example, MP4 is supported by Premiere Pro, so you won’t have troubles in importing MP4 to Premiere Pro.
2. Clean and Organize the Files
Organize and clean the data, including fixing formatting errors, removing duplicates, and handling missing values in your file source. Thus, ensure that data file types are suitable and consistent for your use.
3. Back-Up the File
Before importing the file and making any modifications, it would be wise to create backups of your existing file to avoid losing the data just in case something goes wrong while you import it.
4. Testing and Validating
Do a test to import using other sample files. You have to check if any errors and issues may arise during your actual importation process. Then, make a validation to make sure that the intended imported data will appear correctly in the system of destination. This way, you may also prevent a file format not supported by Premiere Pro.
Part 2. Step-By-Step Guide to Import Files to Premiere Pro
Here are the step-by-step instructions to guide you in importing your media files on Premiere.
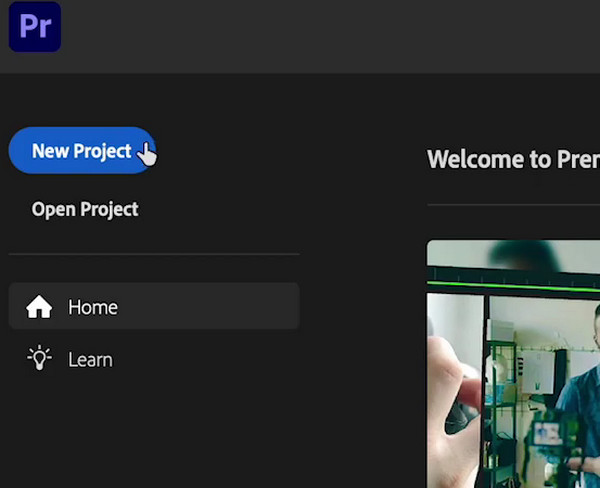
Step 1Fire up the Premiere Pro, and begin by creating a new project. To do so, go to File>New>Project options, then name your Project and hit the OK button.
Step 2Now open the Project Panel by clicking the Window button, then choose the Project option. You can ignore the project preset. For example, when you convert MOV and MP3, you may add videos with different resolutions, then you still need to adjust each video clip' resolution. After that, click the File tab menu from the Panel and select the Import option.
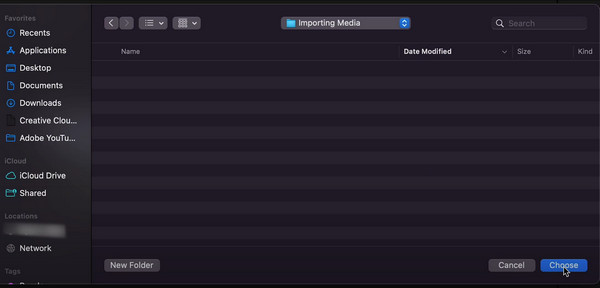
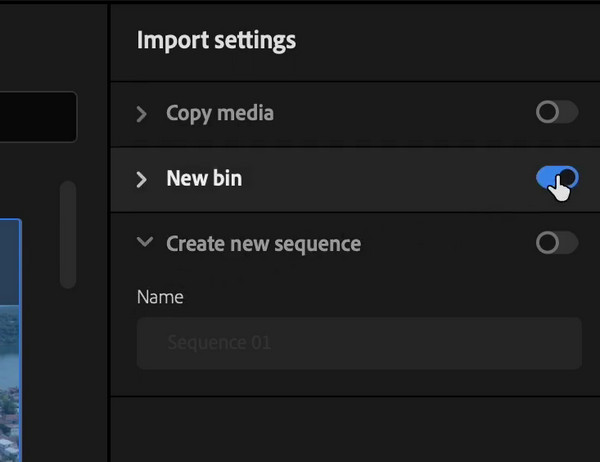
Step 3This time, locate the media file you want to import and hit the Open button. Then, you will see a dialogue box where you can configure the settings for importation or, rather, leave it to its default and just click the Create button, which is also a good option. That’s how to import MP4 into Premiere Pro as well.
Part 3. A Much Easier Alternative for Premiere Pro
Adobe’s Premiere Pro is indeed a powerful video editing software, but please be reminded that its learning curve is almost applicable to professionals and not to beginners. For this reason, it’s usual for a beginner to grab an alternative for this software. That said, here’s the Tipard Video Converter Ultimate to substitute the editing solutions of Premiere Pro. This alternative software lets you convert, edit, and enhance your video files like a pro in a simple and straightforward way. What’s great about this Tipard Video Converter Ultimate is that it is full of editing tools that you can easily access in its Toolbox section, where you can improve the video quality, merge, trim, compress, correct the color, rotate, reverse, and many more to mention.
Moreover, suppose you want to convert your media files. In that case, the converter section provides you with tons of effects, filters, and more extra editing toolkits to modify the file prior to the conversion. What is more amazing is the hardware and GPU acceleration technologies that it has, where you can convert multiple files in one process. Not just that, it processes the conversion in a super swift method 60 times faster than the regular programs. Its importation process is also incredibly simple. And compare to exporting media files in Premiere to MP4, MOV, etc, this converter gives more exporting options. Thus, let’s give you a quick tour of this Premiere Pro's best alternative by looking at the steps below.
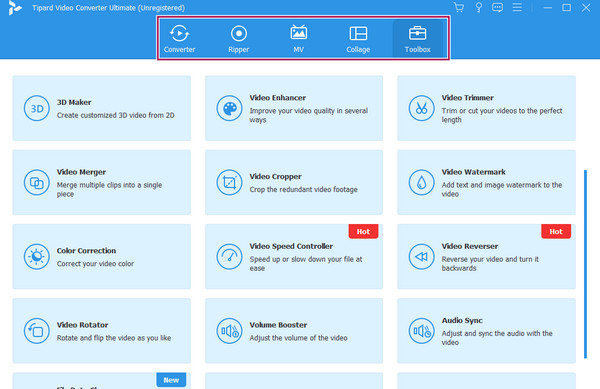
Step 1Install the Tipard Video Converter Ultimate on your PC and open it. Now, when you reach its interface, you may roam to its features first if you want to, and that’s by hovering over the menu options at the top center part of the interface.
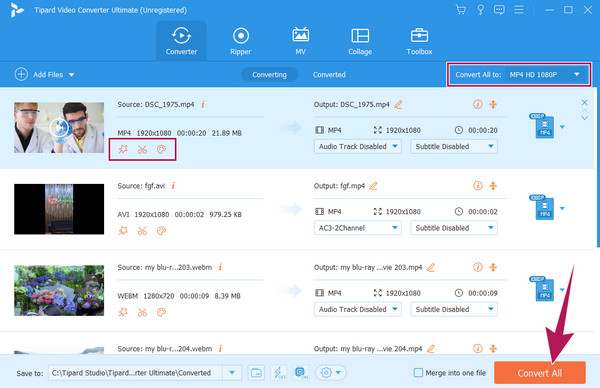
Step 2Now, let’s go back to the Converter menu and hit the Plus button or the Add File button to import all the video and audio files you want to work with. Note that there is no limit to this importation process.

Step 3When all the media files are uploaded, you may start editing them by using the editing thumbnails under each file. Also, you can select a format for them as you want to convert them, and that is by going to the Convert All To section. After that, to save and export them, you will need to click the Convert All button.
Part 4. FAQs About Premiere Pro
Why can't I import media to Premiere Pro?
There may be several reasons why you can’t import your media file to Premiere Pro. The most common reason is due to unsupported format. Premiere Pro doesn’t support all media formats, so better to check the format of your file and see if it’s one of the PR supports.
Which file formats Cannot be imported into Premiere?
Premiere Pro cannot support some file formats, even for importation. Such files are the FLAC, WebM, some MKVs, 3GP, and other older or rare formats.
How do I export in Premiere Pro?
Exporting your Projects from Premiere Pro only takes several steps. The project must be complete, and when you open it, go to the File menu tab and select the Export button. After that, you must configure the exportation settings based on what you need, then click the Export button as you are ready for the queue.
Conclusion
To wrap this up, before you learn how to add music and other media to Premiere Pro, the best practice before doing it must be considered. The tendency to experience some importation errors is there, especially if you are new to Premiere Pro. On the other hand, if you have the choice to have an alternative editor, then grab it. As for this article, the Tipard Video Converter Ultimate is highly recommended as it is as powerful as the Premiere Pro but with an easier and quicker way of editing.