Walk-through Review of Windows Snipping Tool
Do you desire to study more about the Windows Snipping tool? Well, you can have fun reading this article. Content is the discussion about the snipping tool. Here, you will learn all about the snipping tool. It includes its shortcuts and the process of using it. Aside from that, you will also discover an excellent snipping tool alternative. This way, you will have another option of capturing a computer screen. So, give your precious time to read this post and learn everything about the Windows Snipping tool.
Part 1. Complete Review for Windows Snipping Tool
Do you want to capture a screenshot of your Windows computer screen? Sometimes you must take or capture a snippet of an image or text from your screen. In that case, the snipping tool is the ideal application for the task! The Windows snipping tool is a default program that comes with Windows. You can take screenshots and add notes to them. Windows 7 introduced the Snipping Tool, now in Windows 8 and Windows 10. Also, you can use the snipping tool in Windows 11. The full screen, a window, or a rectangular part of the screen can be screenshotted. The screenshot can then be saved as an image file. Additionally, it has a screen capture feature that works on any operating system. It is a practical approach to keeping track of significant on-screen data. Additionally, it removes the hassle of looking for paper or starting a new document to preserve something necessary.
Windows Snipping Tool Shortcut
Don’t you know that there are many shortcuts you can enjoy using when taking a screenshot? The snipping tool offers various shortcuts, so you don’t always need to rely on your mouse. Plus, once you discover these shortcuts, it will be easy for you to use the snipping tool. You can also save more time during the capturing-image process. See the shortcuts below to learn more about the snipping tool.
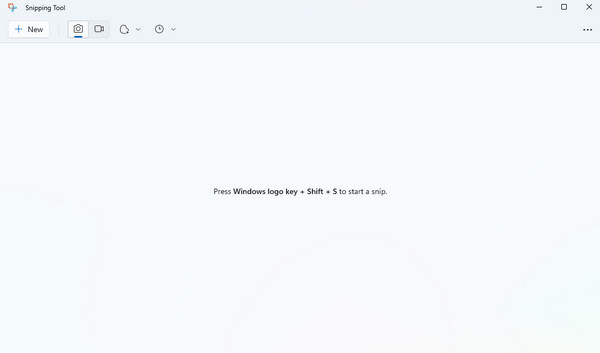
Windows logo + Shift + S: If you already want to start a snip, press the Windows logo + Shift + S keys.
Alt + M: Press Ctrl + S keys on your keyboard to open the snipping tool. So you can choose the type of snip you prefer to create.
Ctrl + A: If you prefer annotating your snip, press CTRL + A keys.
Ctrl + S: Instead of clicking the Save option from the tool’s interface, press Ctrl + S. This way, you can save the captured image easily.
Ctrl + E: Sharing your snip is also possible by pressing the Ctrl + E keys from the keyboard.
Ctrl + D: If you prefer delaying the snip capture, it is better to press Ctrl + D. You can choose the 3-second delay, 5-second, and 10-second delay.
Ctrl + O: If you like to open a file from the tool’s interface, press the Ctrl + O keys.
Ctrl +M: This shortcut allows you to select between various snips. These snips are Free-form snips, Window-snip, Full-screen-snip, and Rectangular snips.
Ctrl + Z: If you like to undo the last snip, press Ctrl + Z keys. If you accidentally make some changes, pressing the shortcut is the best solution.
Ctrl + P: After capturing, you can print the output by pressing the Ctrl + P keys.
Ctrl + Y: By pressing the Ctrl + Y keys, you can make a snip in the same mode as the last one.
Ctrl + Shift + U: If you want to remove the snip’s URL, you can simply press the Ctrl + Shift + U keys.
Shift + Tab: If you want to move the mouse cursor to select your preferred snip type, press the Shift + Tab.
F11: Press the F11 key to activate the Window.
How to Use the Snipping Tool
Using the Snipping Tool is simple, especially when capturing an image or text from the computer screen. You can capture them in just a few presses. Also, there are four ways to capture a shot. These are the Rectangular, Free-form, Window, and Fullscreen modes. If you want to use the Windows Snipping tool, follow the simple steps below.
Step 1To start capturing, press the keyboard's Window + Shift + S keys. Then, the snipping tool will show up.
Step 2The four modes will be the tool you can use on how you want to capture the screen.
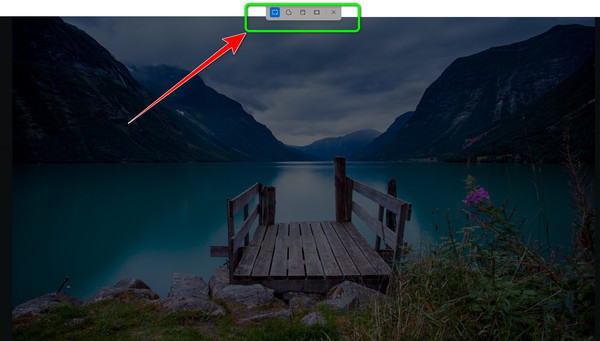
Rectangle Mode: When you choose this mode, the tool allows you to choose a part of the screen you want to capture. The border is a rectangular shape, so you can select the shape and size by holding and dragging the cursor.
Full-screen Mode: This mode is like a normal print screen capture. When using this mode, you can capture the entire screen. So, if you want to capture everything from the screen, the Full-screen mode is perfect.
Window Mode: This mode lets you choose a specific window you want to screenshot. The Window mode will be helpful if you have many applications but want to capture only one.
Free-form Mode: The Free-form mode is one of the best modes you can experience. It is because you can freely drag the cursor on the screen to capture an image based on your desired shape and output. This way, you cannot only get rectangular shape screenshots.
Step 3After you capture the screen, the screenshot will show up in the bottom-right corner. Then, click it to open.
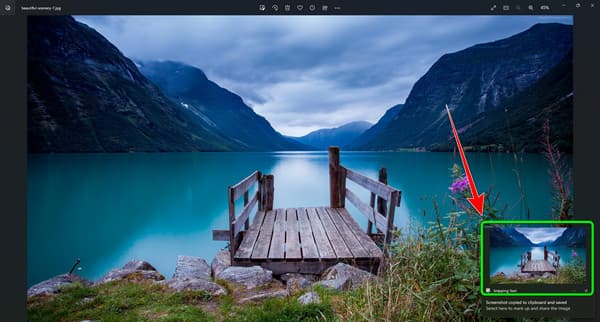
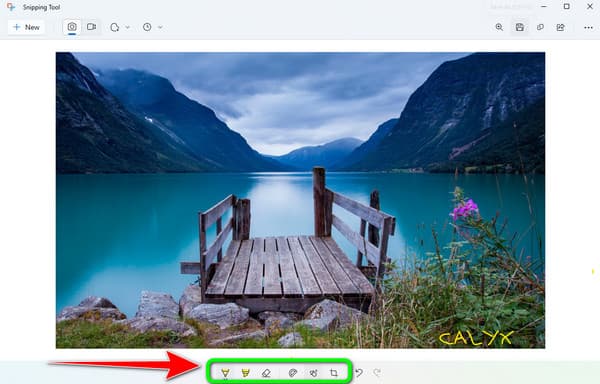
Step 4When the photo you capture already shows up, you can also edit it before going to the saving process. Go to the lower interface and use the editing tools.
Step 5Once you are finished, you can save the photo by clicking the Save icon. Another way to save it is to press the Ctrl + S key from the keyboard.

Pros:
- • The Snipping tool is simple to use.
- • It offers various shortcuts to ease the process.
- • Since it is a pre-built tool, there is no need for an installation process.
- • It provides various modes for capturing the computer screen.
- • It allows users to edit the captured image before saving it.
Cons:
- • The interface is not that simple.
- • There are limited tools for editing the image.
Part 2. Alternative to Windows Snipping Tool
Capturing a computer screen using a downloadable program is challenging. It is because sometimes you don’t know what tool to use. If so, we will guide you to find the perfect alternative for the Windows Snipping tool. Tipard Screen Capture is the most suggested program to take a picture offline. With this downloadable software, you can snap a screenshot of your computer screen. You can extract the text or an image from the screen depending on your demands. Because Tipard Screen Capture is so easy to use, it is better suited for new users. Additionally, it provides a simple layout, making all the settings clear to all users.
Furthermore, you can take screenshots on mobile devices besides screenshots from computer screens. Linking your phone to your computer is all that is required. You can connect on iOS devices like iPhones in addition to Android. Using this program, you can take the best-possible screenshots. Also, it records anything on your iPhone or Android. Finally, Tipard Screen Capture is accessible on both Windows and Mac. Therefore, accessing the program is not a problem whether you use Windows or a Mac.
Step 1Download Tipard Screen Capture on your Mac or Windows by clicking the Download button below. Then proceed to the installation process. Once done, launch the program to begin the screen-capturing process.
Step 2After you open the interface, click the Camera icon next to the REC button. After that, you can already take a screenshot on your screen by holding and dragging the cursor.
Step 3After you take a screenshot, a floating toolbar will appear on the screen with the screenshot. Then, you can use some editing tools before saving the screenshot. You can add text, blur some photo parts, and more. After that, click the Save icon to keep the screenshot on your computer.
Further Reading:
Different Methods on How to Take A Screenshot on Android
Ultimate Guide on How to Take Screenshot on Mac [Proven]
Part 3. FAQs about Windows Snipping Tool
1. What are the functions of the snipping tool?
There are many functions you can experience when using the Snipping tool. You can utilize the tool to make notes or changes on the screenshot. It also offers a sharing function to send the output to other platforms. Another function you can enjoy is blurting the photo and adding text to it.
2. How to share a snip?
Sharing a snip is simple. After you capture a snip, click the arrow next to the Send Snip option. Then, enable the Nearby Sharing option to share the snip with other devices. You can also send it to Feedback Hub, Microsoft Teams, and Mail.
3. How to open the Snipping tool on Windows 11?
You only need to press the keys to open the pre-built Snipping Tool on Windows 11. With that, press the Windows+Shift+S keys shortcut on your keyboard. Afterward, your screen will turn darker, indicating the tool is already activated. On the upper screen, you will see icons. These icons allow you to select the shape for your screenshot.
Conclusion
Now you have an idea about the free snipping tool for Windows. You also learned how to use it and its various shortcuts. In addition, you have discovered the best alternative for the Windows Snipping tool, which is the Tipard Screen Capture. If you are looking for the best downloadable program for capturing computer screens, grab the opportunity to use it.