Matchless Ways about How to Screen Record on Mac and Windows Easily Like a Pro
Screen recording is beneficial, especially for people who want to record their tasks. It can be presentations at work, gameplays, tutorials, and more. In this guidepost, you will discover various ways on how to screen record on Mac and Windows. In addition, while discovering the best ways, you will also learn the tools you need. So, without introducing anything else, let's read this article from beginning to end and learn the most effective methods for you.
Part 1. Easy Ways to Screen Record on Windows and Mac
How to Screen Record on Windows
If you want to screen capture on Windows computers, you can do so. Windows computers have a built-in tool you can rely upon, the Xbox Game Bar. This tool is for gamers to record their gameplay. However, it is also good for recording other activities on your screen. You can record your presentations, tutorials, videos, audio, and more. However, even though this built-in tool is excellent for recording a screen on a computer, it still has some drawbacks. It only works in one program at a time. It cannot capture the desktop on Windows or File Explorer. In that case, you need to use another tool for this situation. Aside from that, the Xbox Game Bar is unsuitable for some users, especially beginners. So you need to ask help from advanced users to help you record a screen on your computer. Use the steps below to learn how to screen record on Windows.
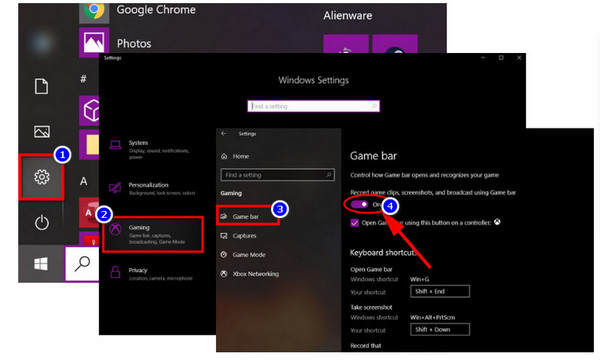
Step 1To set up the Game Bar, navigate to Settings > Gaming > Game bar. After that, turn on the switch to Record game clips and screenshots, and broadcast through the Game Bar.
Step 2Proceed to the screen you desire to record. Then type the default keyboard shortcut to run the Game Bar: Windows + G.
Step 3After that, the Game Bar will appear on your screen. It provides various buttons to access multiple overlays. It includes performance, audio, and capture.
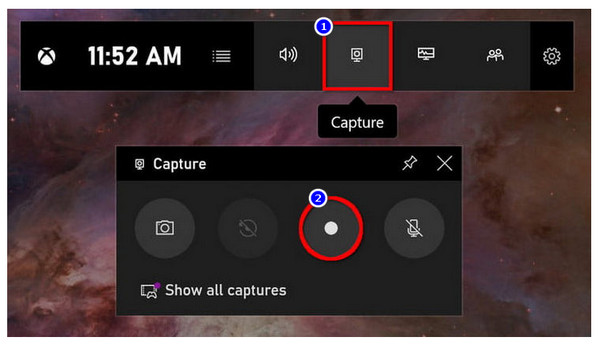
Step 4Then, click the Start Recording button to start recording your screen. If you want an alternative way of recording, press the Windows + Alt + R.
Step 5Lastly, if you are done recording, you can press the square icon from the Game Bar. You can also press the Windows + Alt + R again.
How to Screen Record on Mac
Screen recording comes in handy for anyone working with a Mac computer. It is useful and helpful when you want to create a demonstrational video on how a program works. It is also good for recording gameplay to share on social media. Also, it creates a product demo video for customers. If you are a Mac user, worry no more. In this part, we will give you the best way on how to screen record on Mac. All you have to do is to press some part of the keyboard. See the steps below to learn how to screen record using a Mac computer.
Step 1The first step is to open your Mac. After that, press Command + Shift + 5 on your keyboard. Then, the screenshot will open on your screen.
Step 2In just a second, the onscreen control will show up. Then, you can choose if you want to record the whole screen or a selected portion of the screen. You can also capture a still photo of your screen.
Step 3You can click any screen to begin already recording that screen. You can also click the Record option from the onscreen controls to start the recording.
Step 4If you want to stop the recording, you have two options. The first is to click the Stop button on the right corner of the menu bar. The second one is to press the Command + Control + Esc.
How to Record Screen Using Tipard Screen Capture
If you want to use an excellent program to record a screen on your computer, use Tipard Screen Capture. This downloadable program is accessible on both Mac and Windows devices, making it more convenient for all users. Also, it has a simple interface with simple methods of recording a computer screen. The offline tool is also free to download, so there is no need to pay any plan for it. In addition to that, this screen capture software can help you capture screen actions or movements easily. If you like to make a tutorial, record webcam content, capture screenshots, save call chats, and more, you can use Tipar Screen Capture effortlessly. Moreover, when recording your screen, you can select the area size of the screen before capturing.
Furthermore, there are two options to customize the area size. Select a fixed match like 1280x720 or drag the mouse to determine. You can also save your recording in various formats. It includes MP4 and WMV. Besides screen recording, there are other features you can enjoy from this offline program. You can customize the screen frame based on your preference. You can insert an audio file with the original quality. So, if you want to experience these features, it would be helpful for you to try this program. You can follow the simple steps below to learn the best method on how to screen record on Windows and Mac using Tipard Screen Capture.
Step 1The first step is downloading the Tipard Screen Capture on your Windows or Mac. You can click the Download button to access the program. If you are a Windows user, click the Windows version below. If you are a Mac user, click the download button with the Mac version.
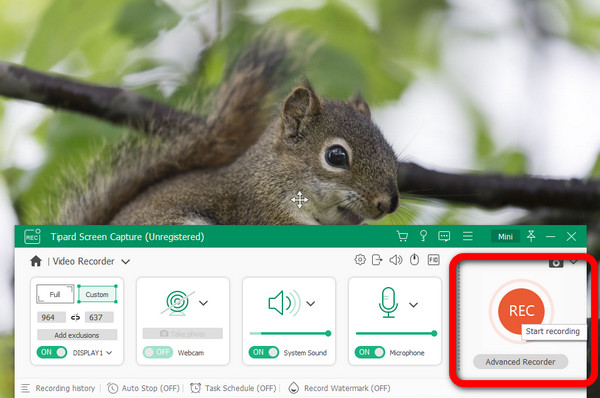
Step 2After the downloading process, launch the offline program. Then, click the Video Recorder option on the left part of the interface. After that, an adjustable frame will pop up on your screen. You can choose how you want to record the screen. You can do a full-screen record or customize it.

Step 3Then, after customizing the adjustable frame, you can start recording by clicking the REC button on the right side of the interface. If you are done recording, click the Stop button.
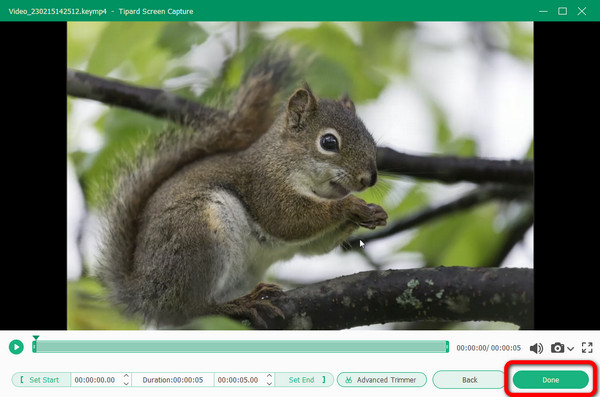
Step 4When you are done clicking the Stop button, your recorded video will appear on the screen. If you are satisfied, click the Done button to save your video.
Part 2. How to Screen Record on Chromebook
The fastest way to screen record using Chromebook is to press ctrl + shift + show windows. After that, select the video camera icon. There is much more to Chromebook's built-in screen recording features. Continue reading for more discoveries. Recording your screen has become an essential tool for users. It includes teachers, students, and other professionals. Thankfully, the Chrome OS 89 update allows Chromebook users to screen record from the comfort of their desktops. No external applications or chrome extensions are required. The update gives Chromebooks a built-in screen recording feature. It can be accessed from the shelf or by using a keyboard shortcut. However, the process of recording the screen is complicated. It has many procedures you need to follow, making it more confusing for beginners. In addition, there are many options on the screen which are challenging to handle. But if you still want to learn how to screen record on Chromebook, see the steps below. We will provide you with the methods you can use to record the Chromebook screen.
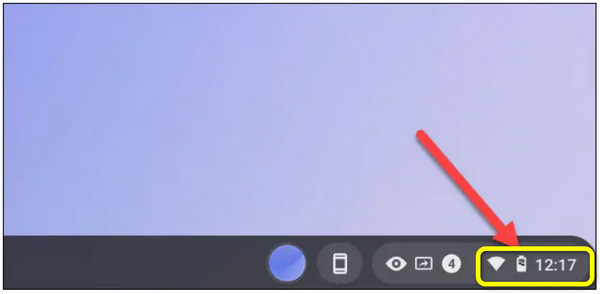
Step 1First, select the Clock icon on the shelf. It is in the bottom-right corner of the screen. It will open the Quick Settings panel. After that, select the Screen Capture icon.
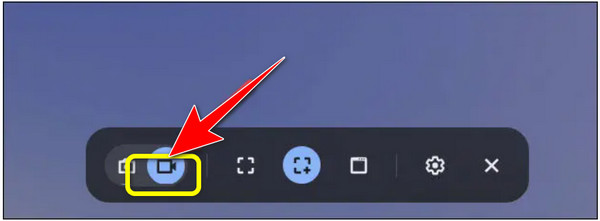
Step 2The screen's bottom will show the Screen Capture toolbar. Make sure the screen recording option is set to the Video icon. On your Chromebook, the camera icon will only take screenshots. In addition, the screen can be recorded in several different ways. The complete screen, a portion of the screen, or a specific window can all be recorded. To move on, pick one.
Step 3Please click the Gear icon before we begin recording. Here, you can decide whether to record audio using the integrated microphone as you record the screen. Depending on your chosen type, starting the recording is different. This way, you can start recording your screen.
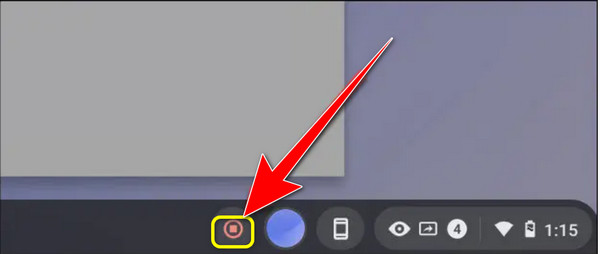
Step 4A three second-countdown will show up on your screen. After that, the recording will start. Then, when you are done recording, click the Stop button on the shelf. A notification will appear, which means the screen recording is done. Go to your Downloads folder to see the record.
Part 3. Best Way to Screen Record Online
If you want an online way to record your screen, use Flexclip. It is an online tool good for recording your screen. You can create a screen capture of the whole screen, program windows, or browser tab. It also allows you to record online seminars, classes, games, video tutorials, and more. In addition, FlexClip is a screen recorder and video editor that allows for the flexible editing of recordings. Subtitles, annotations, highlights, and overlays are more options. You may improve your video material in this way. However, since it is an online tool, ensure a strong internet connection. Also, you can only record your screen for up to 30 minutes. So, if you want to record your screen much longer, you must use the tool multiple times.
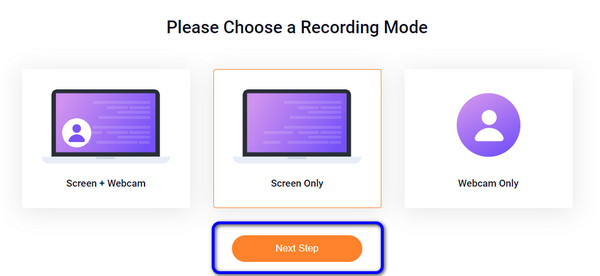
Step 1Visit the FlexClip website. Then, click the v button. There are three options. You can record Webcam only, Screen only, or Screen and Webcam.
Step 2Then, click the Next Step button. Once on the new webpage, click the Start Recording button. This way, you can start recording your screen.
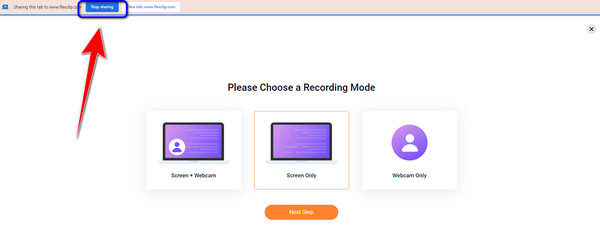
Step 3If you are done recording, click the Stop Sharing button on the upper left part of the webpage. After that, click the Download and Edit button to save your recordings.
Part 4. Effective Way to Screen Record Professionally
Another way to record your screen is using OBS. The program is one of the advanced programs offline you can try when recording your screen. However, it has a complicated method. This type of program is not perfect for non-professional users. Also, the downloading process of this program needs to be clarified.
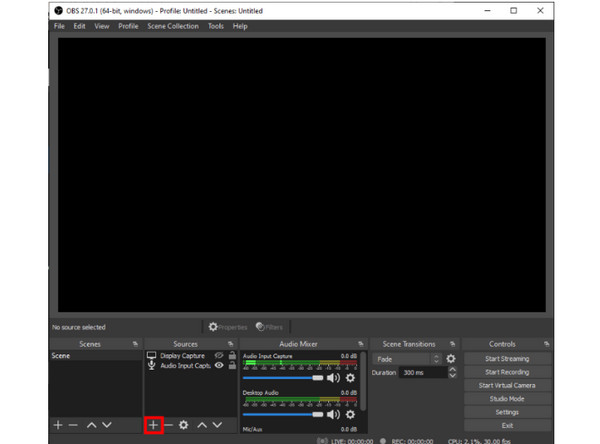
Step 1Download and install OBS on your computer. Activate OBS Studio. Usually, after launching, the program will immediately add a Scene. If not, select the Add icon in the Scenes to box in the lower-left corner of the screen. Then, click the Plus icon at the bottom of the panel, and navigate to the Sources box next to Scenes.
Step 2After that, select Display capture from the menu. A small window will show up. Add the title and select the OK button.
Step 3Then another pop-up will show up. If you have several displays, you can access a drop-down menu by clicking the tiny downward arrow. Select the display you want to capture, then click OK. After that, navigate to the lower part of the interface and click Setting.
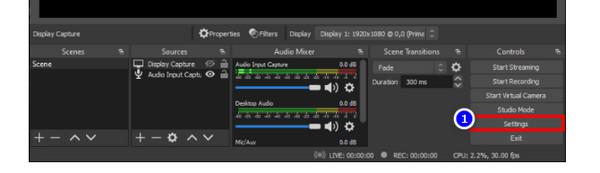
Step 4Select Output from the left-hand sidebar to open a new window. Select a file destination under Recording Path.
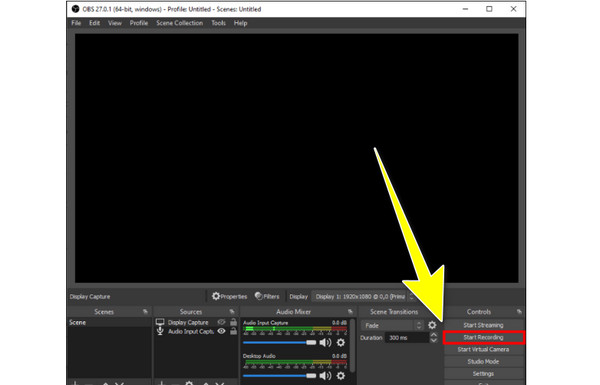
Step 5When you're finished, click the Start Recording button in the bottom-right corner of the screen.
Part 5. FAQs about How to Record Screen on Computer
1. What is screen recording?
Screen recording lets you capture the action happening in individual windows. It can also be on the whole desktop or a selected computer area using software, an app, or a browser. Also, they are essential tools for content creators and live-streamers. It is also helpful in sharing projects with colleagues. It is also good at area tutorials or grabbing content from a website for later use.
2. How do I screen record on my Android or iPhone?
Some phones come with screen recording and screen capture features. If you use an Android device, you can go to Quick Settings. Then you will see the Screen Recording option and icon. Click it to start the screen recording. On the other hand, if you are an iPhone user, click the Assistive touch. From the options, select the circle-shape icon. After clicking, it will start recording your screen.
3. How do I record a computer screen with sound?
You can use Tipard Screen Capture. This program lets you record your screen with sound. You can comment on your recordings easily. This way, you can make your video more engaging.
Conclusion
If you plan to record your computer screen, you can use the ways above. There are methods about how to screen capture on a PC. But, if you prefer a most straightforward way of recording your screen, use Tipard Screen Capture. This program offers a simple-to-understand interface and basic ways of recording.