How to Use Functions of VLC Subtitles: Adjust Timing, Sync, and Shift
One of the most popular media players for a decade now is VLC. It is a media player that has been active with updates and innovations, including showcasing captions and subtitles. However, as subtitles become an essential tool for easier and more understandable movie watching, there are still problems where the absence of subtitles are inevitable. In line with this, there’s also a report saying that there are times when VLC subtitles are not showing. It is why we intend to let you read this entire content to teach you how to manage the common problems of VLC regarding subtitles.

Part 1. How to Adjust Subtitle Timing on VLC
Perhaps you are being bothered by why the subtitles are not in sync with your playing video. The moment that the VLC subtitle is delayed or, on the other hand, faster means that there is something wrong with its synchronization. Good thing that VLC offers you a synchronization feature that enables you to set the subtitles in perfect timing along with the video. However, for a first-time user of VLC, you might find it difficult to locate, as it is somehow hidden along with the other advanced features that this software has. Fortunately, there are shortcut keys that will help you to navigate the software easily. Meanwhile, here’s how to sync subtitles in VLC.
Step 1Run the media player and open the video you want to edit via a drag-and-drop procedure. Alternatively, you can also click the Media tab and choose the Open File button.
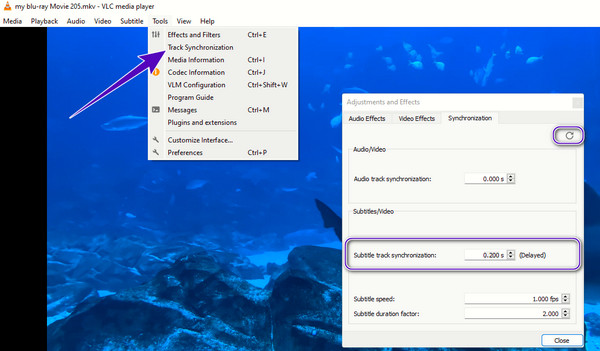
Step 2While the video is playing, click the Tools button and choose the Track Synchronization option. Then, on the popped-up window, adjust the subtitle track synchronization you see under the Subtitles/Video section.
Step 3You must know if you need to delay or hasten the subtitle to sync it to your video. Once done, hit the Refresh button to apply the changes. And that is how to synchronize subtitles in VLC.
Part 2. How to Shift Subtitles in VLC
After learning the proper way to delay or hasten the subtitles with the helpful steps above, let’s now assimilate how to move the subtitles in VLC. Typically, this media player showcases the subtitles of the video at the bottom part of the viewing screen. However, did you know that you have the option to shift the subtitles anywhere you want? Yes, you read it right. You can adjust to place the subtitles on the top or on the side of the screen. And that is what we will teach you how to shift subtitles in VLC using the instructions below.
Step 1Once you run the media player on your computer, upload the video with subtitles by dragging it into the player’s interface. Otherwise, upload it the way you are comfortable with.
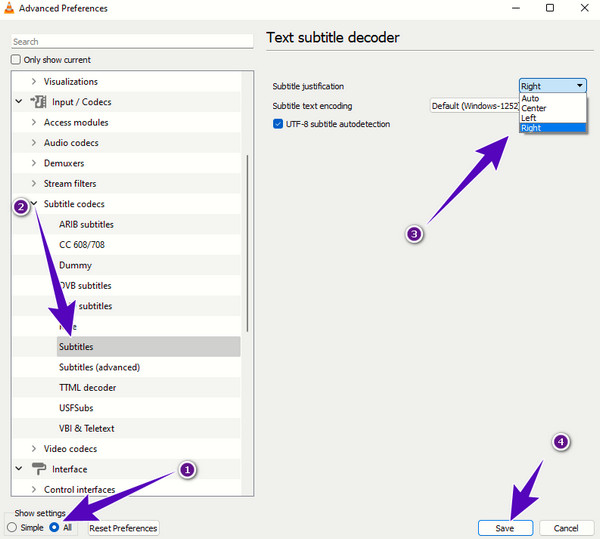
Step 2Click the Tools tab and select the Preference button. Then, toggle the All button and look for the Subtitles option.
Step 3After that, navigate to the prompted options on the right side of the window. Then, choose your preferred subtitle location by clicking the Arrow button in the Subtitle Justification section. Then, hit the Save button to apply the changes.
Part 3. Steps to Add Subtitles to Video in VLC
Finally, to add subtitles to the video in VLC, here are the simple steps to follow. Yes, adding the subtitles is far easier than shifting and adjusting them. You can do this task in just a couple of clicks as long as you have the subtitle file in SRT, SSA, or SUB formats.
Step 1Open the video to which you want to add the subtitle using the VLC media player.
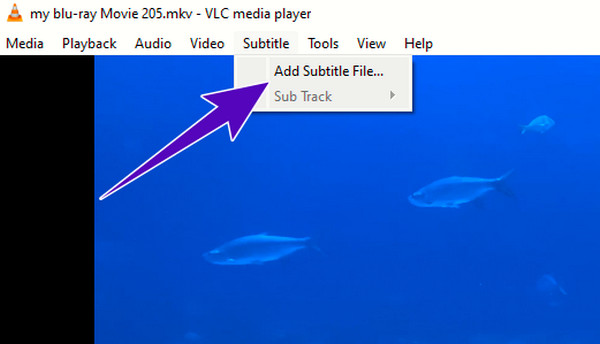
Step 2Go to the Subtitle tab menu on the top of the screen and click the Add Subtitle File option.
Step 3Then, locate the subtitle file you want to add.
Part 4. Best Alternatives to VLC on Subtitles
Here, we present to you the two best alternatives to VLC you can use in line with managing subtitles.
1. Tipard Blu-ray Player
Tipard Blu-ray Player is a great media player that playback not only the digital videos on your computer but also all types of Blu-rays and DVDs. Similar to VLC Media Player in subtitles management, this Blu-ray player enables a quick and hassle-free process, especially in adding subtitles. On the contrary, this Tipard Blu-ray Player has a more elegant and facile interface compared to VLC. In addition, it has a more lively and vibrant image display, letting you feel like you are watching in the cinema while playing your movies and videos. Meanwhile, let’s see add subtitles to the video in this VLC alternative player.
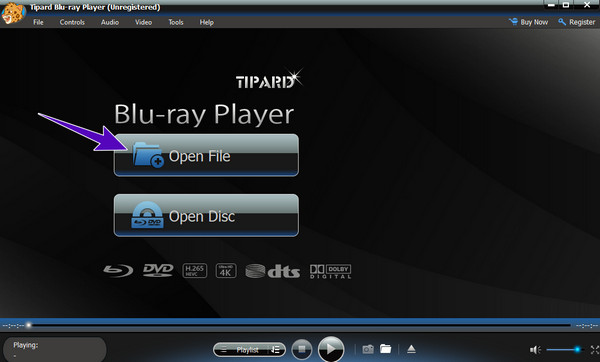
Step 1Install the player using the download buttons below. Then, launch it and click the Open File button.
Step 2While the video is playing, go to the ribbons and click the Video tab menu.
Step 3Now choose the Subtitle Track option and click the Add Subtitle button. Then, locate the subtitle file you want to add.

2. Tipard Video Converter Ultimate
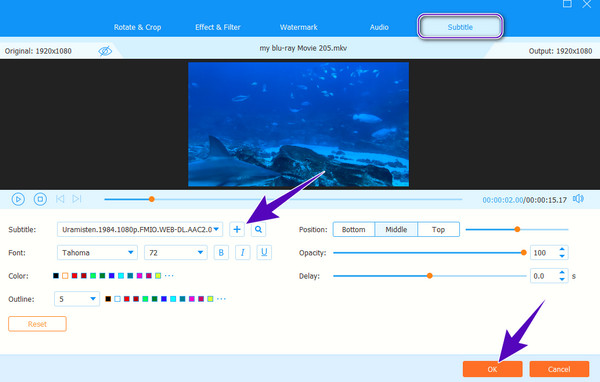
If you want to have a full blast on adding and editing the subtitles in the video, this Tipard Video Converter Ultimate is the one you need. This video editing software has a marvelous feature where you can personalize the subtitle more extensively. If you want to customize the opacity, delay, position, font style, outline, and color of the subtitle, this Tipard Video Converter Ultimate will help you.
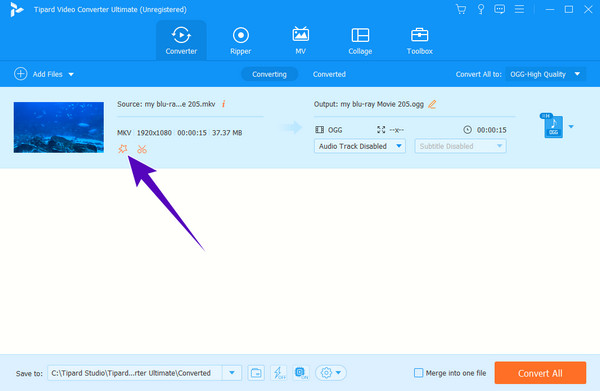
Step 1Freely install the video editing software on your computer, then launch it. Click the Plus button at the center of the interface and import the video you want to edit. Then, hit the Star button beside the video thumbnail.
Step 2Go to the Subtitle menu and click the Plus button to add the subtitle file. After that, you can steer all your desired navigation controls available there. Then, hit the OK button to save the changes.
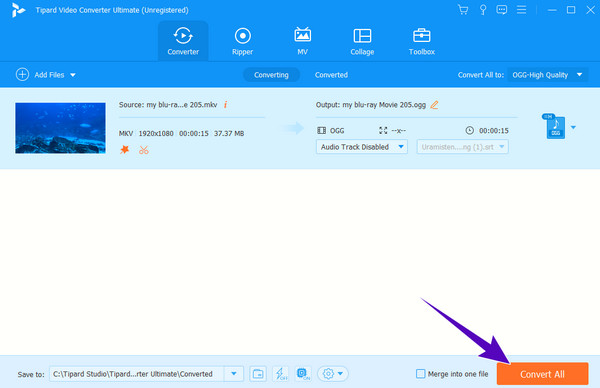
Step 3Finally, hit the Convert All button to produce a saved video file with the added subtitles.
Part 5. FAQs about VLC Subtitles
How do I get VLC to play subtitles automatically?
If you want an automatic playback of subtitles on VLC, you will need a subtitle plugin called VLSub.
How to encode subtitles with VLC?
Go to the Convert window of VLC, and look for the subtitle codec there. Then, choose the format you want to encode and navigate to the other options that will enhance your file, then click the save button.
Why are VLC subtitles not showing?
Maybe the subtitle file is in a different directory from the video, which is why it is not showing. Otherwise, you can just add the subtitle by clicking the subtitle tab and choosing the add subtitle button.
Conclusion
You’ve just learned how to manage and adjust subtitle timing on VLC. But if you think VLC is insufficient for this task, you can rely on the alternatives presented here. You can choose the Tipard Blu-ray Player for your exquisite watching experience of videos with subtitles or the Tipard Video Converter Ultimate if you want to edit the subtitles.