How to Use Premiere Pro to Change the Aspect Ratio of the Video Display
Premiere Pro, a professional editing tool developed by Adobe, possesses various functions that will boost your video performance. Its good-standing reputation for both experts and beginners has always been the reason why many video editors use this program. One of the benefits you can get is to change the aspect ratio in Premiere. Meanwhile, the aspect ratio and resolution are privately related features with a significant difference, and as these dimensions change, you must know how to intertwine the two when working. While the two dimensions can be edited, let this article focus on editing the aspect ratio with the said most popular editing method, such as Premiere.

Part 1. Are There Aspect Ratio Templates on Premiere
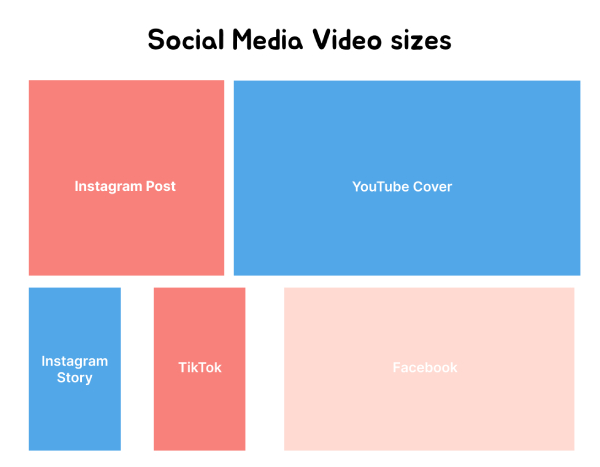
Unfortunately, Adobe Premiere Pro does not have built-in templates for aspect ratio. Thus, to use the Premiere Pro to change aspect ratio, you can only manually set up the sequence settings and your project to match commonly used specific aspect ratios in video production, such as 16:9, 9:16, 4:3, etc. Rest assured that these settings will help your final video conform to the needed aspect ratio. You must remember that the level of the aspect ratio you selected with the said settings will influence how your video project is displayed. Therefore, if you are creating content for popular platforms such as YouTube, Instagram, or TV, you must customize the proper aspect ratio to guarantee a correct-looking video when viewed.
Part 2. Step-By-Step Guide to Change Aspect Ratio on Premiere
How to Set Aspect Ratio in Premiere Pro For New Sequence
Step 1Launch Premiere Pro, create a new project or open your existing one. Click either the New Project or the Open Project button to do so.
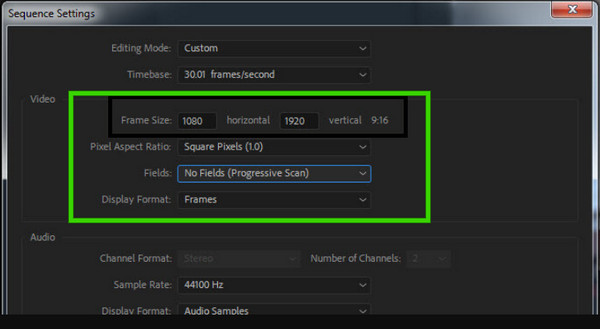
Step 2Next is creating a new sequence by going to Files>New>Sequence or pressing CTRL+N on your keyboard. Then, start setting the sequence parameters such as the Frame Size, Pixel Aspect Ratio, and others.
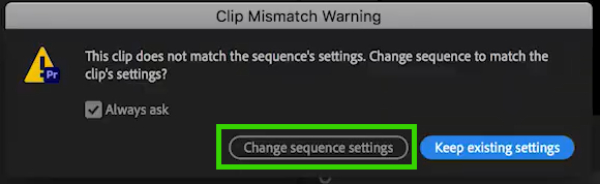
Step 3After that, re-access the File tab menu, and this time, click the Import button to bring the video in. Then, if there is a mismatch alert, for example, you want to convert MOV and MP3 but add videos with different resolutions, click the Change Sequence Settings button on the pop-up window so that the parameters, like the timebase, will match your footage.
There are also helpful techniques on how to adjust the aspect ratio in Premiere Pro for the existing sequence.
Adjust the Aspect Ratio by Pan and Scan (Cropping)
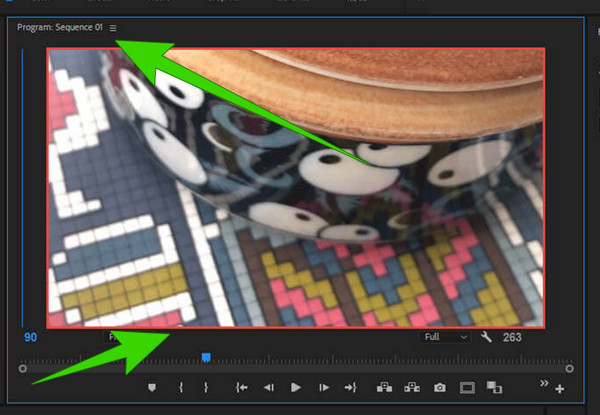
Step 1On the program sequence window, click the sequence settings.
Step 2Adjust the 1080x1920 to a new one, which is 1920x1080.
Step 3After that, click on the video and look at the blue box with pointers, then drag it to adjust the image that will fill the screen.
Step 4Now, you may add motion effects and keyframes to pan the video and for you to be able to include more details to it. However, please ensure that no important details will be compromised when you crop video aspect ratio Adobe Premiere.
Adjust Aspect Ratio by Adjustment Layer
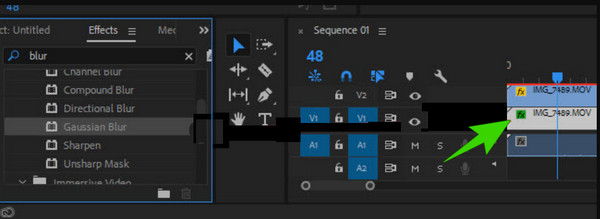
Step 1With the same sequence settings of 1920x1080. Then, drag the video you want to edit to the video track 2.
Step 2Copy your video from track 2 and drag it to track 3.
Step 3Click the video file from the first track and blur it. Then, you will see the two videos layered.
Tips: Import your video source into the resources bin and drag it to your project’s timeline. Premiere Pro will ask if you want the sequence settings to match your source video. Click yes to to ensure that your sequence settings match the source video.
Part 3. Change Aspect Ratio with Premiere Pro Alternative
If you want a much easier and more convenient way to change aspect ratio than Premiere Pro, then learn about Tipard Video Converter Ultimate. It is a simple video editing program that basically offers powerful tools and functions to edit and enhance video and audio files. Unlike Premiere Pro, Tipard Video Converter Ultimate provides a neat and pleasing interface, making beginners love to work with. The compelling evidence is how its features are presented in an organized way, where powerful tools like the video compressor, enhancer, trimmer, merger, GIG maker, color corrector, reverser, cropper, and many more are located in the Toolbox. Aside from the cropper in the Toolbox, you can also change the aspect ratio of your videos through the extra presets under the converter menu, which, by the way, can convert numerous videos at a 60x fast rate speed.
Moreover, the aspect ratio editor or the cropper enables you to automatically and manually adjust the details. As a matter of fact, you can drag the cropping box accordingly or input the measure you want in number. While its aspect ratio selection lets you freely choose among the various ratios it offers. With these details, allow the steps below to show you how it works.
How to Change the Video (4K) Aspect Ratio on Premiere Pro Alternative
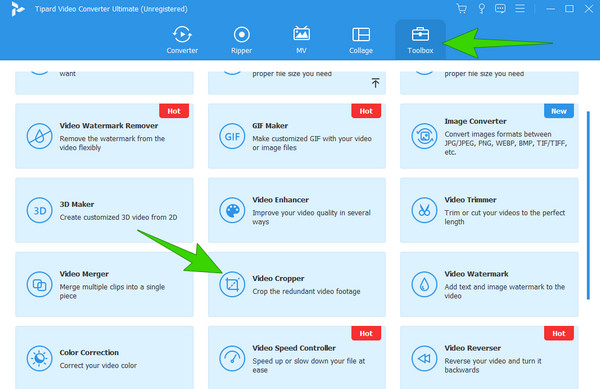
Step 1Frie up the newly installed Tipard Video Converter Ultimate on your computer. Then, head over to the Toolbox and choose the Video Cropper tool.
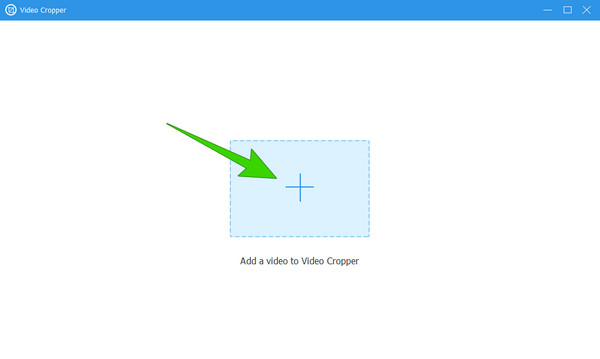
Step 2Once clicked, start importing the video you want to edit by clicking the Plus button from the next window.
Step 3When the video is in place, start setting your desired aspect ratio. See, by just looking at the image below, you already know how to adjust it.
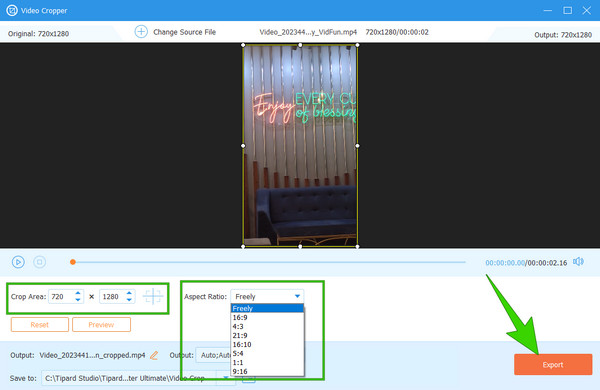
Step 4Once done, hit the Export button to save the output.
Tip: The converter here does not only help change the frame size of the video, but also allows its users to increase or reduce the video file size on Windows and Mac.
Part 4. FAQs About Aspect Ratio and Premiere
How do I change the frame size to 1920x1080 in Premiere Pro?
To change the frame size on Premiere Pro to 1920x1080, you must create a new sequence. You will find the frame rate section when you reach the editing mode in the sequence settings.
What is the difference between the 3:2 and 16:9 aspect ratio?
They mainly differ in size, wherein the 16:9 aspect ratio offers a wider screen.
What is the aspect ratio in video editing?
Aspect ratio refers to the proportional relation between the height and the width of the screen or frame of a video.
What aspect ratio should I use for Twitter?
The most recommended aspect ratio of a video for Twitter is 16:9.
Are video dimensions and aspect ratio the same?
Although the two are correlated, they are still not the same. Dimension is the actual size of the video in pixels, while the aspect ratio is the height and weight of the video.
Conclusion
There you have it, folks, the various comprehensive tutorials to change aspect ratio in Premiere Pro. This program has many options, but they seem not to fit all types of users. For this reason, you can utilize the best alternative, which is Tipard Video Converter Ultimate.