Ways and Steps to Add Video to DaVinci Resolve [Explained]
We do not like it when the software or any technology doesn't work well the way it should. And if you are in a situation now where you find yourself saying how to add music to DaVinci Resolve since you have tried other media files and they failed, then you're in luck, ironically. This is because this article will guide you to solve this problem with this video editing software. After all, DaVinci Resolve is known to be a powerful video editor that has an impressive array of features and support for formats, including MP3, WAV, MOV, AVI, MKV, MP4, and more. However, even though a supported format is used, you might still be stuck during importation due to an error. Don't worry, though, because as you read this article, you will see the possible reasons for the error with the good solutions to pursue the importation.
Part 1. Ways to Import Media Files to DaVinci Resolve
There are several ways to import AVI and other media files into DaVinci Resolve. If you are unfamiliar with this editing program, it is important to learn how to add your files with it, as written below.
Way 1. Via the Media Page
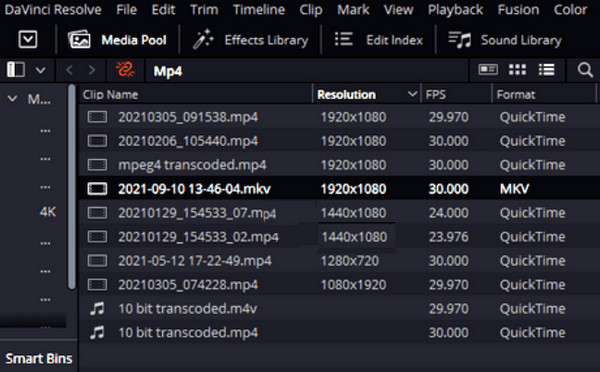
This is the dedicated place of the DaVinci Resolve to view files. The Media Page can help you view and work on the clip you need.
Step 1After installing the software, open it and go to its Media tab menu along the ribbon navigator.
Step 2Now, go to where your files are located and use the directory tree from your window.
Step 3Next, click the media file and preview it on your screen. Then, drag the clip to the Media Pool to place it into your project. This is also a good way to import GIFs into DaVinci Resolve.
Way 2. Via the Edit Page
This page is where the editing happens. It is located inside the workspace of a project.
Step 1On a project's workspace, click the Menu bar followed by the File tab menu.
Step 2Choose the Import File option from there and click the Import Media button.
Step 3Then, choose the file you want to import to the software, and once you have found the file, click it and hit the Open button.
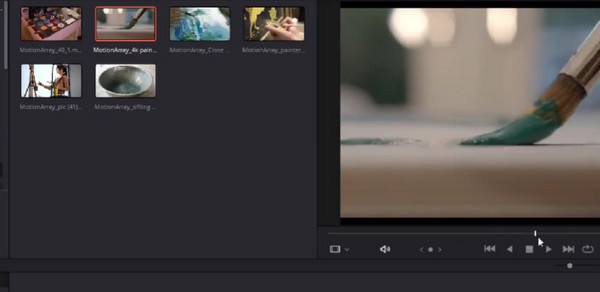
Way 3. Via the Cut Page
Cut Page is a built-in feature of DaVinci Resolve that has something to do with speed. It allows you to run quickly and make modifications to your media file. It is a good way to import your MP4 into this page of DaVinci Resolve. How to do it? Check out the steps below.
Step 1Hit the Import Media when you reach the Cut Page.
Step 2Using your cursor, choose all the media files you want to import.
Step 3You may also click the Import Folder button if you want to import an entire folder.

Part 2. Why Can’t I Import File into DaVinci Resolve
There are different reasons why media files can’t be uploaded in DaVinci Resolve. And we have collected the possible reasons below, along with the fixations to perform. After understanding the reasons behind failing to import media files in DaVinci, it would be much easier for you to fix them. For example, if it is an incompatibility issue, you can always convert files to MP4, like TS to MP4.
Reasons:
- • The file must be corrupted.
- • There’s a permission issue on the file.
- • DaVinci Resolve does not support the format of the file.
- • The codec of the file is unsupported.
- • The software is outdated.
Solutions:
- • Import the assumed corrupted file to other video editing software to check if the issue is the file. If so, use data recovery software to recover the file.
- • Try to import the media file from a different file folder. You can also change the permission to access any file from your computer device.
- • Check if your software is updated because outdated software may cause existing and even unexpected errors. Enter the interface of DaVinci Resolve, hover over to its menu, then find the check for update dialogue and click it.
- • If the file has an unsupported format and codec, you need to convert it to a more suitable format for DaVinci Resolve using a powerful file converter software.
Bonus: The Best Video Converter Software for Windows and Mac
Try this Tipard Video Converter Ultimate for your conversion needs; it is the best solution for any conversion task. This software is available on Windows and Mac and has comprehensive support for more than 500 various formats and codecs. It lets you convert your file and its codec to fit it into DaVinci Resolve. Furthermore, it has many quality editing tools where you can modify your media files however you want but with a professional touch. The good thing about it is that you won’t need to be an expert to develop an excellent edited and converted file because Tipard Video Converter Ultimate is infused with Artificial Intelligence, hardware acceleration, Ultrafast conversion, and GPU acceleration technologies. Thus, all you have to do is to upload, click, and export. That said, let’s scrutinize the ultimate conversion process of this software below.
How to Convert Numerous Files at Once
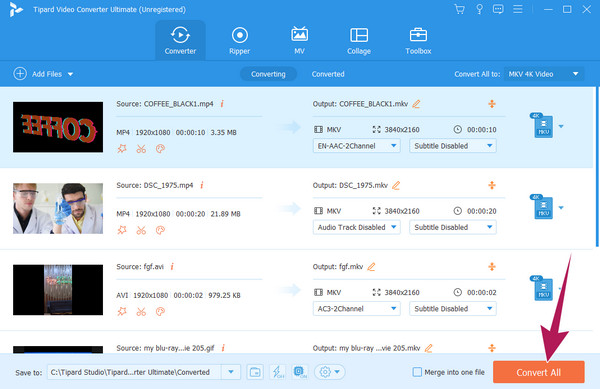
Step 1Launch the ultimate video converter after installing it on your computer. Once you reach its interface, click the Add Files button or the Plus button at the center to upload all the files you want to convert.
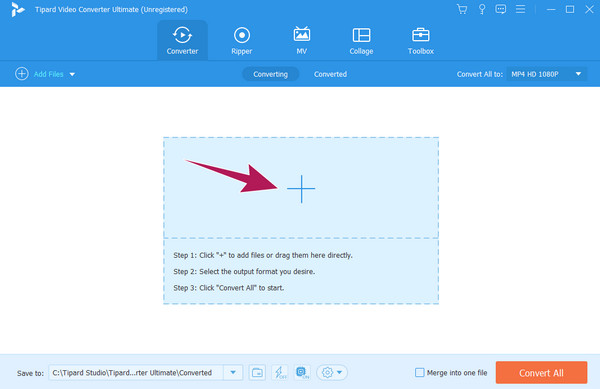
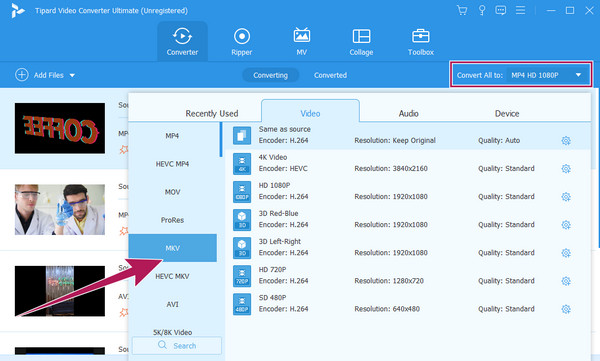
Step 2You may begin choosing the format and codec when all the files are in. If you want the same format for all the files, click the Convert All To option. Then, choose the format from the new window. Don’t forget to choose the codec as well.
Step 3As simple as that, you may now hit the Convert All button. Wait for the conversion process to finish quickly, then try to upload them to DaVinci Resolve.
Part 3. FAQs About Media Files and DaVinci Resolve
How do I open media storage in DaVinci?
To open the media storage, go to the File tab, click Import Media, and open your media storage.
Why does DaVinci say media offline?
When you see this dialogue in the software, it only means it cannot access the media file.
How do I convert MP4 to MP3 in DaVinci Resolve?
You can only convert the MP4 to MP3 in DaVinci Resolve if you export only the MP4 video to audio. To do so, click the Deliver button and choose the Audio Only option. Then, select the MP3 from the format choices and click the Render All button.
Conclusion
This article shows how to add videos and music to DaVinci Resolve in three easy ways. Also, the reasons and solutions for the importation error were included. Do not forget the Tipard Video Converter Ultimate as the best file converter worthy to have.