User Guide
Tipard Video Converter, the first-rank Video Conversion software, helps you convert any video formats like MTS, M2TS, TS, MKV, FLV, AVI, WMV, MPG, SWF, MP4, MOV, M4V, and more to your needed 4K and even 3D videos with superior quality. This guide shows you detailed info about using this Video Converting software to convert video files and extract audio files according to your need.
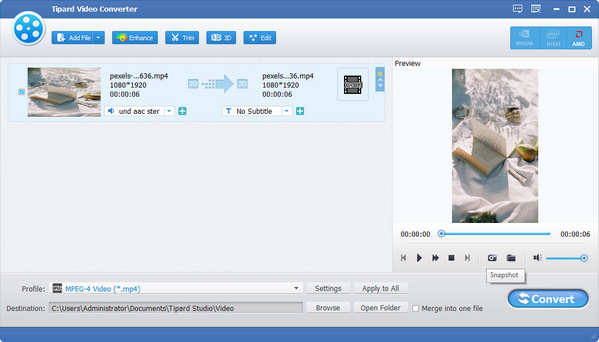
Step 1 Add Video & Audio File
Click the Add file(s) icon on the toolbar in the main window to browse your computer and open the local video and audio files one by one you want to convert. Or, you can directly drag video files from your computer to the program.
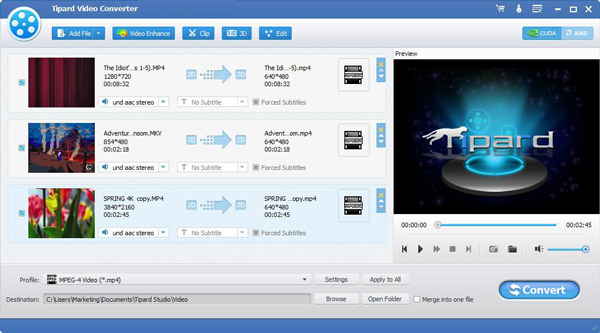
Step 2 Choose Output Format
Click the Profile drop-down arrow to open the window. Here you can select different output formats for each source video/audio file. Or input the format name to the quick search box and select one of the corresponding formats as the output format.

Step 3 Start Converting Videos
Click the Convert button to start converting videos to your needed formats. The progress bar would show the detailed progress of the conversion. During this process, you can click the Pause or Stop button to control the conversion process. In addition, this user-friendly Video Converter supports batch conversion, which greatly saves your time.
Customizing your videos with multiple editing features, open the edit window, and start to personalize the videos.
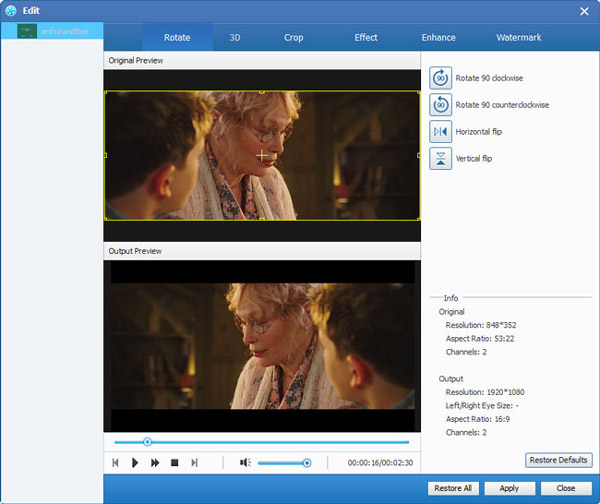
Step 1 Rotate Video Direction
Choose the file you want to rotate, and then click Edit. Select the Rotate column to rotate or flip your video.
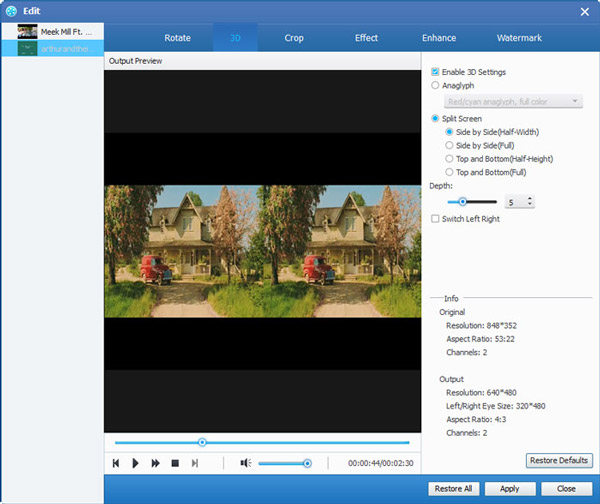
Step 2 Define 3D Settings
Click the 3D icon on the toolbar to open the edit window. Here you would check the Enable 3D Settings option to select the needed 3D mode for your output 3D videos, like Anaglyph 3D mode or Split Screen 3D mode.
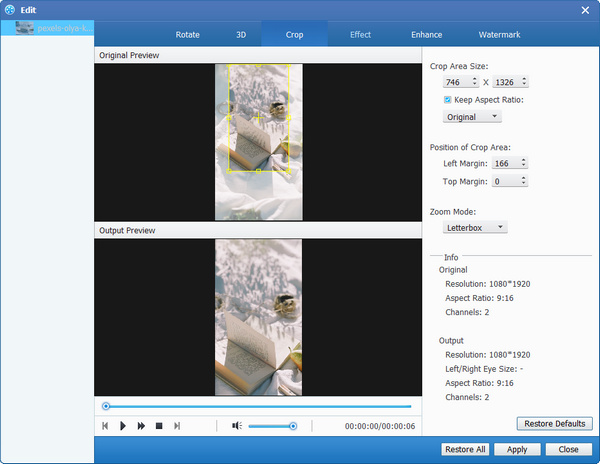
Step 3 Crop Video File
Select the Crop option to adjust the video frame, like Original, Crop area, 16:9, 4:3. Change the zoom mode according to your need, like Letterboxing, Pan & Scan, etc.
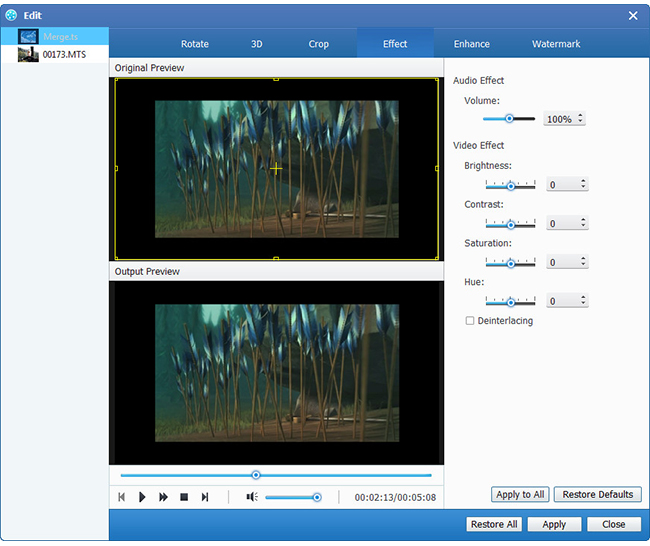
Step 4 Adjust Video Effect
Click the Effect column, and you can adjust the Brightness, Saturation, Contrast, Hue, and Volume for a better video effect.
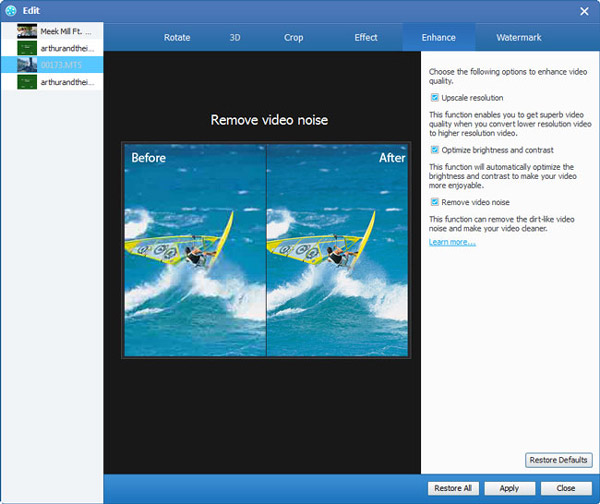
Step 5 Enhance Video Quality
Choose the options to enhance your video quality.
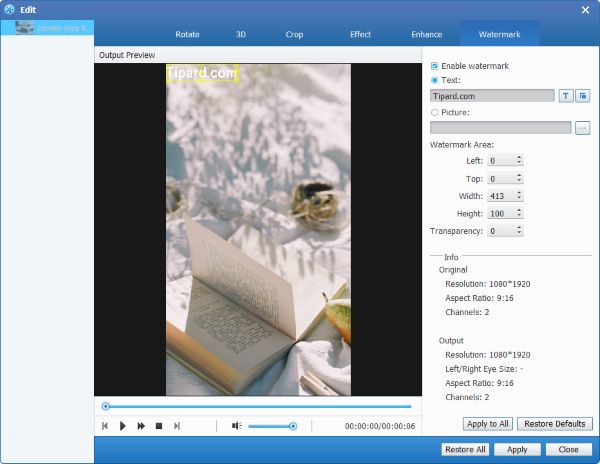
Step 6 Add Watermark to Video
Image and text watermarks are enabled here. You can customize the transparency, position, and size of the watermark. For the text watermark, the font style, size, and color are adjustable.
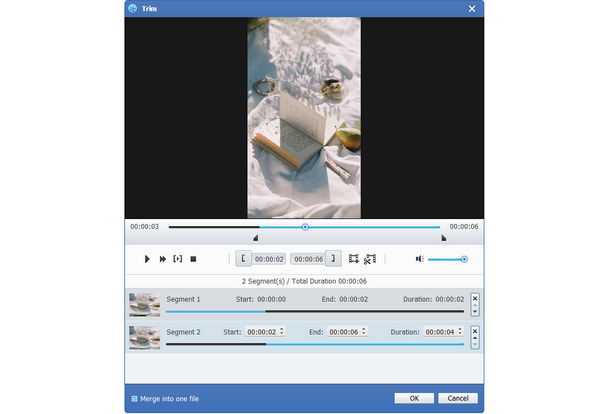
Step 7 Clip Videos and Merge Clips
Click the Clip button on the toolbar in the main window to open the window, and then you can trim the video length and clip the video into several segments. Or you can check the box of Merge into one file to merge the selected video clips into a new single file.
Step 1 Adjust Video Settings
As for the video settings, adjust the encoder, frame rate, resolution, aspect ratio, and video bitrate at your disposal.
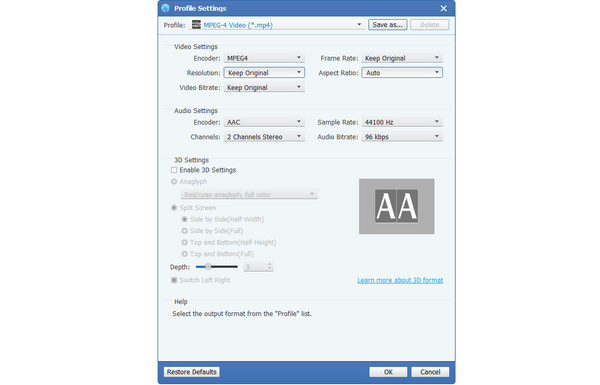
Step 2 Modify Audio Settings
Adjust the audio settings like encoder, sample rate, channels, and audio bitrate to fulfill your needs.
Step 3 Take Snapshot and Preview
In the Preview window, you would watch the source video before conversion. After editing videos, you can preview the output video effect with the built-in player. When previewing, you can click the Snapshot icon to capture your favorite video image.

Home | About | Privacy Policy | Terms of Use | Affiliate | Support | Contact Us
Copyright © 2024 Tipard Studio. All Rights Reserved.