
Tips and Tricks About Camtasia You Need to Learn

TechSmith Camtasia Studio is suit of professional screen shooting software, including Camtasia Recorder, Camtasia editor, Camtasia MenuMaker, Camtasia Theater and Camtasia Player. Compared to other screen recorders, The program provides more controls about screen capture and video editing. With it, you can record your screen and save the outputs into high quality videos. Before sharing the recorded videos to YouTube from the program directly, you could edit your creations within the program. Given integrates so many features; this article will introduce this excellent screen capture program in details and provide its tutorial.
Introduction of Camstasia Studio 8
Camtasia Studio 8 embedded many features related to screen capture and video editing. I will classify these features into recording, post-production and output.
Recording
Recording the activities on your computer screen and turning it to a video is the principal feature. With Camtasia Recorder, users could record the whole screen or choose a portion to record. It supports to capture webcam as well. The application lets you to control the audio when shooting screen. The biggest advantage is to capture everything on your screen, from video streams and video games to your actions and Google Hangouts.
Post-production
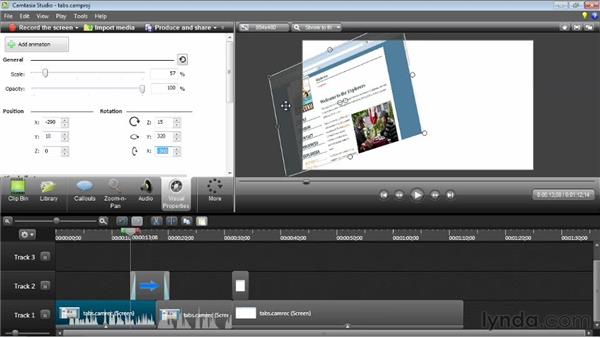
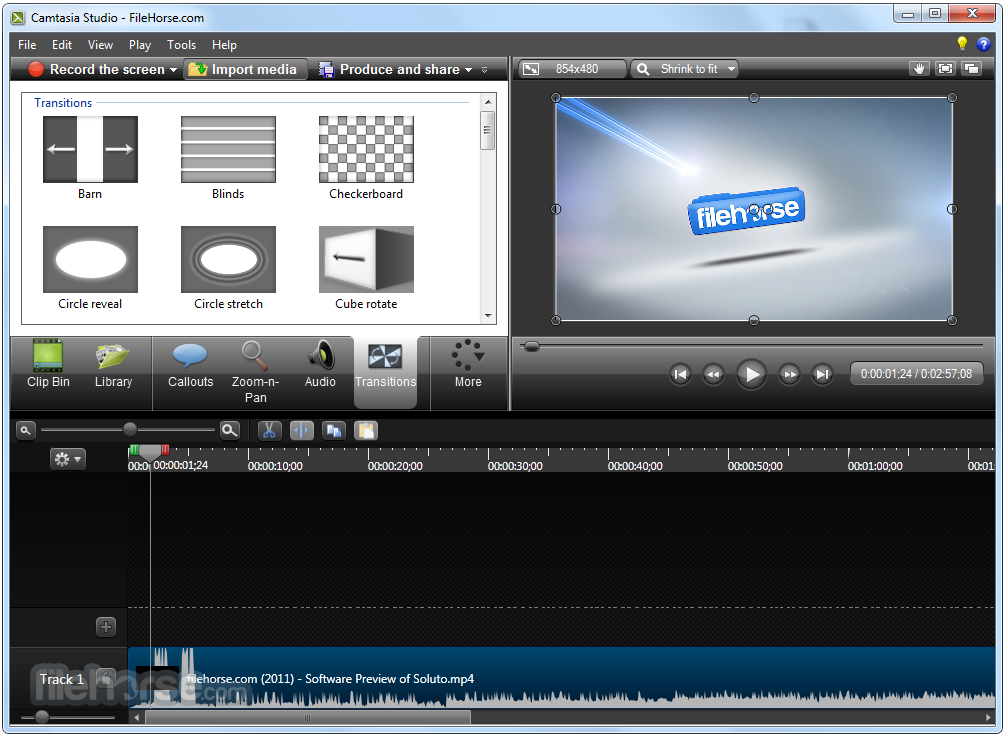
Camtasia Studio has almost all editing tools to polish the recorded video. It not only provides the basic editing features, like crop and text, but also offers special effects, transitions and animations. Screen record programs usually do not integrate video editing tools; however, it will display the video as tracks on timeline. At this time, it is a video editor allows users to modify audio and video as well.
Output
A good screen capture program depends on the quality of outputs, including audios and images. Based on the test, it is able to create highest quality outputs. Camtasia Studio will create a CAMREC, which contains video clips, images, audio files and special effects, for each project. So if you are not satisfied with the output, you can revisit the CAMREC file and modify again. It supports to export the video as MP4, WMV, MOV, AVI and M4V.
Pros & Cons of Camstasia Studio 8
Every coin has two sides, so does Camtasia Studio. We tested Camtasia Studio 8 and summarized its advantages and shortcomings. Just check more detail about the program to find whether it works for you.
Pro
1. Although it has so many features, the interface is quite friendly. Everyone could understand how-to with tutorials.
2. The program allows users to control it with hotkeys.
3. Users could share the recorded with to Google Drive or YouTube in Camtasia Studio directly.
4. It has the ability to export highest quality videos.
5. It is available on both Windows and Mac OS.
Cons
1. There is no automatic screen-shooting feature in Camtasia.
2. It lacks the ability to capture the screen of smartphones or tablets.
3. Users have to pay for nearly $200 to enjoy its extensive features.
4. It has crashed during testing for unknown reason.
How-to
To create a perfect screenshot, you should make a plan first. This plan should include the elements of screenshot required, the length of the video, screen size of the video and more. And you can follow the following process to get the desired files with Camtasia Studio accordingly.
Record Screen
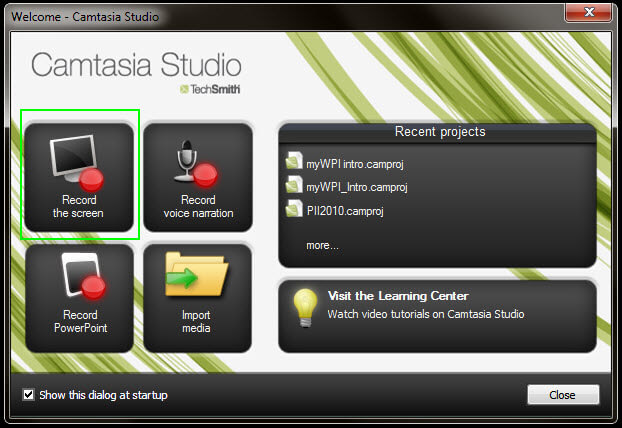
1. Launch It and select Record screen option to open the record window.
2. Open the online video or game to capture. And customize the screen dimensions to record by dragging the green box or entering values.
3. Other settings include webcam, microphone and system audio. You can set them depending on your requirements.
4. Move the slider to adjust the sound level.
5. Sometimes, users need to capture their actions on the screen, like some video classes. It supports to record screen draw as well. At this time, open recording control box and select Recording toolbars in Tools menu. If you just want to record the screen without your activities, skip to step 7 directly.
6. Then select Effects and click on OK to confirm the settings. Camtasia Studio will open a blank PowerPoint slide. And the screen draw toolbar will show up when you start recording.
7. After settings, click on red rec button to start to record.
8. During recording, you can tap on pause key to suspend recording.
Post produce and publish
1. After recording, press STOP to preview the video.
2. Then select Save and Edit option to open the video in Camtasia Studio editor as a new project.
3. Click on Import media option and load the required media files from hard drive or Google Drive. Or you can drag and drop the media files into it.
4. It provides plentiful editing features, like remove unneeded parts, insert video clips into the original recording, add transitions, zoom and more.
5. If you capture the screen, webcam and microphone at the same time, editor will play them in different tracks, so you can edit each of them separately.
6. You can preview the output before publishing in Camtasia Studio editor. If the result is perfect, select the option of Produce and share in top ribbon.
7. In Publish box, you have to decide the format and the destination to save the output.
8. Finally, click on Finish to export the output. And then you can save the file to computer share the files to social media directly.
Conclusion
This article introduced everything about Camtasia Studio in details. It is not only a screen capture program, but also embedded extensive editing tools and publishing features. It even attracts many professional users. Teachers, for example, prefer to use it as an ideal eLearning authoring tool. To explore this excellent program, we also tested it and summarized its pros and cons. Although it is expensive and unstable, the output videos are almost perfect. Finally this post introduced how to utilize it to capture screen and edit the recorded videos. If you have any other queries about the program, you can share more detail about your information in the comments with us in the article.

 Screen Recorders for Desktop Capturing Worth to Try
To record high quality videos for free, you should not miss this screen capture guide, with which you can get 4 representative desktop recorder freeware.
 How to Capture Skype Calls without Informing Party Members
If you need to record a Skype call and save it on your computer, you can read this article to learn more about 2 efficient ways to capture Skype video calls.
 How to Record Minecraft Gameplay on PC Easily without Lag
After creating a wonderful world in Minecraft, how to record Minecraft videos on PC to share your masterpiece on YouTube? You can learn two easy ways in this article.
 MP4 Video Recorder – 5 Best Methods to Record MP4 Files with High Quality
When you need to capture MP4 videos from media player or other channels, you can learn more about the 5 best MP4 recorders from the article.
