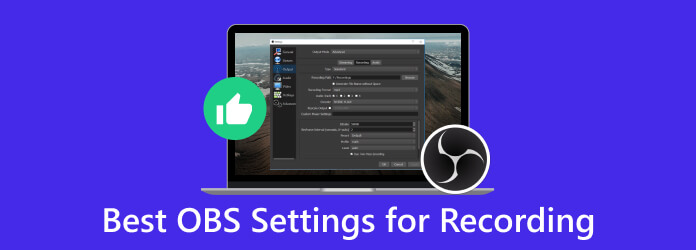
Best OBS Settings for Recording and Having Excellent Outputs
Why will you want to learn the best OBS settings for recording?
With the fast-paced innovation of web technology, we as humans have also been adapting fast. Decades ago, screen recording was not that common thing to do. Still, with the development of new technology and devices such as Windows, Mac, tablets, smartphones, and others, screen recording has been introduced. One of the promising screen recording tools today is OBS, an open-source and free program that you can work on various platforms. In fact, it is an exquisite tool a video creator must acquire if he wants to create video gameplay, video tutorials, and even when capturing an online meeting. However, you can never come up with a perfect recording if you do not follow its proper settings. Thus, learn the setting and the best recording format on OBS you must set after reading the information below.
Part 1. What are the Best Settings For Recording With OBS
The proper settings on OBS still depend on the purpose or the screen you want to capture. To learn the settings you can set, we have gathered the three different objectives that users often search for.
Best OBS Settings for Recording Gameplay
When setting the OBS for your gameplay recording, you must consider your game, your computer's hardware, and the video quality. Thus, here are the general settings for gameplay.
Video Settings:
- • Resolution - 1920x1080.
- • Downscale Filter - Lanczos with a sharpened scaling of 32 samples.
- • Frames Per Second - 30 to 60 FFPS as the common, or match the frame rate setting of your game.
Audio Settings:
- • Sample Rate - 44.1 kHz being the standard.
- • Audio Bitrate - 128 kbps.
Output Settings:
- • Output Mode - Advanced.
- • Format - MP4.
Advanced Settings:
- • Scene Buffering Time - Increase to meet your CPU requirement.
- • Process Priority - Above normal.
- • Network Buffering - Disabled.
Encoder Settings:
- • Encoder - Hardware(AMD) or Hardware(NVENC).
- • Bitrate - 8000-12000 kbps is the best bitrate for recording on OBS.
Best OBS Settings for Recording Online Meetings
Video Settings:
- • Resolution - Same with your canvas resolution.
- • Downscale Filter - Basic with a sharpened scaling of 16 samples.
- • Frames Per Second - 30 FFPS as the common for meetings.
Audio Settings:
- • Sample Rate - 44.1 kHz can work well as the standard.
- • Audio Bitrate - 128 kbps.
Output Settings:
- • Output Mode - Advanced.
- • Format - MP4 or MKV.
Advanced Settings:
- • Scene Buffering Time - Increase to meet your CPU requirement.
- • Process Priority - Set to high or above normal.
- • Network Buffering - Disabled.
Encoder Settings:
- • Encoder - Hardware(AMD) or Hardware(NVENC).
- • Bitrate -1500-3000 kbps.
Best OBS Settings for Recording on a Low-End Laptop
Video Settings:
- • Resolution - 540p to 720p to lessen the potential strain on your hardware.
- • Downscale Filter - Bicubic with 16 samples sharpened scaling.
- • Frames Per Second - 30 FPS is common for low-end laptops.
Audio Settings:
- • Sample Rate - 44.1 kHz can work well as the standard.
- • Audio Bitrate - 96 kbps.
Output Settings:
- • Output Mode - Simple.
- • Format - MP4 or MKV.
Advanced Settings:
- • Scene Buffering Time - Same.
- • Process Priority - Set to below normal.
- • Network Buffering - Disabled.
Encoder Settings:
- • Encoder - Software(x264).
- • Bitrate -800-1500 kbps.
Part 2. Best OBS Alternative on Video Recording
Do you want a screen recorder that will give you the best settings even without spending a lot of effort just to acquire even the OBS 4K recording settings? Then, you need the Tipard Screen Capture. This versatile program application is developed to record and capture the activities you make on your computer screen. So, whether you need to record your gameplay, capture video meetings, create tutorials, or save your streaming content, this Tipard Screen Capture will help you accomplish your tasks. Moreover, it offers a wide range of tools. It allows you to adjust the screen areas for video recording, enabling you to capture either the custom-defined regions or the full screen of your computer.
Other key points about this video recorder are the advanced tools and settings that you can apply to your video recording. Such advanced tools are the trimmer, merger, converter, compressor, media metadata editor, and more. In addition, it also lets you adjust similar to OBS bitrate for 1080p 60fps recording, added to various settings such as audio sources, output formats, and frame rates to tailor your recording needs. Above all that, Tipard Screen Capture gives features for editing and annotating your captured content. Then enhancing its utility for educational, entertainment, and professional purposes.
Step 1Install the Screen Recorder
Download the leading screen recorder by clicking the Free Download above. Then, proceed to install it.
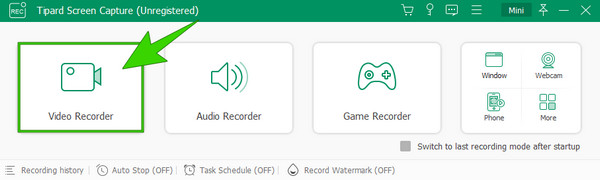
Step 2Select the Video Recorder
Upon reaching the program’s interface, the options for screen recording will be presented. You will see options such as the Video Recorder, Game Recorder, Audio Recorder, and more modes. In the meantime, click the Video Recorder tool.
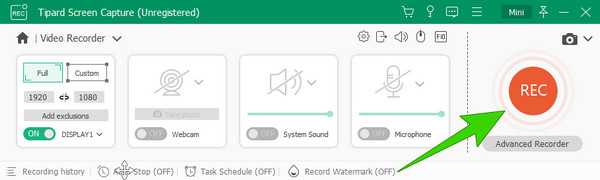
Step 3Start the Recording
Once you click the certain tool, you may start adjusting the recording features you need to use. With this recording mode, you can set the display, webcam, system sound, and microphone. When the screen is ready to record, hit the REC button, which is located on the right side of the interface. You will know that it starts recording since it has a countdown.
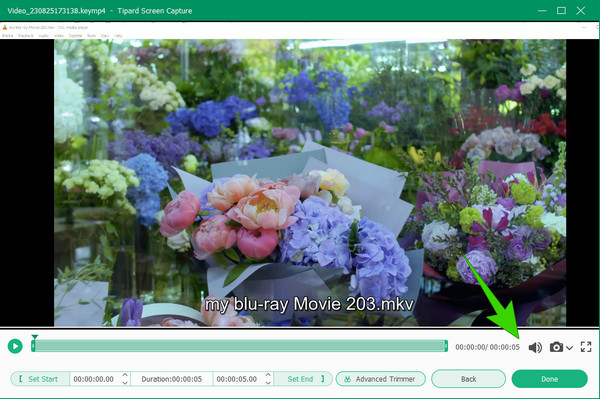
Step 4Save the Recording
Click the Red Box button to stop recording the video on your computer screen. After that, you will see the preview window where you can take screenshots and trim your video. Then, to save the recording, you will need to click the Done button.
Tip: Click the Coggle button to adjust the settings on the recording before you start.
Part 3. FAQs About OBS and Recording
How do I set up OBS for recording?
To set the recording on OBS, you must first create a new scene by clicking the plus button. The second is to add a source, then right-click it to go to the source settings. From there, you can be able to set up.
What bitrate is needed for recording 1080p 60fps?
The bitrate needed for 1080p and 60fps is 6000 to 12000 kbps.
Is 6000 bitrate enough for 1080p 60fps?
Yes. 6000 bitrate is sufficient for 1080p and 60fps.
Why is my OBS recording laggy?
There are potential reasons why OBS recording is laggy, such as hardware limitations, high bitrate settings, background application, and more.
Can OBS record mobile on the computer?
Yes. One of the features of OBS is to record content from a mobile device on the computer.
Conclusion
This article helps you arrange to have the best OBS settings for recording. Consequently, it provides you with the settings for recording gameplay and online meetings. In addition to that, the best settings for the low-end laptops are also included. However, to minimize the many settings you must apply, we have recommended the Tipard Screen Capture to give you an effortless video recording solution.