
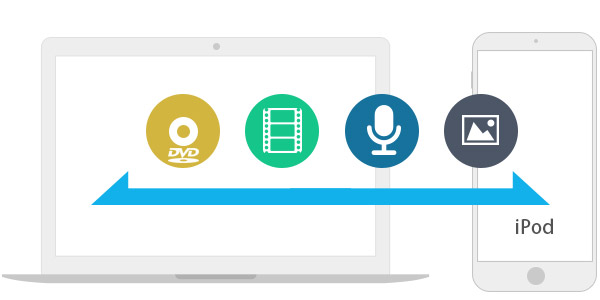
How to Transfer Music/Audio/Images/DVD from iPod to Computer
If you were a music fan like me, you would not want to miss the music video of an excellent song. And now with iPone, iPad and iPod, we love to add our great music to these devices. But there are one or two problems that might bother us: If you want to transfer these songs from iPod to computer, some music formats may not be supported by iTunes. And when syncing music with iTunes, sometimes the original music videos on the iPad or iPhone would be overwritten. For a music fan who come across these problems, I would like to recommend you Tipard iPod Transfer, which has solved problems for me perfectly.
As the professional and special-designed iPod Transfer, Tipard iPod Transfer can not only transfer music, audio and images from iPod to computer for safety, but also can help iPhone users extract audio file from video or DVD file to transfer it from computer to iPod to enjoy. Plus, you are allowed to copy various photo or image files from your computer to iPod. In addition, iPhone SE, iPhone 6s Plus/6s/6 Plus/6/5s/5c/5/4s/4/3GS, iPad and iPod are highly supported by this iPod transfer with multiple functions. Except transfer music and images, this iPod transfer software also has ability to transfer messages, whatsapp messages, contacts or memos from iPod to computer or from computer to iPod.
Guide on how to transfer music from iPod to computer used this iPod Transfer software
Download and install Tipard iPod Transfer program
You just need to download and install Tipard iPod Transfer, and then follow the instructions to finish the installation.
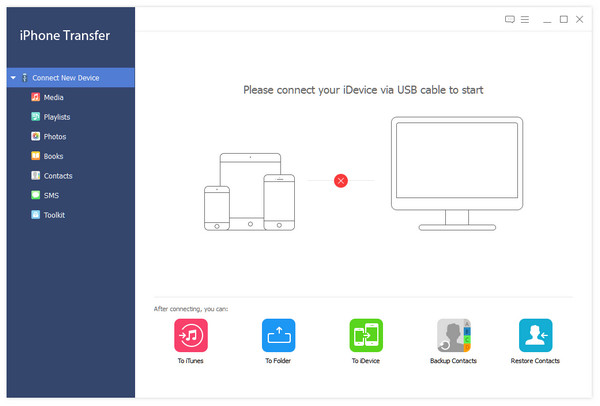
Connect your iPod to computer
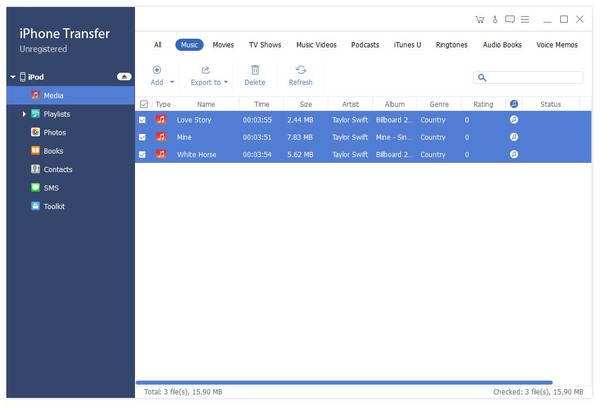
After installed, you will see the following screenshot. Connect your iPod to computer through Apple dedicated data line, and then you will see the following images. Once connecting, your iPod will be recognized instantly, and the detailed information about your iPod will be displayed, including type, capacity, version and serial number. Plus, this transferring software will show the specific capacity values of different iPod files that have taken, and the available space.
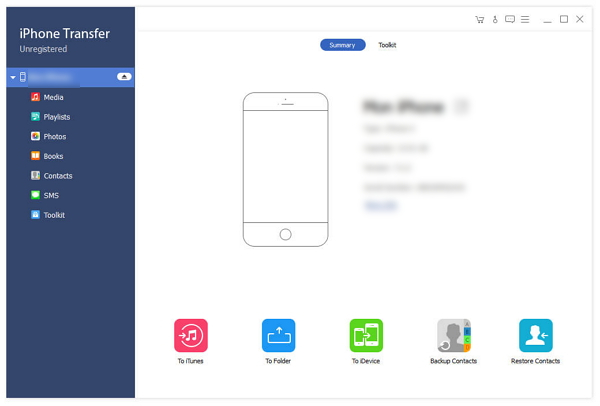
Transfer iPod files to computer
On the left side of the main interface, you will see the display list, which will show your various iPod files in different types such as media, images, messages (SMS), WhatsApp messages, contacts, books and playlists. You can freely choose any kinds of file types (Music, Video, Photos) to transfer to your PC for backup safety.
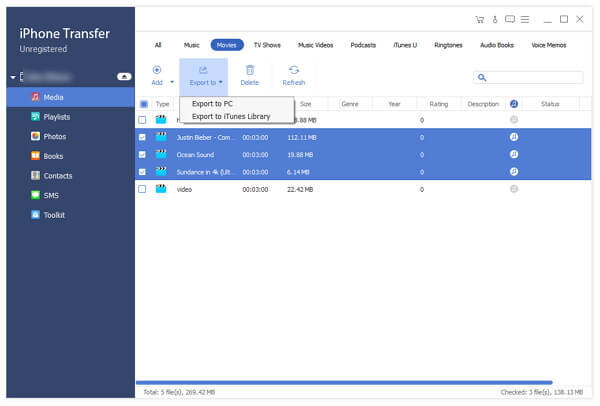
Transfer iPod Music to computer
Click Media on the display list, then the right side of the interface will display all your music files in details as the following screenshot shows. In front of each listed music file, there is a check box, you can check all to choose all music files or specific one you need, and then click Export to button. You will see Export to PC and Export to iTunes Library. Click Export to PC to start to transfer music files from iPod to computer. What's more, you can add songs to iPod or you can load your favorite video files or DVD disc on the display list, and choose the target audio format you like, then the iPod compatible music files will be generated and to be put on your iPod.

 The Easiest Way on How to Sync iPhone to Mac
When you need to transfer photos, videos, messages and other files from iPhone to Mac, you can learn more details about the methods to sync iPhone to Mac.
 Transfer Music between iPod and Computer
This article shows the easiest way on how to transfer music from iPod to computer, and also provides the detailed steps to copy music from computer to iPod.
 How to Sync an iPad to Computer
When you switch an iPad to computer, you might be used to connect iPad with iTunes. Just find another easy way that sync iPad to computer with a powerful tool.
 How to Transfer Music from iPod to iPod
This article provides you with the easiest way to transfer purchased or free music from an iPod to another iPod with an iPod Music Transfer efficiently.
