
The Reputable Way to Convert FLV/WMV/ASF/F4V to MP4/MP3/AVI
FLV to MP4 Converter is a professional and special designed tool with upgraded kernel to support iPhone SE, iPhone 6s/6s plus, Samsung, HTC, Window Phone 7, etc. In addition, this FLV converting software allows you to convert Flash videos of FLV, WMV, ASF and F4V format to mainstream portable devices, like iPhone, iPad, iPod series, Samsung Galaxy Series, HTC, Kindle Fire HD, Gphone, LG, Mortorola, Windows Phone 7, BlackBerry and so forth. What's more, converting such videos to devices for playback, this FLV Video Converter enables extract audio to these devices.
Sometimes, your device cannot support FLV format, and want to convert FLV to MP4. I would recommend you FLV to MP4 Converter. You just need to download Tipard Video Converter Ultimate installation file, then double click the downloaded installation file to start installation; next follow the instructions to finish the installation. After installation, please launch FLV Converter, and then enter correct User Name and registration key in pop-up registration window, then click Register button to finish registration.
What do you need?
OS Support: Windows NT4/2000/2003, Windows 7, Windows 8, windows 10, Windows 11
Hardware Requirements: 800MHz Intel or AMD CPU, or above; 512MB RAM or more
Install and register Tipard FLV Converter
Guide Steps:
Step 1: Load FLV to MP4 Convert application
Step 2: Optimize output video file
Step 3: Choose output video format
Step 4: Adjust video settings
Step 5: Start to convert FLV to MP4 format
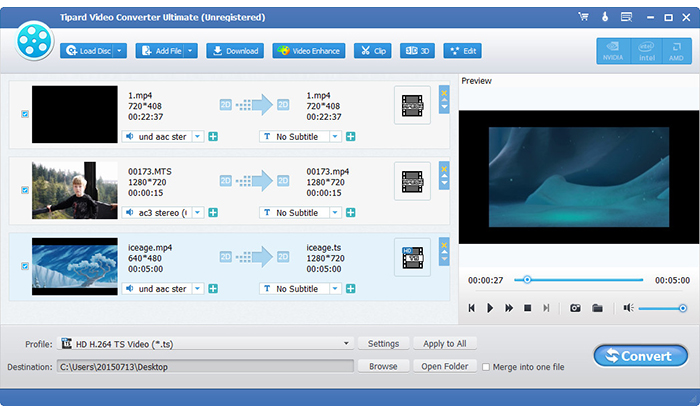
Load FLV to MP4 Convert application
Load any FLV file you want to convert by clicking Add Video option under the drop down list of File button.
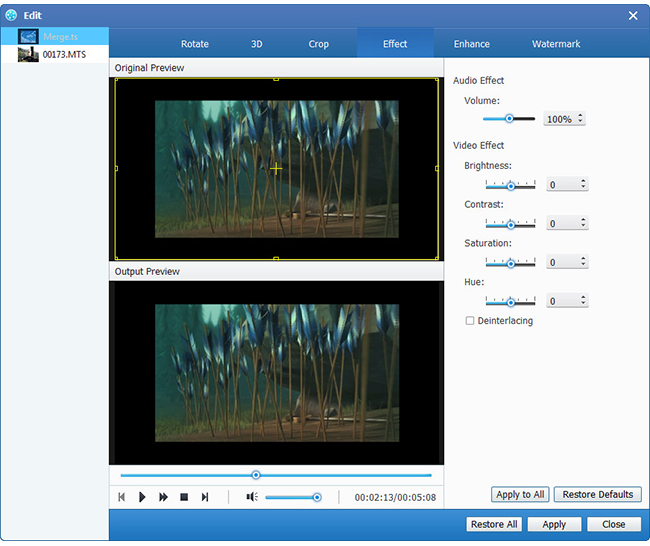
Optimize output video file
Tipard FLV to MP4 Converter software serves as a basic editor, which empowers users to adjust visual effect, retouch videos (like changing parameters of saturation, hue, contrast, brightness and so forth), trim video, crop vide, etc. You are entitled to add watermark of text or picture to make the video in your style. Additionally, the added text is allowed to change colors and size and added picture size and transparency can be altered as well.
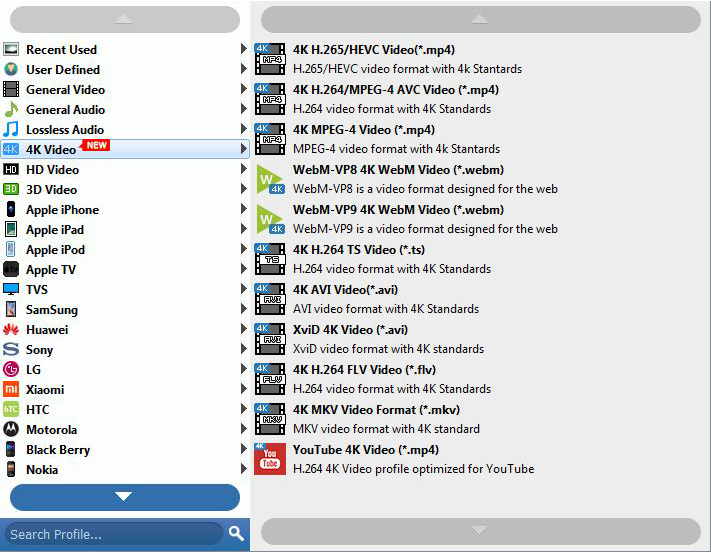
Choose output video format
Based on the formats supported by your portable devices, you can select the output format for the movie from the Profile button and set the destination folder. Also you are allowed to select your preferred audio track and subtitle for your video such as converting FLV to MP4 format.
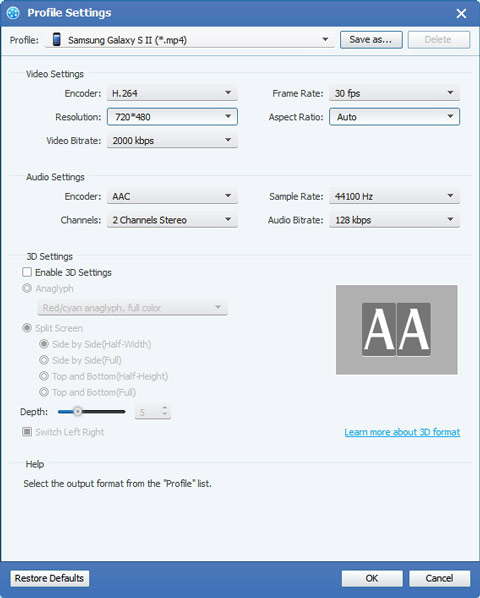
Adjust video settings
Detailed video and audio settings are provided by this Video Converter for you to adjust, such as video Encoder, Frame Rate, Resolution, Bitrate and audio Encoder, Channels, Sample Rate, etc. Even more, you can input your own parameters. The well-customized profile can be saved as User-Defined for your later use.
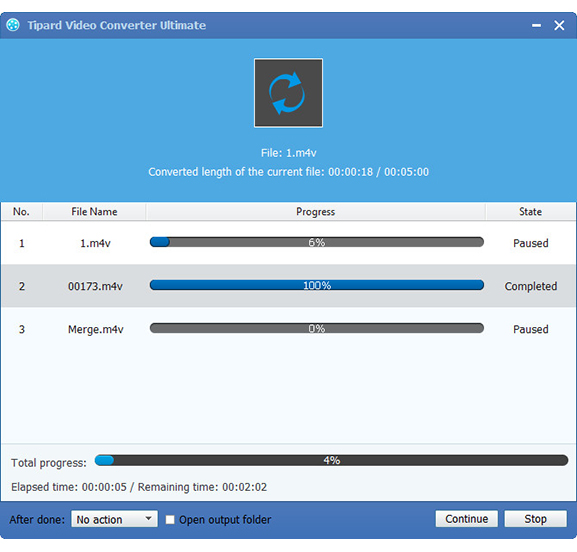
Start to convert FLV to MP4 format
Finally, you just need to click Convert button to start to convert FLV to MP4 with high speed.

 Top 6 Methods to Convert FLV to MP4 on Mac
Have no idea how to watch FLV videos on Mac? Get top 5 FLV to MP4 freeware to convert FLV to MP4 on Mac for free.
 How to Convert GIF to MP4 with Top 15 Methods
What should be the best method to convert GIF to MP4 files? Check out the best 15 solutions from the article now.
 Top 20 MP4 to MP3 Converter Software
Want to have easy access to convert MP4 video to MP3 audio easily? The following article suggests 20 Converters.
 3 Easiest Ways to Remove Watermark/Logo from Video
This is the detailed tutorial for beginners to remove watermark from video. You can remove watermark or logo from a video within several steps quickly.
