Best Way to Convert MKV to AVI, WMV, MP4, MOV, 3GP, FLV, etc.

In this article, we will show you Tipard MKV Video Converter. The powerful MKV Video Converters can easily convert MKV to AVI, MPG, WMV, MP4, MOV, 3GP, FLV etc and extract audio from MKV to MP3, AAC, M4A, WMA, WAV, AC3, and OGG for your iPod, iPhone, Zune, PSP, PS3, Xbox and other portable Players.
How to Use Tipard MKV Converter
Load video file
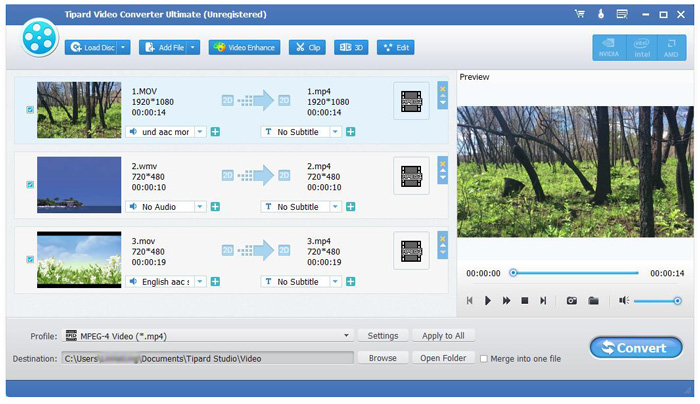
Install MKV Converter on your computer. Click "Add Video" option under the "File" menu and Load any MKV file you want to convert. Or you can click the "Plus" image button in the main interface.
Choose output format
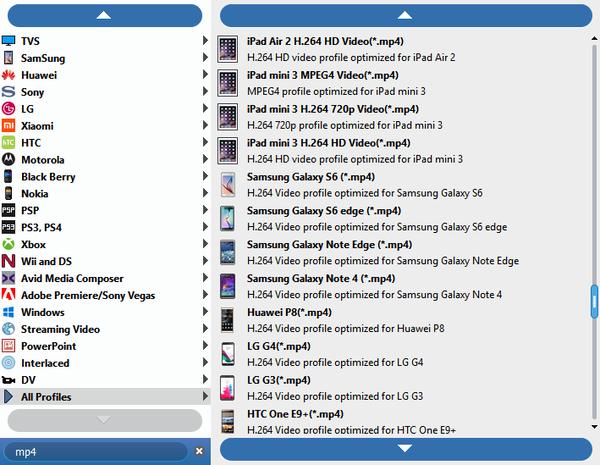
Based on the formats supported by your portable devices, you can select the output format for the movie from the "Profile" column and set the destination folder. Also you are allowed to select your preferred audio track and subtitle for your video.
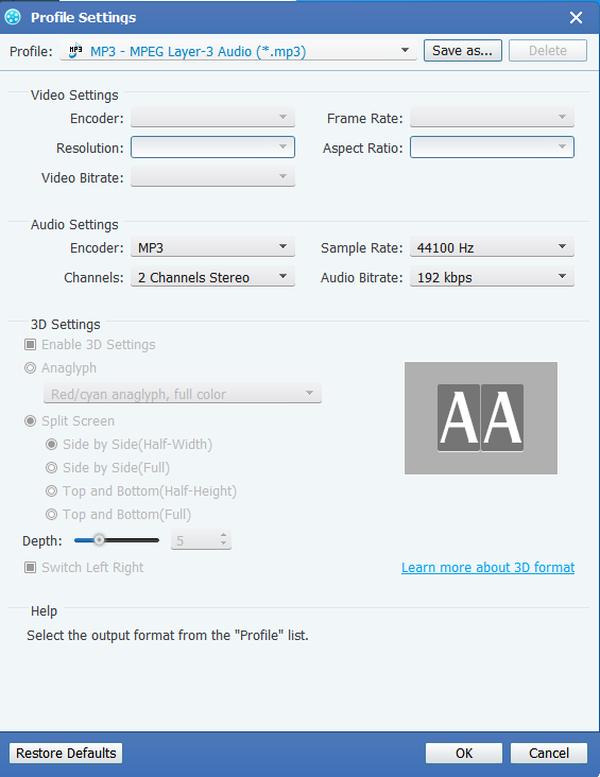
Detailed video and audio settings are provided by this MKV Video Converter for you to adjust, such as video Encoder, Frame Rate, Resolution, Bitrate and audio Encoder, Channels, Bitrate, Sample Rate, etc. Even more, you can input your own parameters. The well-customized profile can be saved as "User-Defined" for your later use.
Video and audio settings
Detailed video and audio settings are provided by this Mod Converter for Mac for you to adjust, such as video Encoder, Frame Rate, Resolution, Bitrate and audio Encoder, Channels, Bitrate, Sample Rate, etc. Even more, you can input your own parameters. The well-customized profile can be saved as "User-Defined" for your later use.
Editing features
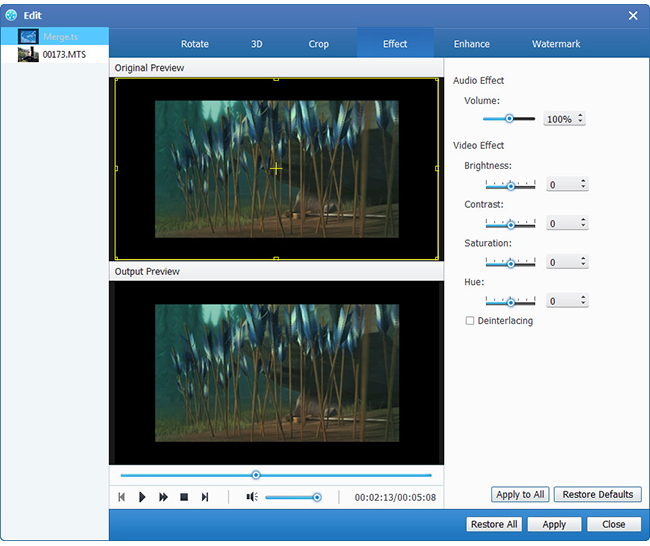
Apart from the converting function, Tipard MKV Converter also possesses more editing functions for you to use. You are allowed to trim any certain segment of a video, crop video, watermark video, merge video files into one, and preview the video effect before converting. Also you are allowed to adjust video effect on brightness, contrast, and saturation.
1. Adjust output video effect.
Click "Edit" on the initial interface, and choose "Effect" command after context menu popped up to open the Effect window. Or you can just click  button to open the Effect window. You are allowed to freely drag the Brightness, Contrast, Saturation, Hue and Volume.

2. Trim any video.
Click "Clip" command. Tipard MKV Video Converter provides you two methods to trim your video length.
Method 1: Enter the start time in the "Start Time" box, then enter the end time in the "End Time" box and click OK.
Method 2: Drag the scissors bars under the preview window when you want to trim, then the time will be shown in the Start Time box and End Time box for your reference.
After you set the trim time, the length of the captured clip will be shown in the Select Length box for your reference.

3. Crop any video.
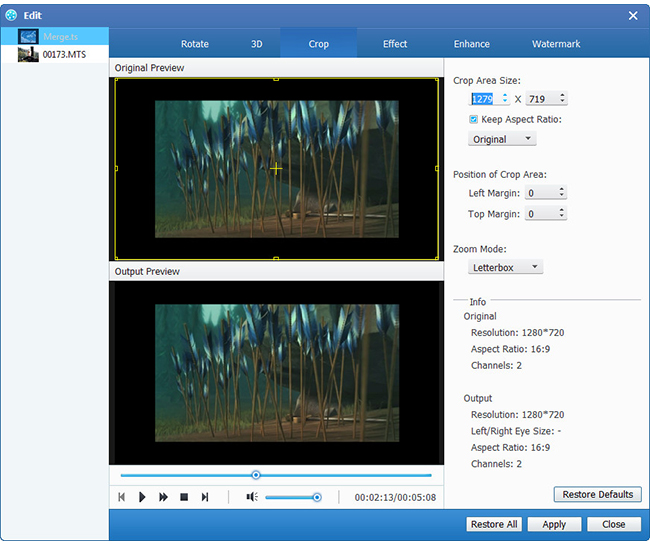
Click "Edit" > "Crop" window. Or you can just click "Crop" button to open the Crop window. Tipard MKV Video Converter allows you to remove the black edges around your movie video and customize the size of video play region. There are three methods available to crop your video:
Method 1: Choose the output aspect ratio from the "Zoom Mode" drop-down list according to your need.
There are four choices available: Full Screen, Keep Original, 16:9 and 4:3.
Method 2: Crop by adjusting the crop frame
The crop frame is the yellow line around the movie video. There are eight small adjustment boxes on the crop frame. Each adjustment box allows you to crop the movie video from a different position. To crop your movie video, you can just move your mouse cursor to an adjustment box and drag the crop frame.
Method 3:Crop by setting the crop values
There are four crop values on the lower right part of the Crop window: Top, Bottom, Left and Right. You can set each value to crop your movie video, and the crop frame will move accordingly.
Hint: After you crop your video and set the zoom mode, the result can be previewed in the Preview window of the program main interface.
4. Add a text or image watermark.
Click "Edit" > "Watermark" command after context menu popped up to open the Watermark window.
Check the "Enable Watermark" checkbox, then select "Text" or "Picture" radio button to add a text or image watermark to any video as you like.
