User Guide
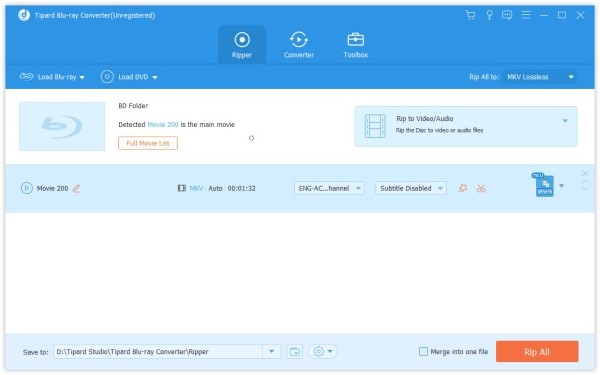
Step 1 Load Blu-ray Disc/ISO/Folder
If there is no Blu-ray ISO/folder on your computer, you need to insert a Blu-ray disc first.
Run Blu-ray Converter on your computer. The main interface you see is the Ripper option. Click Load Blu-ray to import your Blu-ray disc/ISO/folder. Or directly drag multiple video and audio files to this program.
If you want to see other small videos, click the Full Movie List to find your target video.
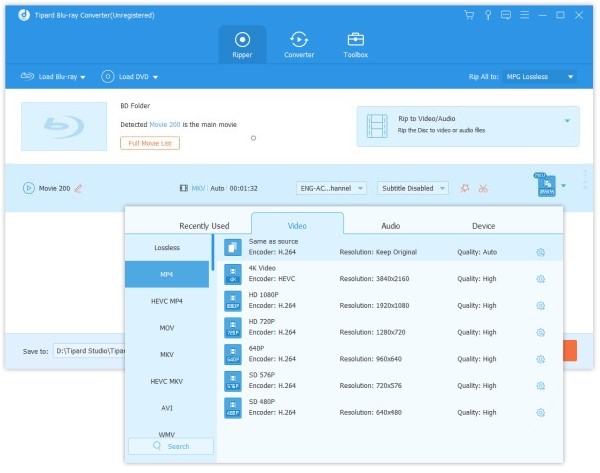
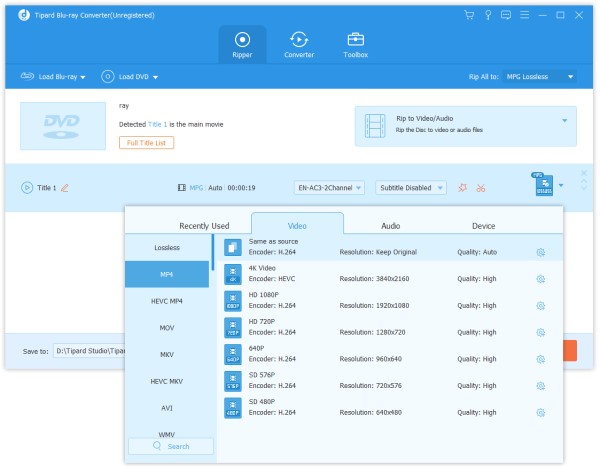
Step 2 Choose output video format
The default output format for this software is MPG Lossless which can preserve the lossless output quality.
If you want to rip Blu-ray to digital formats for easy playback on devices, just find the Rip All to option to select suitable output format from its drop-down list.
You also can decide each video by clicking the format icon on the right side of the video file.
If you want to edit videos or cut them, you can click the Cut or Edit icon. Click here to see what it can do for you.
Note: You should make sure the output format is not MPG Lossless when you edit the DVD.

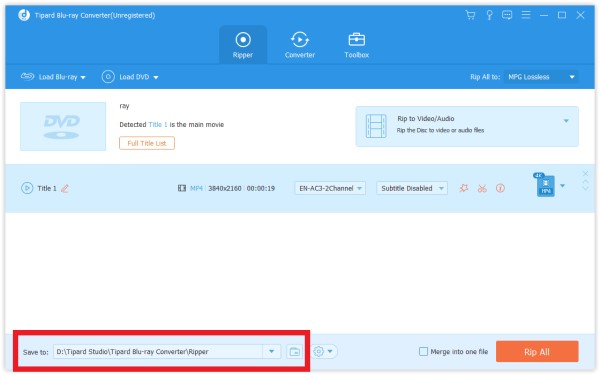
Step 3 Start Ripping
Select a path for the files on the bottom bar. And then click the Rip All button on the main interface to start ripping.
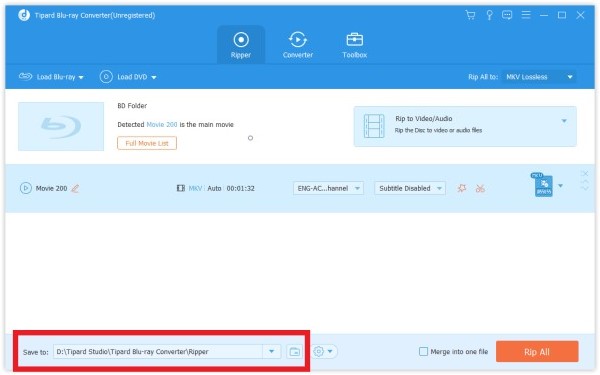
Note: If you want to merge them into one, tap Merge into one file on the left of Rip All.
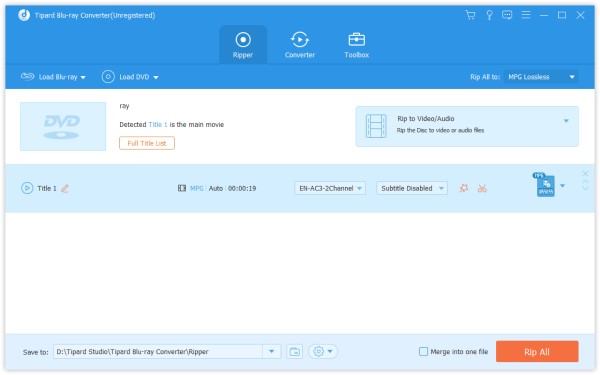
Step 1 Load DVD Disc/ISO/Folder
If you don't have any DVD ISO/folder on your computer, you need to insert a DVD disc first.
Just in the same Ripper option of the last part, click Load DVD on the top to import your DVD disc/ISO/folder. Or directly drag multiple video and audio files to this program.
If you want to see other small videos, click the Full Title List to find your target video.
Step 2 Choose output video format
The default output format for this software is MPG Lossless which can preserve the lossless output quality.
If you want to rip DVD to digital formats, just find the Rip All to option to select the output format you need from its drop-down list.
You also can decide each video by clicking the format icon on the right side of the video file.
If you want to edit videos or cut them, you can click the Cut or Edit icon. Click here to see what it can do for you.
Note: You should make sure the output format is not MPG Lossless when you edit the Blu-ray.

Step 3 Start Ripping
Select a path for the files on the bottom bar. And then click the Rip All button on the main interface to start ripping.
Note: If you want to merge them into one, tap Merge into one file on the left of Rip All.
Step 1 Install and launch program
Install and launch Blu-ray Converter on your computer. Click the Converter option on the top bar.
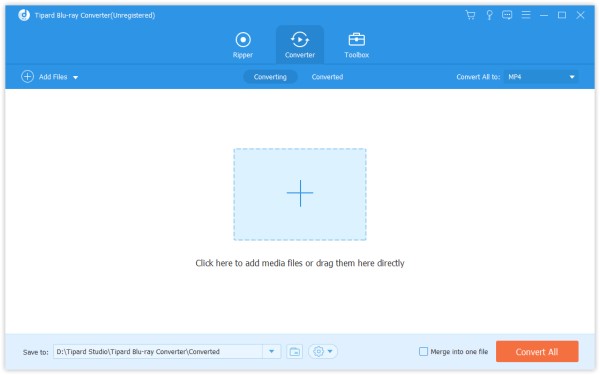
Step 2 Add video/Audio files
Click Add File and select the Add File or Add Folders to add video files. Or you can directly drag multiple video and audio files to this program.
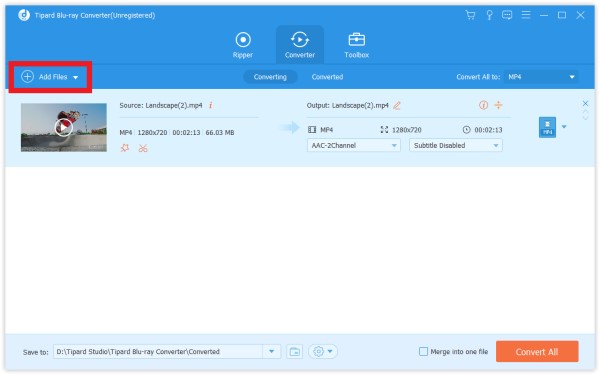
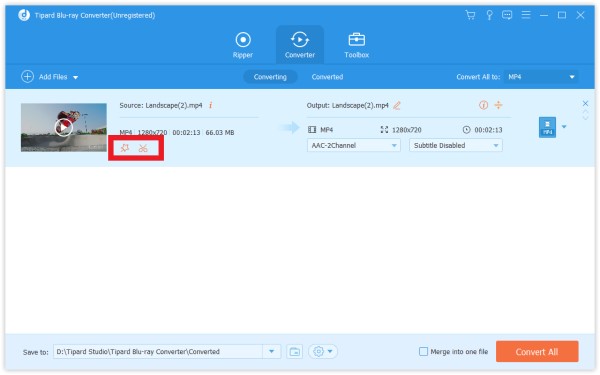
After adding files, you can see its information on the interface, like the original format, the screen size and the time length.
You can click the video to play it. On the playing interface, you can also take snapshot and edit the video by clicking the Camera icon.
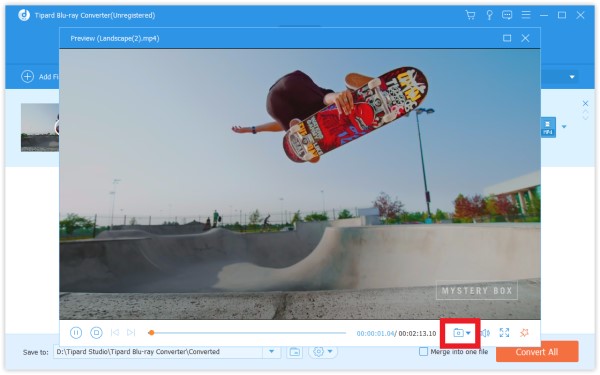
If you want to edit videos or cut them, you can click the Cut or Edit icon. Click here to see what you can get.
Step 3 Choose output format
Click on the format icon on the right side of the video file. Then you can see a list of formats. Choose one of them as the target format.
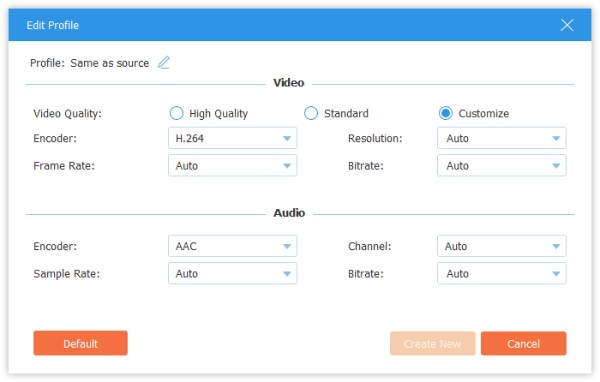
If you want to change the format settings, you can click the Gear icon on the right to custom profile. In the pop-up-window, you can change settings as follows.
Video: Quality, Encoder, Resolution, Frame Rate and Bitrate.
Audio: Encoder, Channel, Sample Rate and Bitrate.
Step 4 Start converting
Select a path for the converted files on the bottom bar. And then click the Convert All button on the main interface to start converting on your computer.
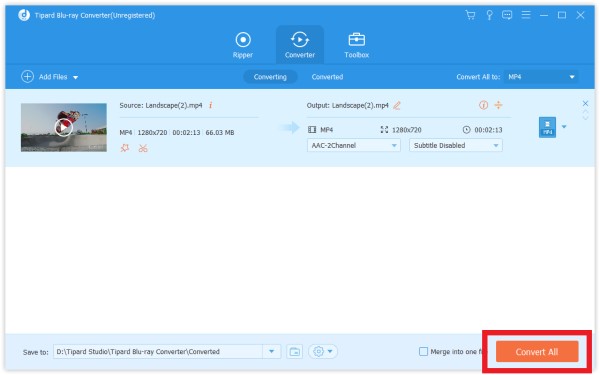
Note: If you want to merge them into one, tap Merge into one file on the left of Convert All.
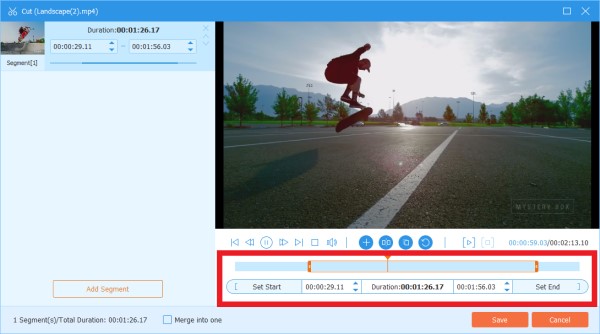
Step 1 Select a video file and click the Cut icon
Step 2 To cut your wanted parts of the video, you can drag the clipper on the progress bar or enter the start and end time directly on the bottom Duration bar. The part you chose is what will be left.
If you want more segments in the same video, click Add Segment on the bottom of the segment list and a same video will added. Choose another wanted part in the same way.
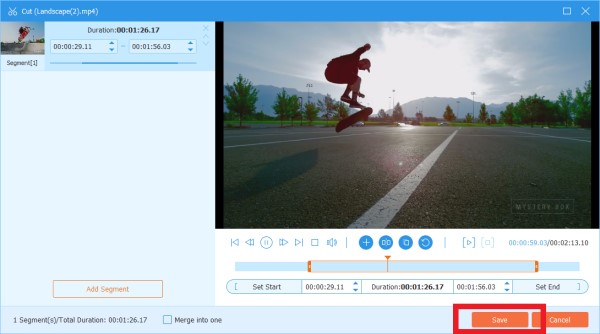
Step 3 After you make all right, you can click Save. If you want to merge them into one, check on Merge into one on the bottom left of the Cut window.
Step 4 Now you are back to the main interface. Preview the video by clicking the thumbnail. If that's just what you want, click Convert All.
Step 1 Click the Edit icon. The first interface of the pop-up window is the Rotate & Crop option. And you can see other editing features on the besides in this window.
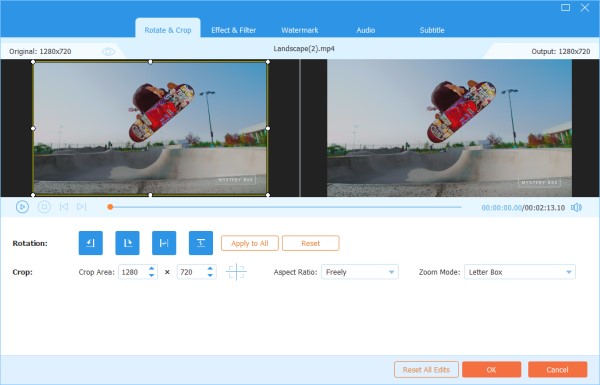
Step 2 Here you can flip video vertically and horizontally, rotate 90 degrees, rotate 180 degrees or rotate 270 degrees. Then, you can check the result in the preview.
Step 3 Below the Rotate option is the Crop option. There are several types in Aspect Ratio, like 16:9, 4:3, 1:1 and 9:16. It can help you quickly get the size you want.
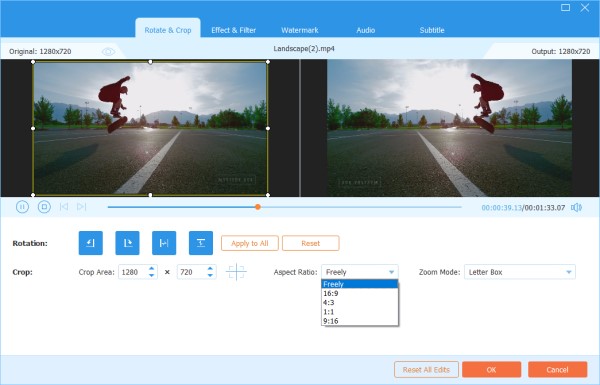
If you have other size needs, you can select Freely in Aspect Ratio first, then input number in Crop Area to set the size. Dragging the frame of the left playing screen is also OK. If you only want the center screen, click Cross icon after setting the size and it will help you put the cropped screen in the center.
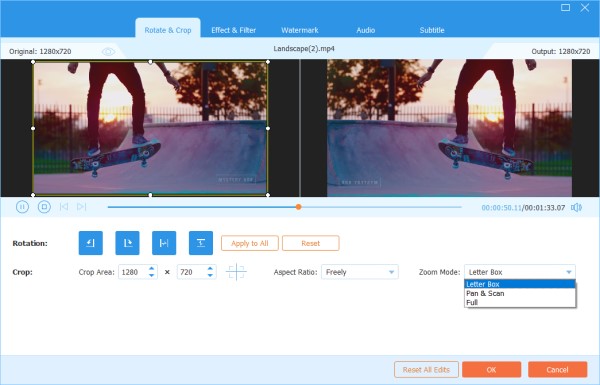
Besides Ratio, you can also select the right Zoom Mode to get the best effect.
Full Mode: Make the selected screen become the biggest size, which would stretch the screen.
Letter Box: Add black edges up and down.
Pan & Scan: Make the screen size to 16:9. But it would not show left and right edges in 16:9 or up and down in other size.
It is up to your needs.
Step 4 Click the OK button to save the changes.
Step 1 Find Effect & Filter in the Edit window. You can adjust brightness, contrast, saturation, hue and select deinterlacing as you need. Besides, you can choose a filter to beautify your video.
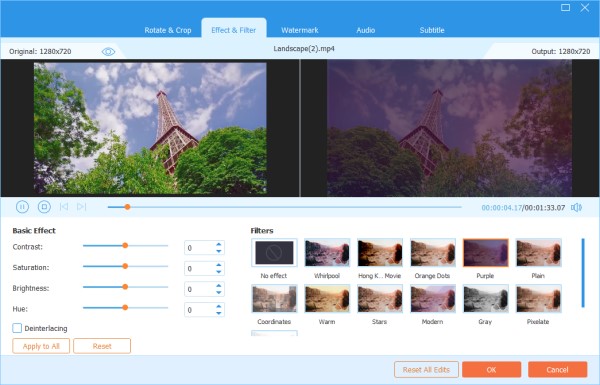
Step 2 Click the OK button to save the changes.
Step 1 Find the Watermark option in the Edit window. If you want to add a text watermark, check Text and enter the text to the blank. You can adjust the text fonts, colors, writing system and size. Then move the text watermark by dragging or setting size.
Furthermore, you also can rotate text and set opacity.

If you want to add an image watermark, check image and click the Add icon to select an image. And then adjust the size and place it on the screen. You can also rotate the image and set opacity.
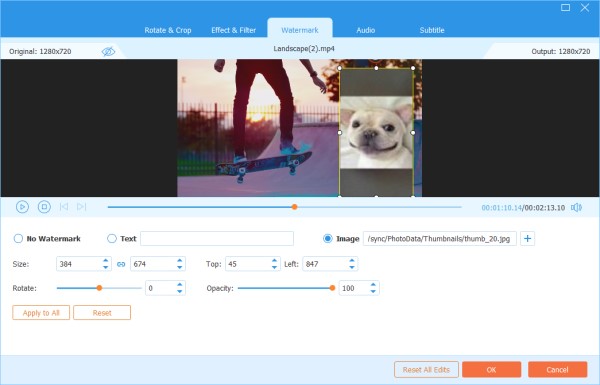
Step 2 Click the OK button to save your settings.
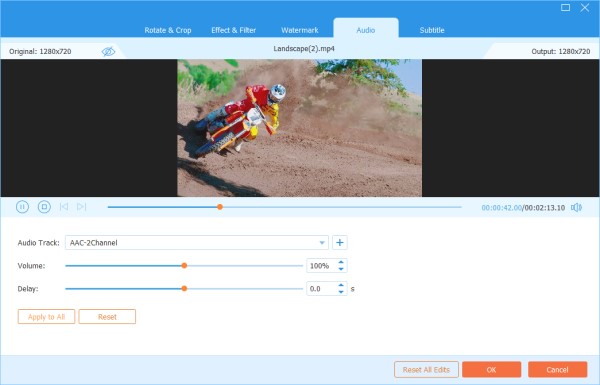
Step 1 Find the Audio option in the Edit window. Click the Plus icon besides the Audio Track bar to find the audio track you want to add. You can adjust the audio volume and change the delay time to decide when to play audio track.
Step 2 Click the OK button to save your settings.
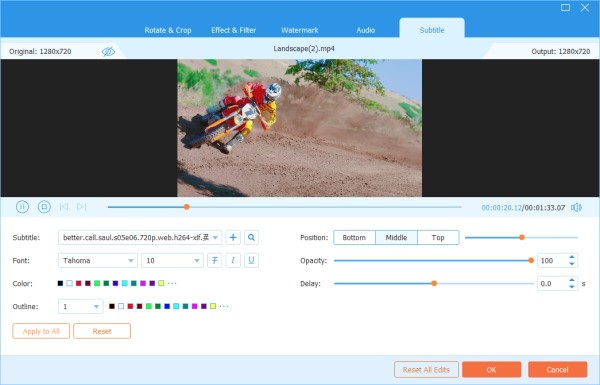
Step 1 Find the Subtitle option in the Edit window. Click + to import the subtitle file (*.srt; *.ssa; *.ass) from your computer. After that, you can adjust the position, font, color, opacity, delay time and outline.
Step 2 Click OK to save the adjustments.
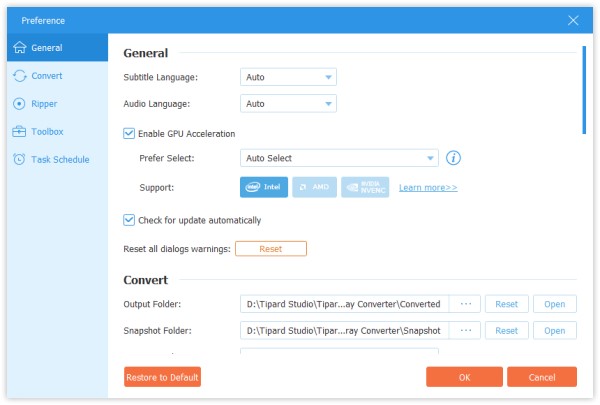
When you are using converter function or ripper function, you can click the Gear icon on the bottom on the interface. This is the button of Preferences.
There are five options in it.
In General option, you can set subtitle language, audio language, GPU acceleration and update settings.
In Convert option, you can set output folder, snapshot folder, convert tasks, etc.
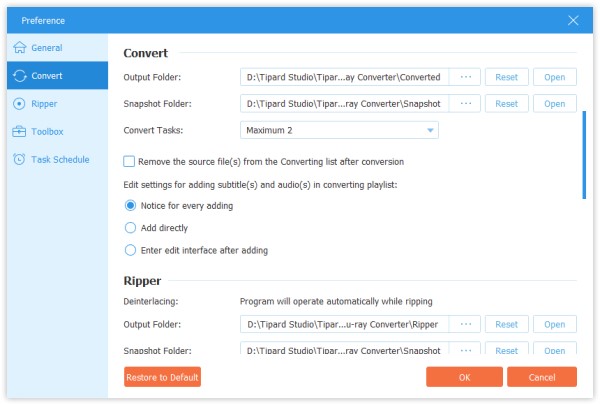
In Ripper option, you can set output folder, snapshot folder, convert tasks, etc.
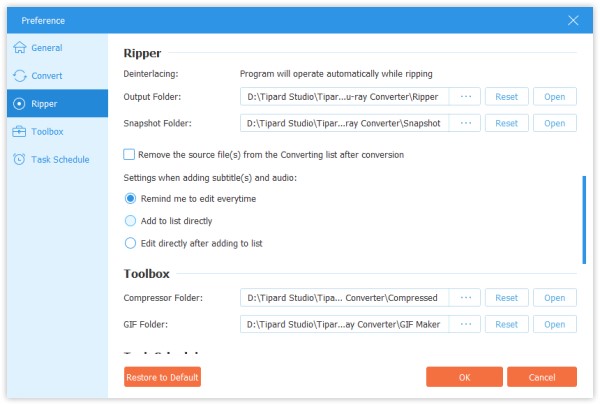
In Toolkit option, you can set the saving path for compressed files and GIF files.
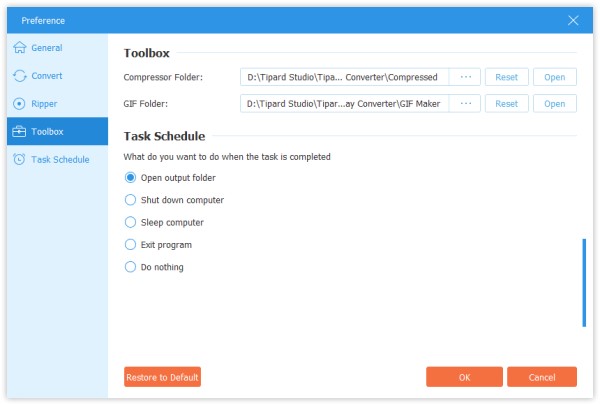
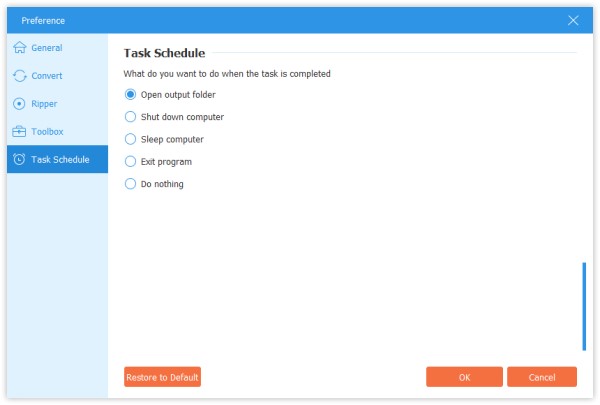
In Task Schedule option, you can choose the action when the task is completed.
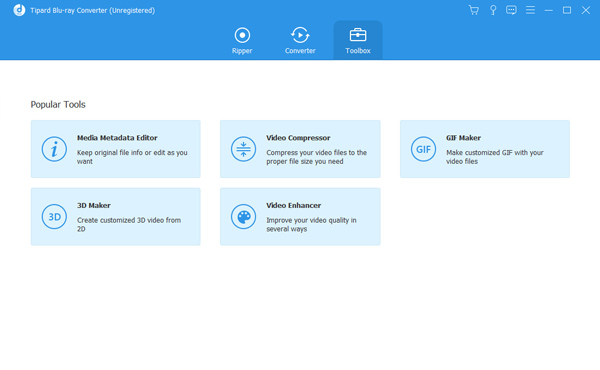
Click Toolkit on the top and find Media Metadata Editor. And there are also Video Compressor, GIF Maker, 3D Maker, and Video Enhancer.
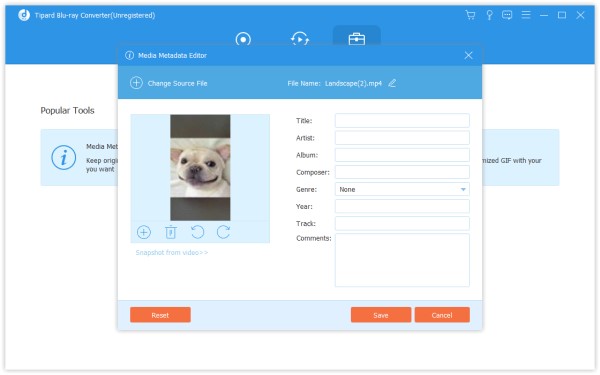
Step 1 Click Media Metadata Editor and add a file in supported format, such as MP4, M4A, M4R, M4P, 3G2, M4V, MOV, MP3, WMA, ASF, WMV, and AVI.
Then you can edit the cover, file name, cover, artist, album, composer, genre, year, track, comments.
Step 2 Click the Save button to save the metadata.
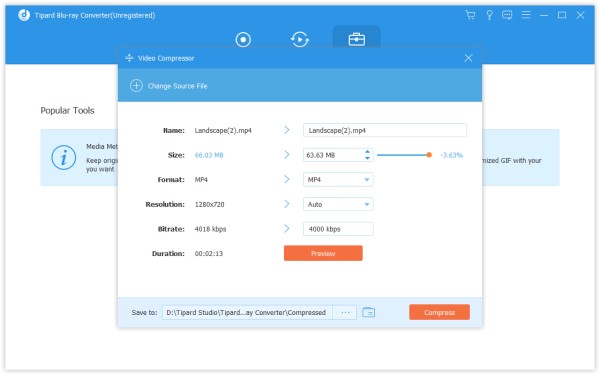
Step 1 Find Video Compressor in Toolkit. Click it and add a video to compress. After adding files, you can change the size, name, format, resolution, bitrate of the target file.
Step 2 Then set the path to save your compressed file, and click the Compress button.
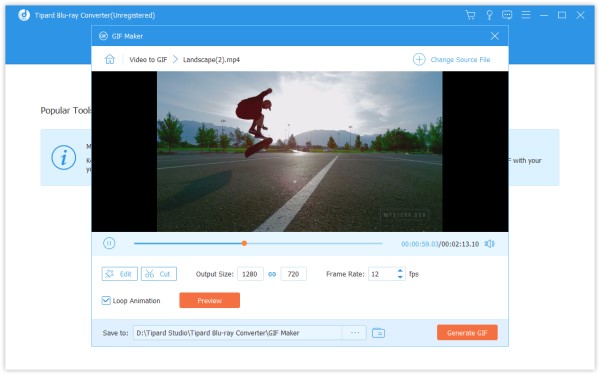
Step 1 Find GIF Maker in Toolkit. Click it and add a video to GIF Maker. As you see, you can edit the video with various features, such as Rotate & Crop, Effect & Filter, Watermark, Audio, and Subtitle.
Or cut the video and save the part you want to make a GIF. And you also can set the output screen size and Frame Rate.
Step 2 Click Generate GIF to create your own GIF.
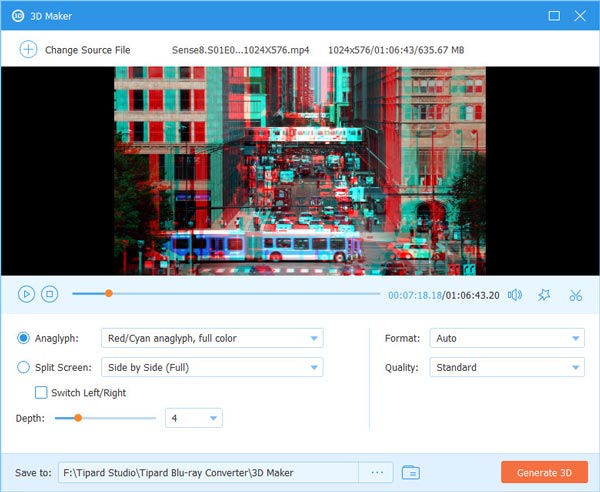
Step 1 Click on the 3D Maker option and add the video you want to convert to a 3D movie. Then you are able to add or adjust various 3D effects as you like, including anaglyph changing, screen splitting, layer switching, and depth adjusting. You can wear a pair of 3D glasses to see if the effect is what you want while setting.
Step 2 Click on the Generate 3D button to make your own 3D movie.
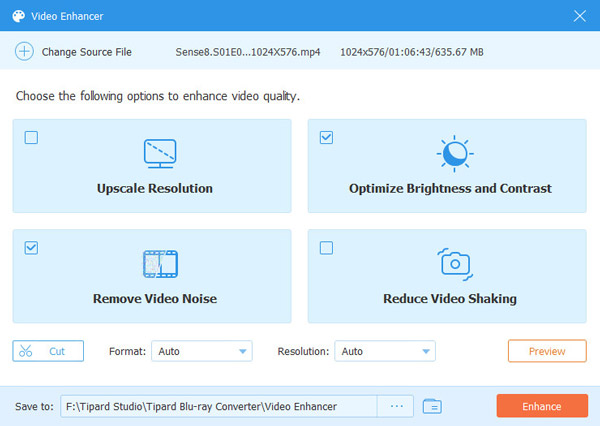
Step 1 Select Video Enhancer when you have a video whose quality needs to be improved. Add the video to this video enhancer. Usually, you can choose Upscale Resolution to get superb video quality. You can also optimize the brightness & contrast, remove video noise, and reduce video shaking according to your needs. You are allowed to preview the refined video before saving it to your computer.
Step 2 Choose a folder to save your video and then click the Enhance button.

Home | About | Privacy Policy | Terms of Use | Affiliate | Support | Contact Us
Copyright © 2024 Tipard Studio. All Rights Reserved.