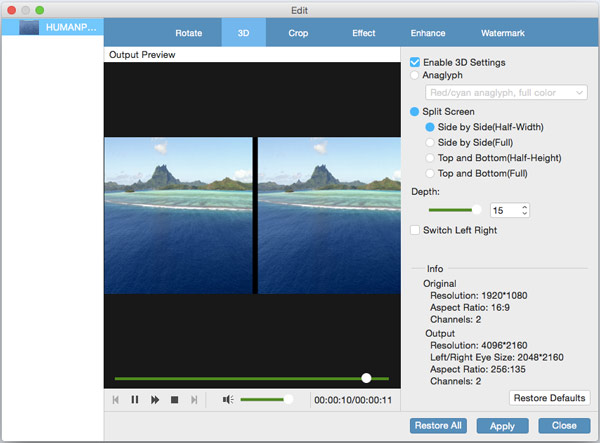
Tipard Video Converter Platiis the professional video converting software, which has the capability to convert any video format like MP4, MKV, FLV, AVI, WMV, MPG, MOV, VOB, TS, M4V and more to your needed 4K/HD and regular videos. It enables you to edit video and enhance its effects. Moreover, it can convert 2D video to 3D video with high quality. The following description will show you how to do these on Mac step by step.
Click "Add File" on the top list to import source video to this video converting software.
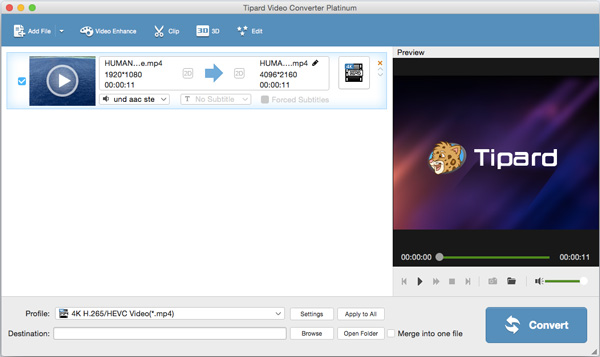
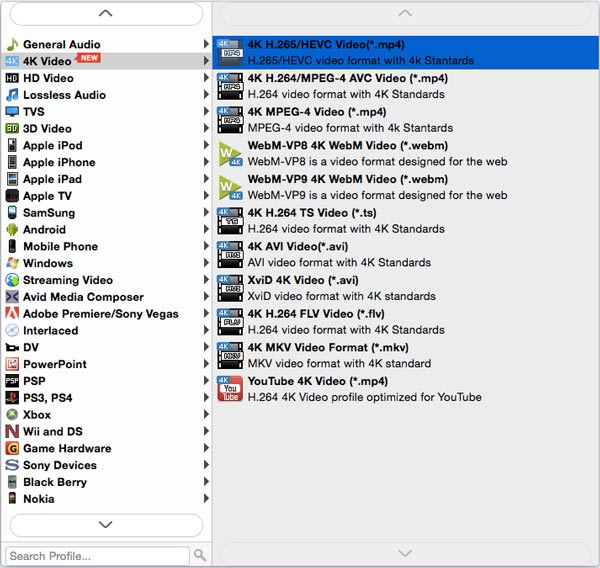
Click the drop-down window on the right side of "Profile" column. Choose the needed 4K format you want to convert to. And then you can select the destination folder for the converted video.
Click the "Convert" button on the lower-right corner of the window. Within a few seconds, the original video will be converted to the suitable 4K video without any quality loss.
Note: If you want to convert video to any other frequently-used video or audio formats, the method will be the same. Just select the preferred video/audio format from the drop-down list of "Profile" and click "Convert", then you can handily get the format you want.
Apart from the video/audio converting function, it provides multiple setting options for you to free edit source video, enhance video quality and adjust its effects.

Click "Edit" button on the top list, and then click "Effect".
You're free to adjust the audio volume and video brightness/contrast/saturation/hue by dragging the slide bar of each parameter or directly input the value in the text area.

After that, tab "Apply" button to confirm these settings.
Click "Edit" button on the top list, and then tab "Rotate".
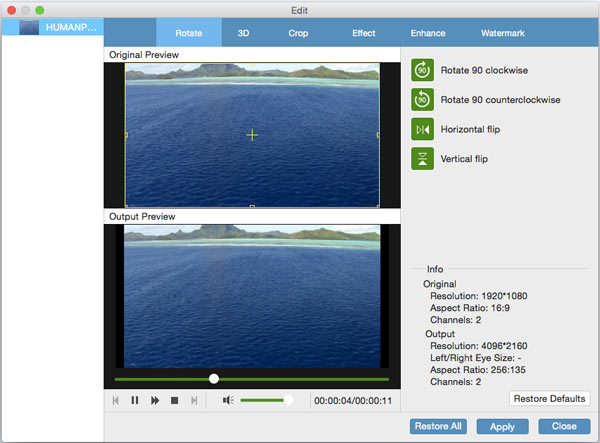
You can rotate the video by clicking the orange buttons of "Rotate 90 clockwise", "Rotate 90 counterclockwise", "Horizontal flip" and "Vertical flip". Click "Apply" and you can save the rotating.
Tab "Clip" on the top list. You can drag the sliding button or directly input value in the box to set the starting and ending point.
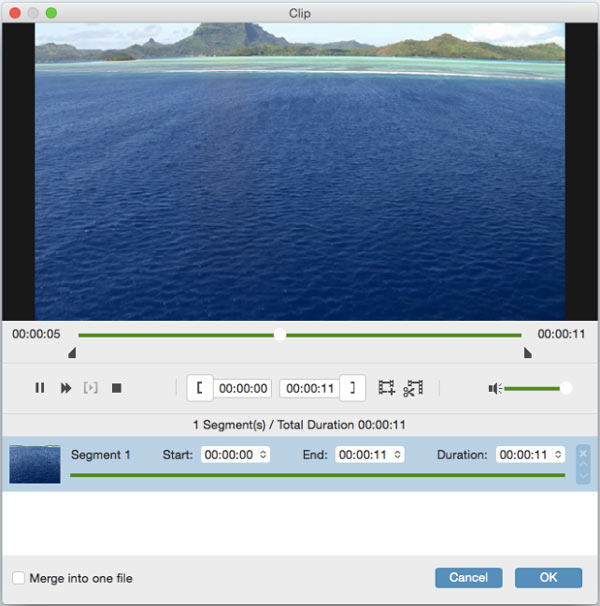
Click "OK" to save the video segments.
Back to the main interface, select the clips you want to merge, and then you can click "Merge into one file" next to "Convert" button to merge the clips.
Click "Edit" button and tab "Crop".
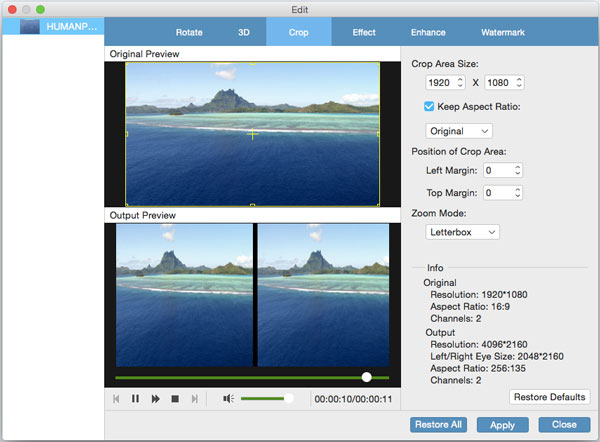
Input the specific value in the box to set the "Crop Area Size". Mark the "Keep Aspect Ratio" option, you can free choose "Original", "Crop area", "16:9" or "4:3 as the aspect ratio. And you're allowed to adjust the position of crop area and zoom mode.
Click "Edit" and then tab "Watermark".
Mark "Enable Watermark", and then you can add text or picture to the output video and manage the size and position of the watermark.
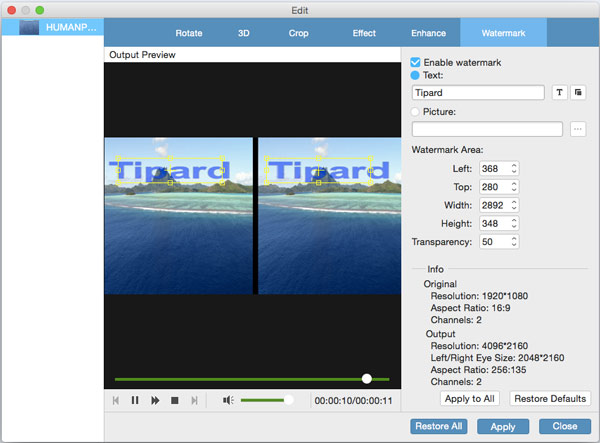
Tab "Apply" button to leave watermark on the output video.
Click the "Play" button to play the video in the preview window. During the video viewing, you can easily take snapshot of any specific moment you want by clicking the camera icon.

Home | About | Privacy Policy | Terms of Use | Affiliate | Support | Contact Us
Copyright © 2024 Tipard Studio. All Rights Reserved.